
Elswick Band Instrument Repair has repaired thousands of woodwind and brass instruments in the Central Virginia area and beyond since 1972.
Welcome, Bienvenido, Welkom, Bienvenue, Willkommen!!!
I hope this website will be beneficial to you in 4 ways: 1 - To show you a bit of my world, out here in The Repair Universe and possibly entertain you, 2 - To provide some good quality, used instruments and mouthpieces for sale at a good price, 3 - Possibly provide some info about the care and feeding of your instrument and 4 - Offer some useful tips about how to approach your instrument, for example, the way you hold the horn, the way you put your reed on the mouthpiece, when to change reeds, etc., etc., etc.
This website is definitely a work in progress so if you click on one of the links and nothing happens, check it again the next time you’re here. I might not have added any information to the link quite yet.
NOTE: Just click on “Elswick Band Instrument Repair” to return to the Home page.
A Bent Bell Rim on an Alto Saxophone
This is an older Yanagisawa alto saxophone from a local school that has not lived an easy life.
Obviously, the sax has been dropped, and the bell rim was badly bent. Maybe the neck strap broke!
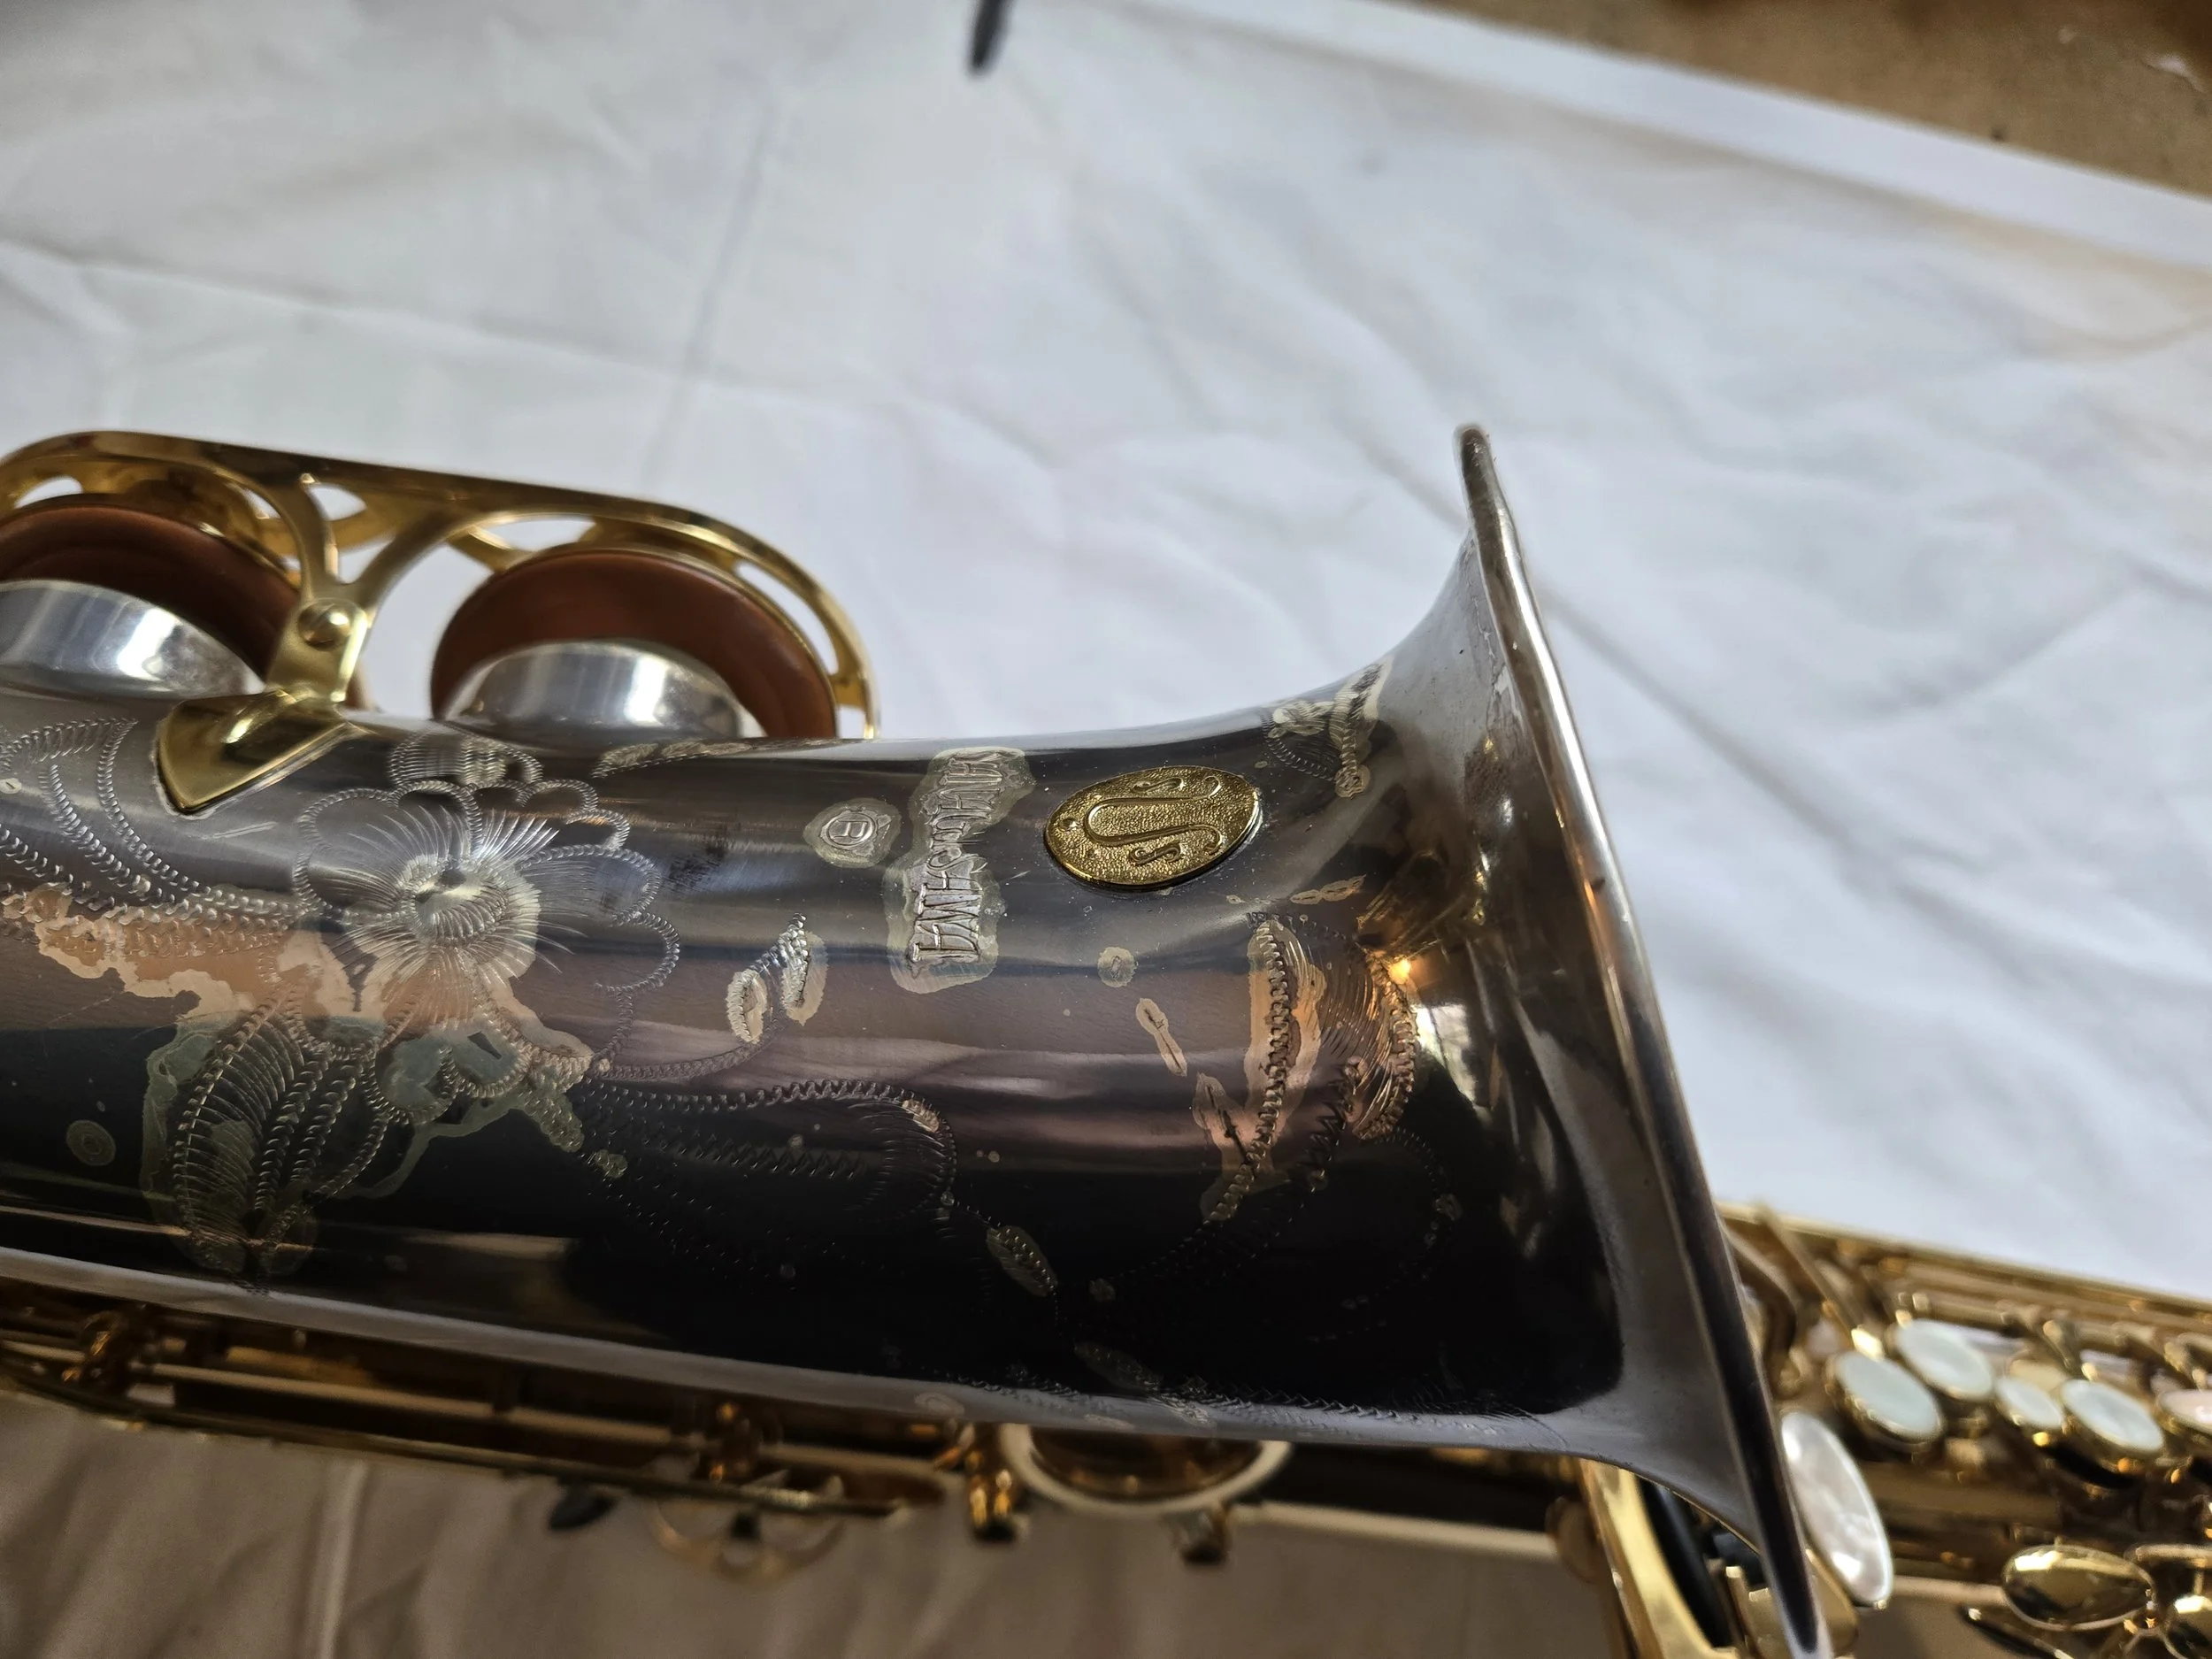
And again, it has been healed!!!
One more time!
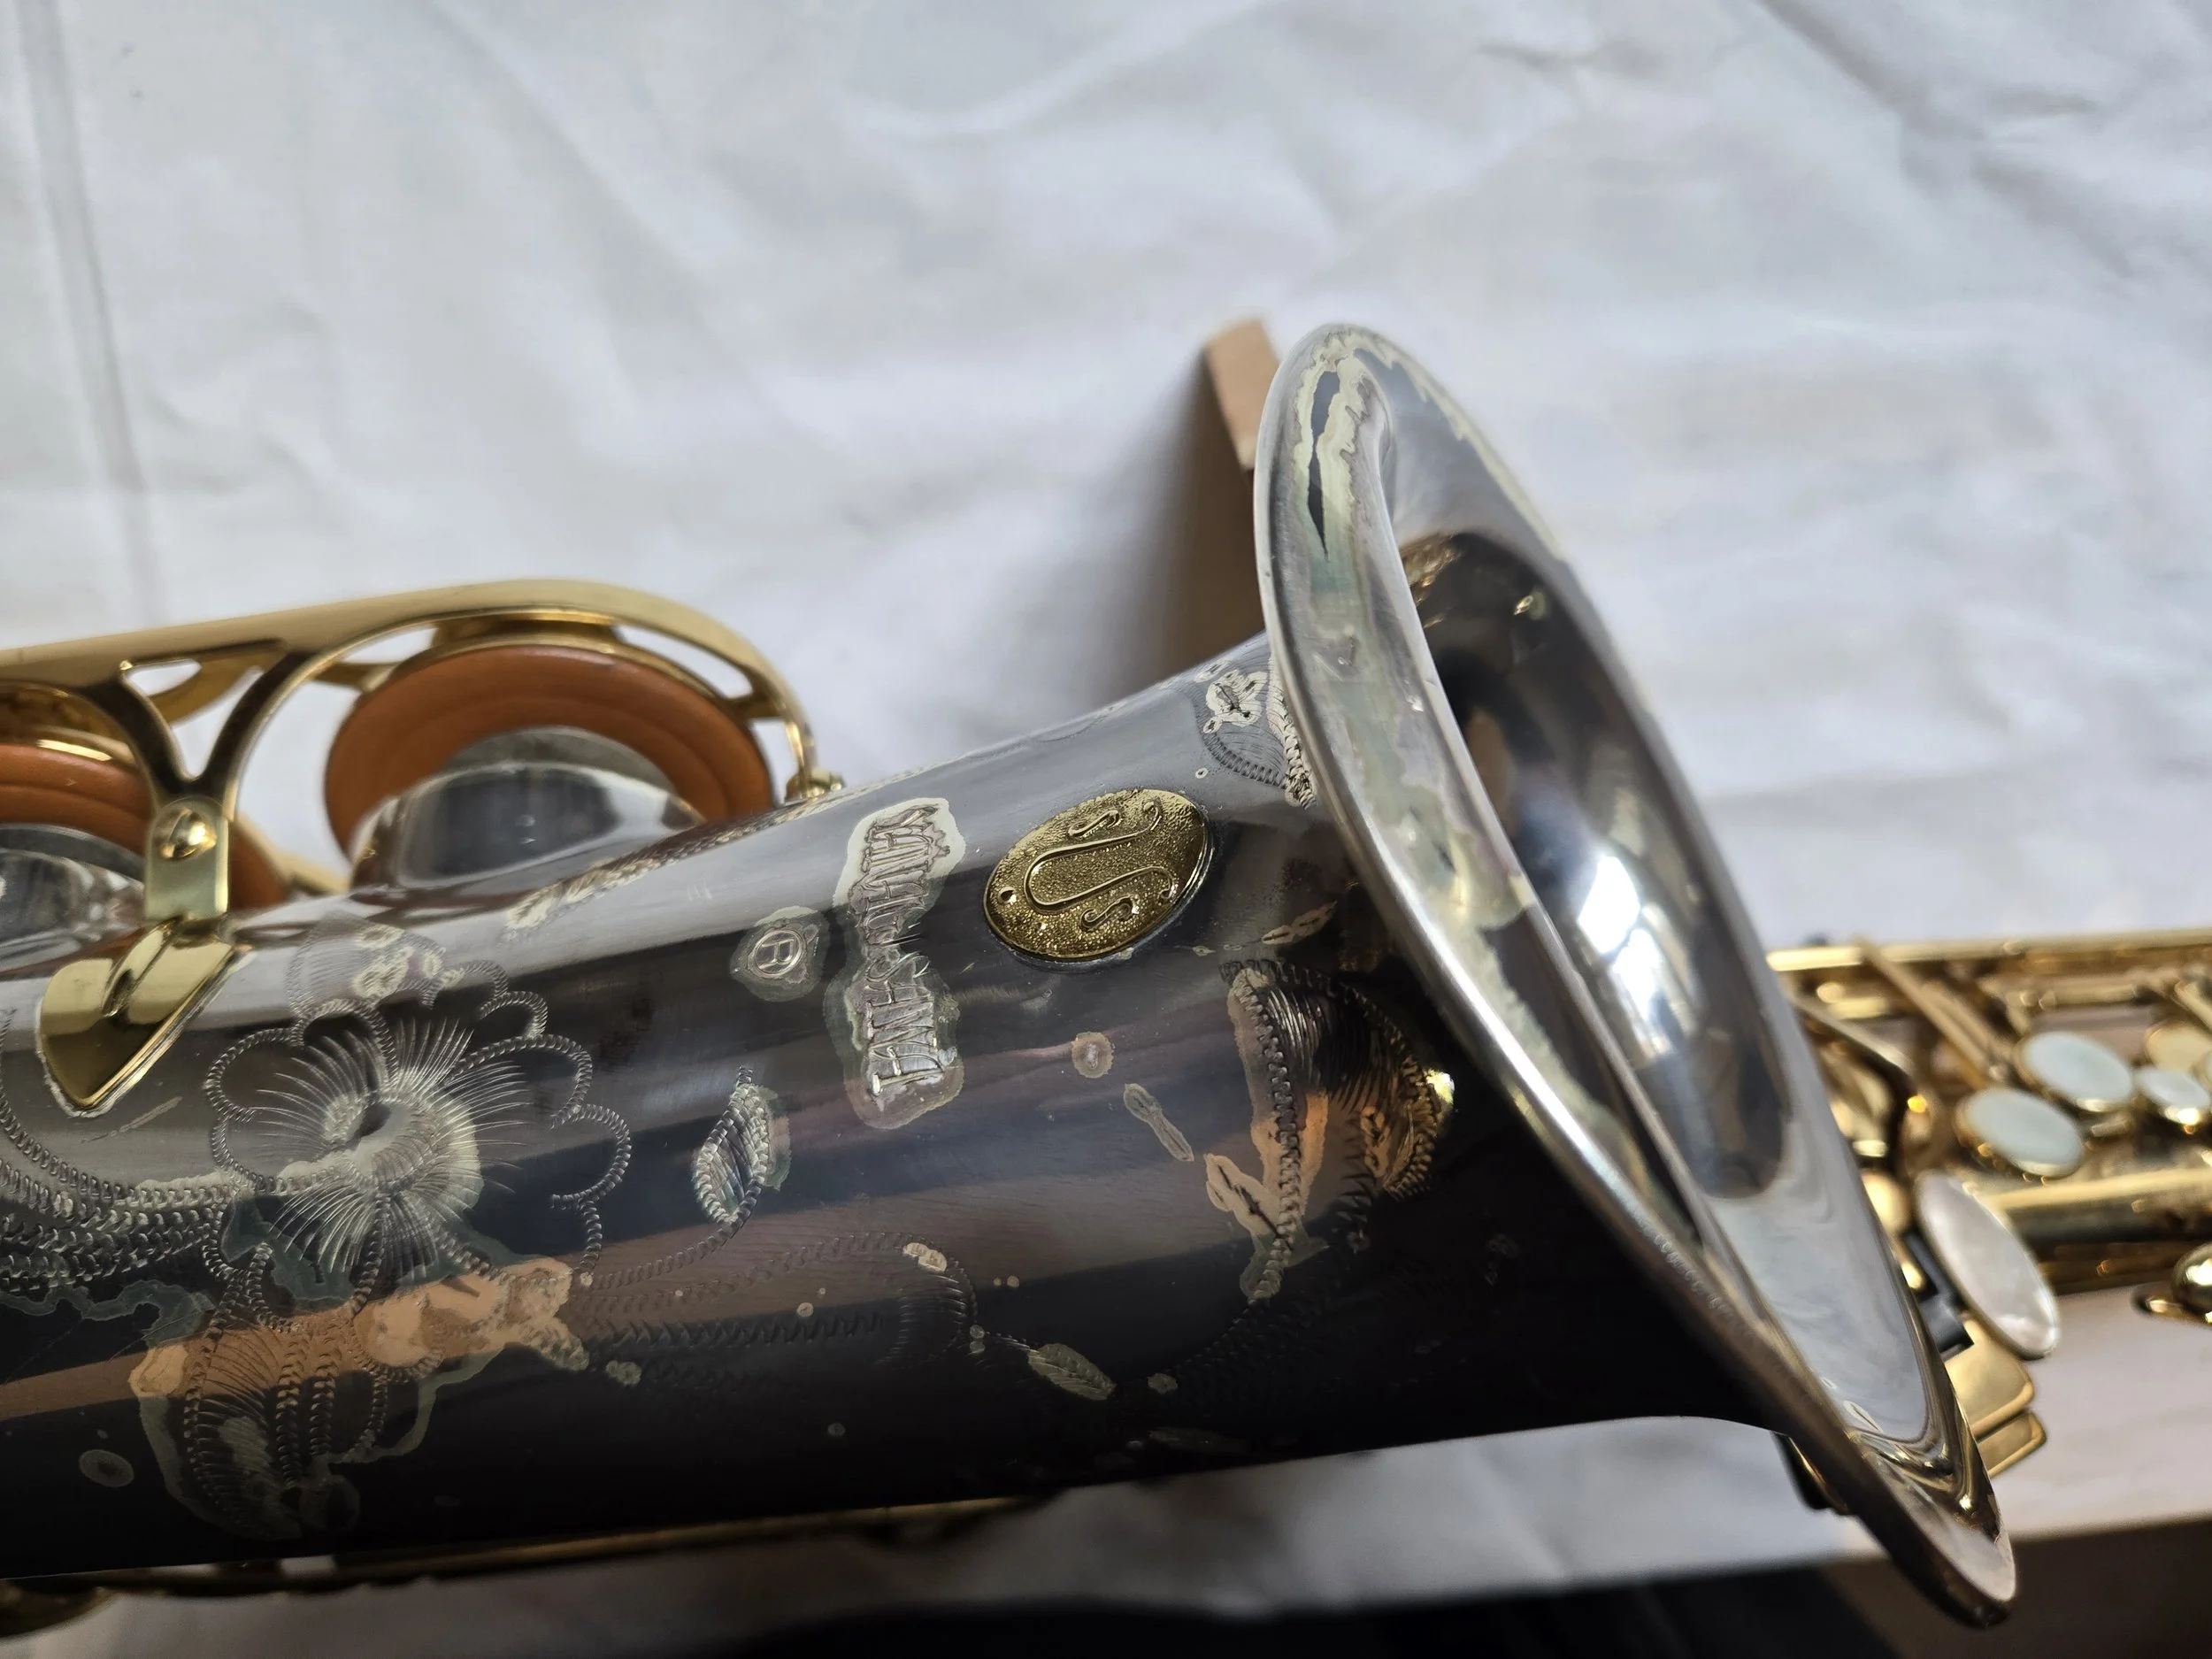
And again, the final laying on of hands has nicely finished the repair of the sax bell rim successfully.
There is much more that needs to be done on this sax like bell alignment, replace a bunch of pads, yada, yada, yada.
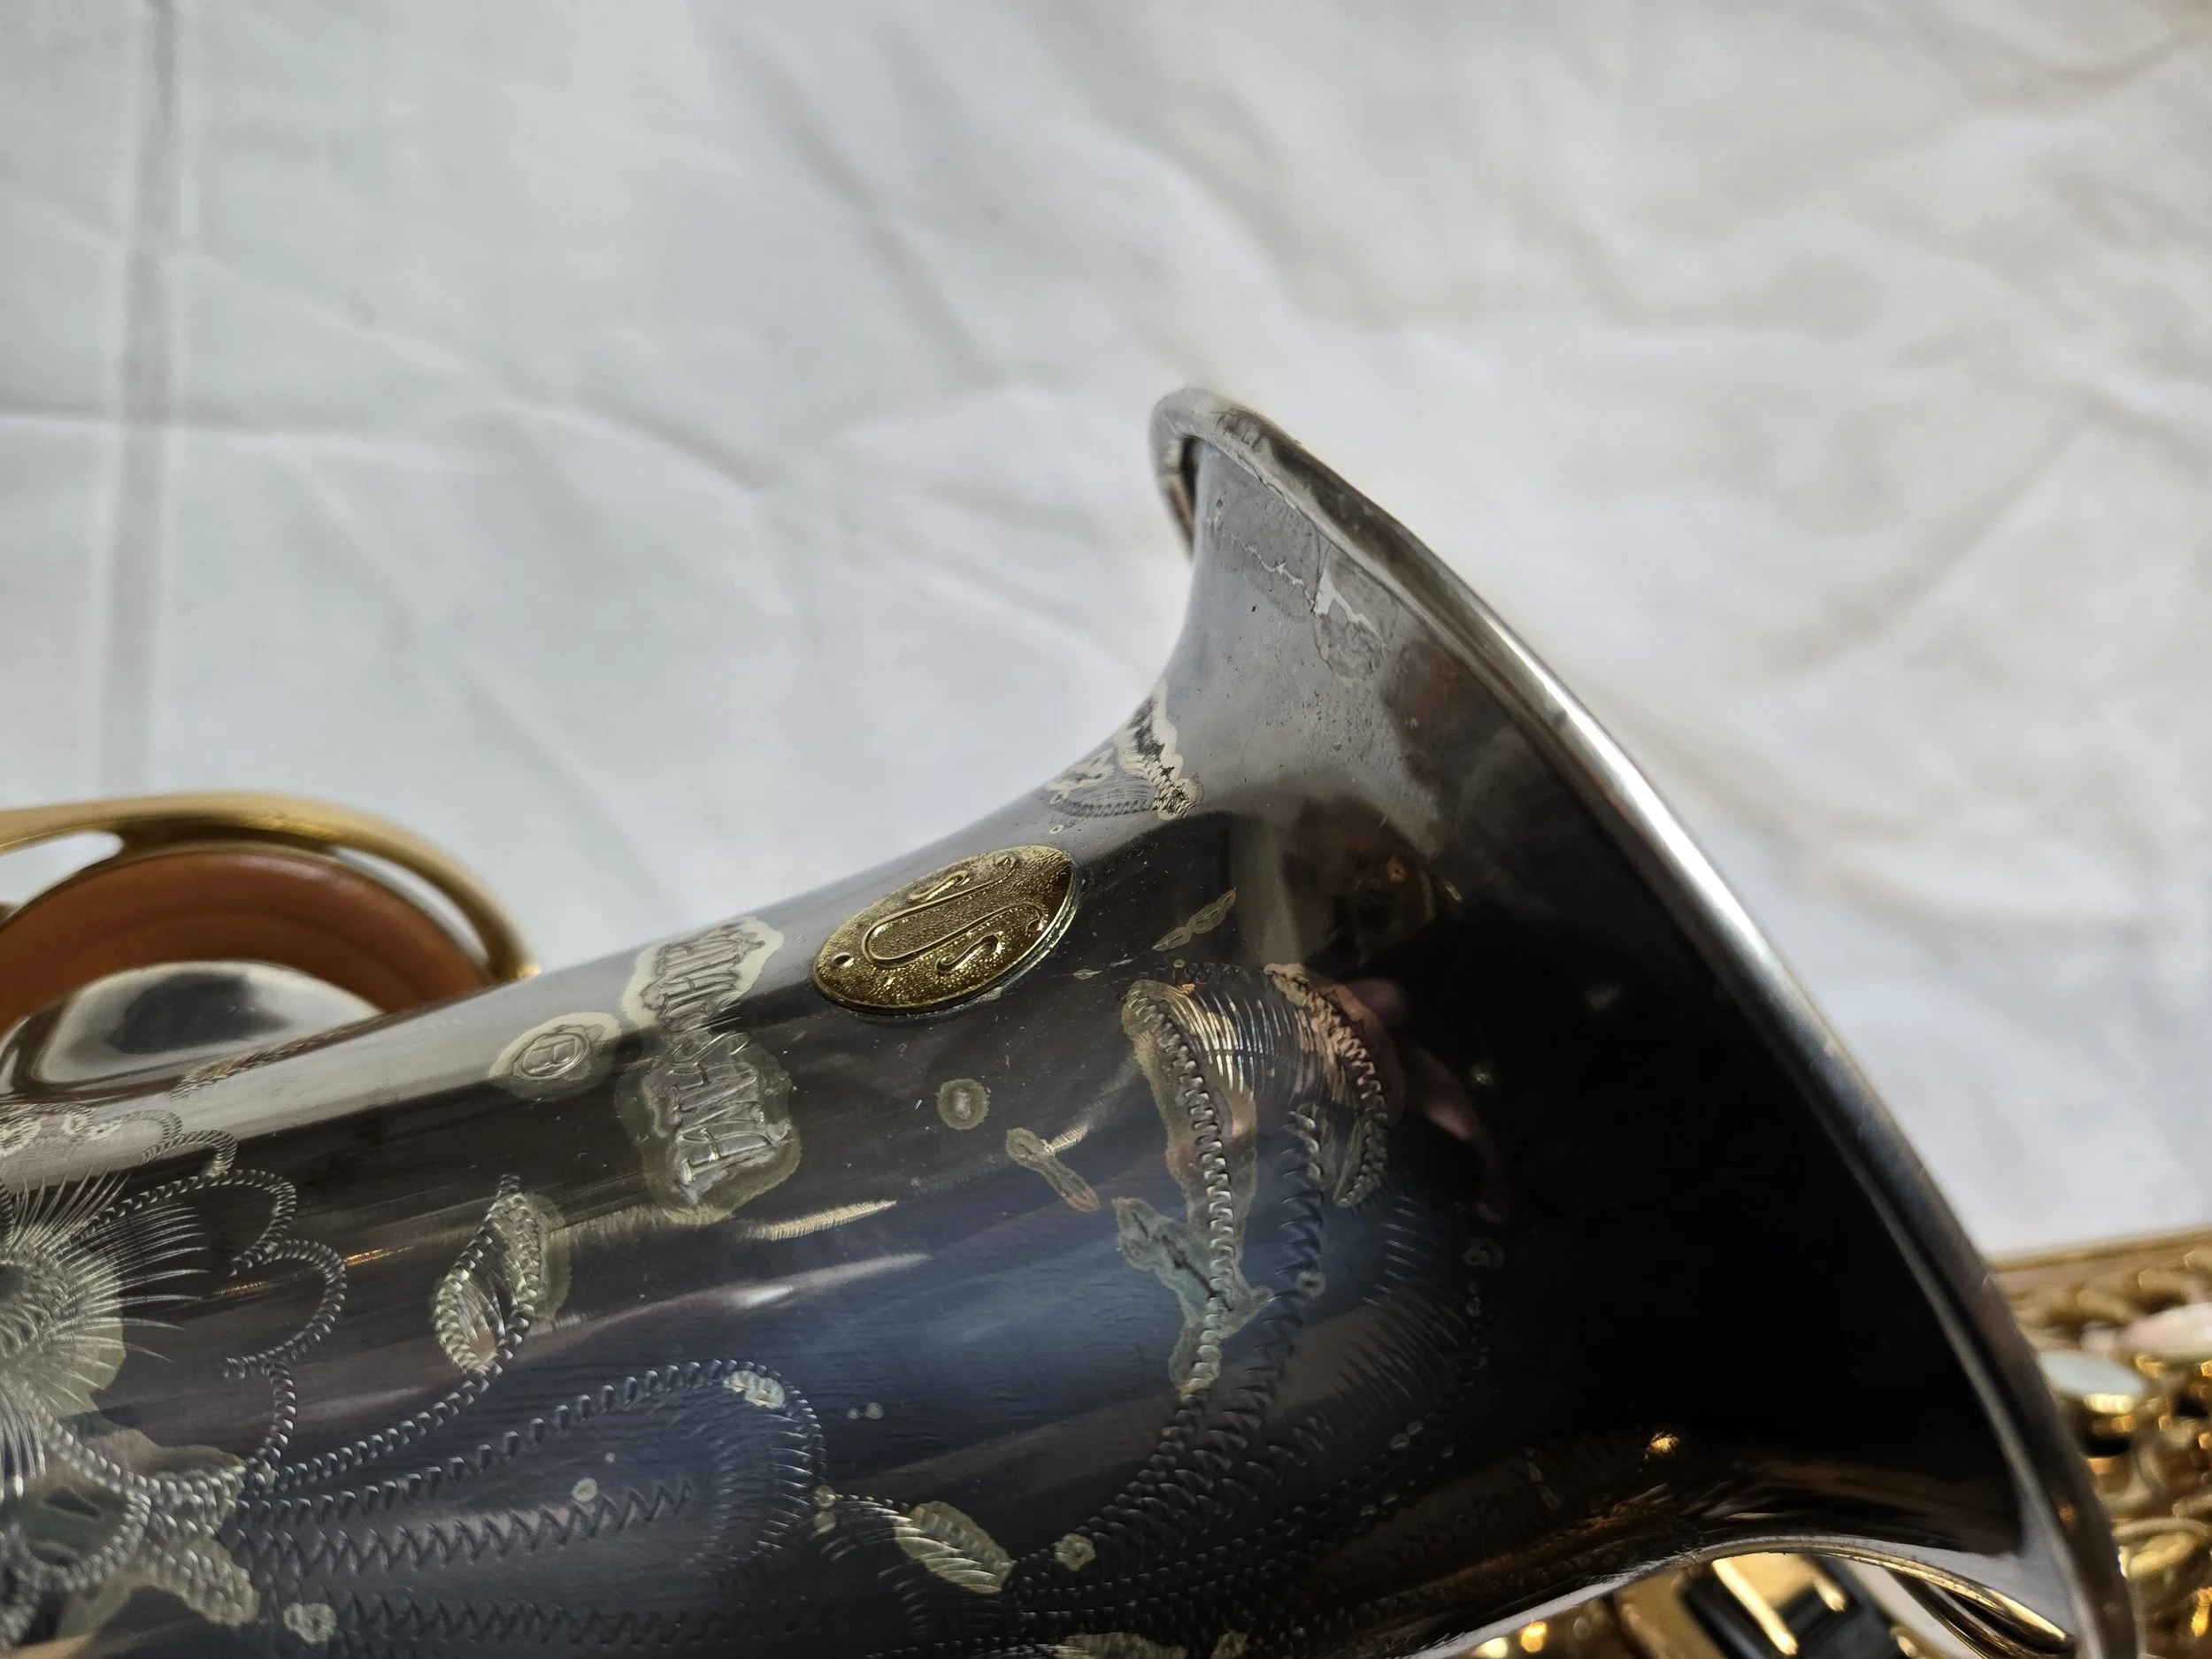
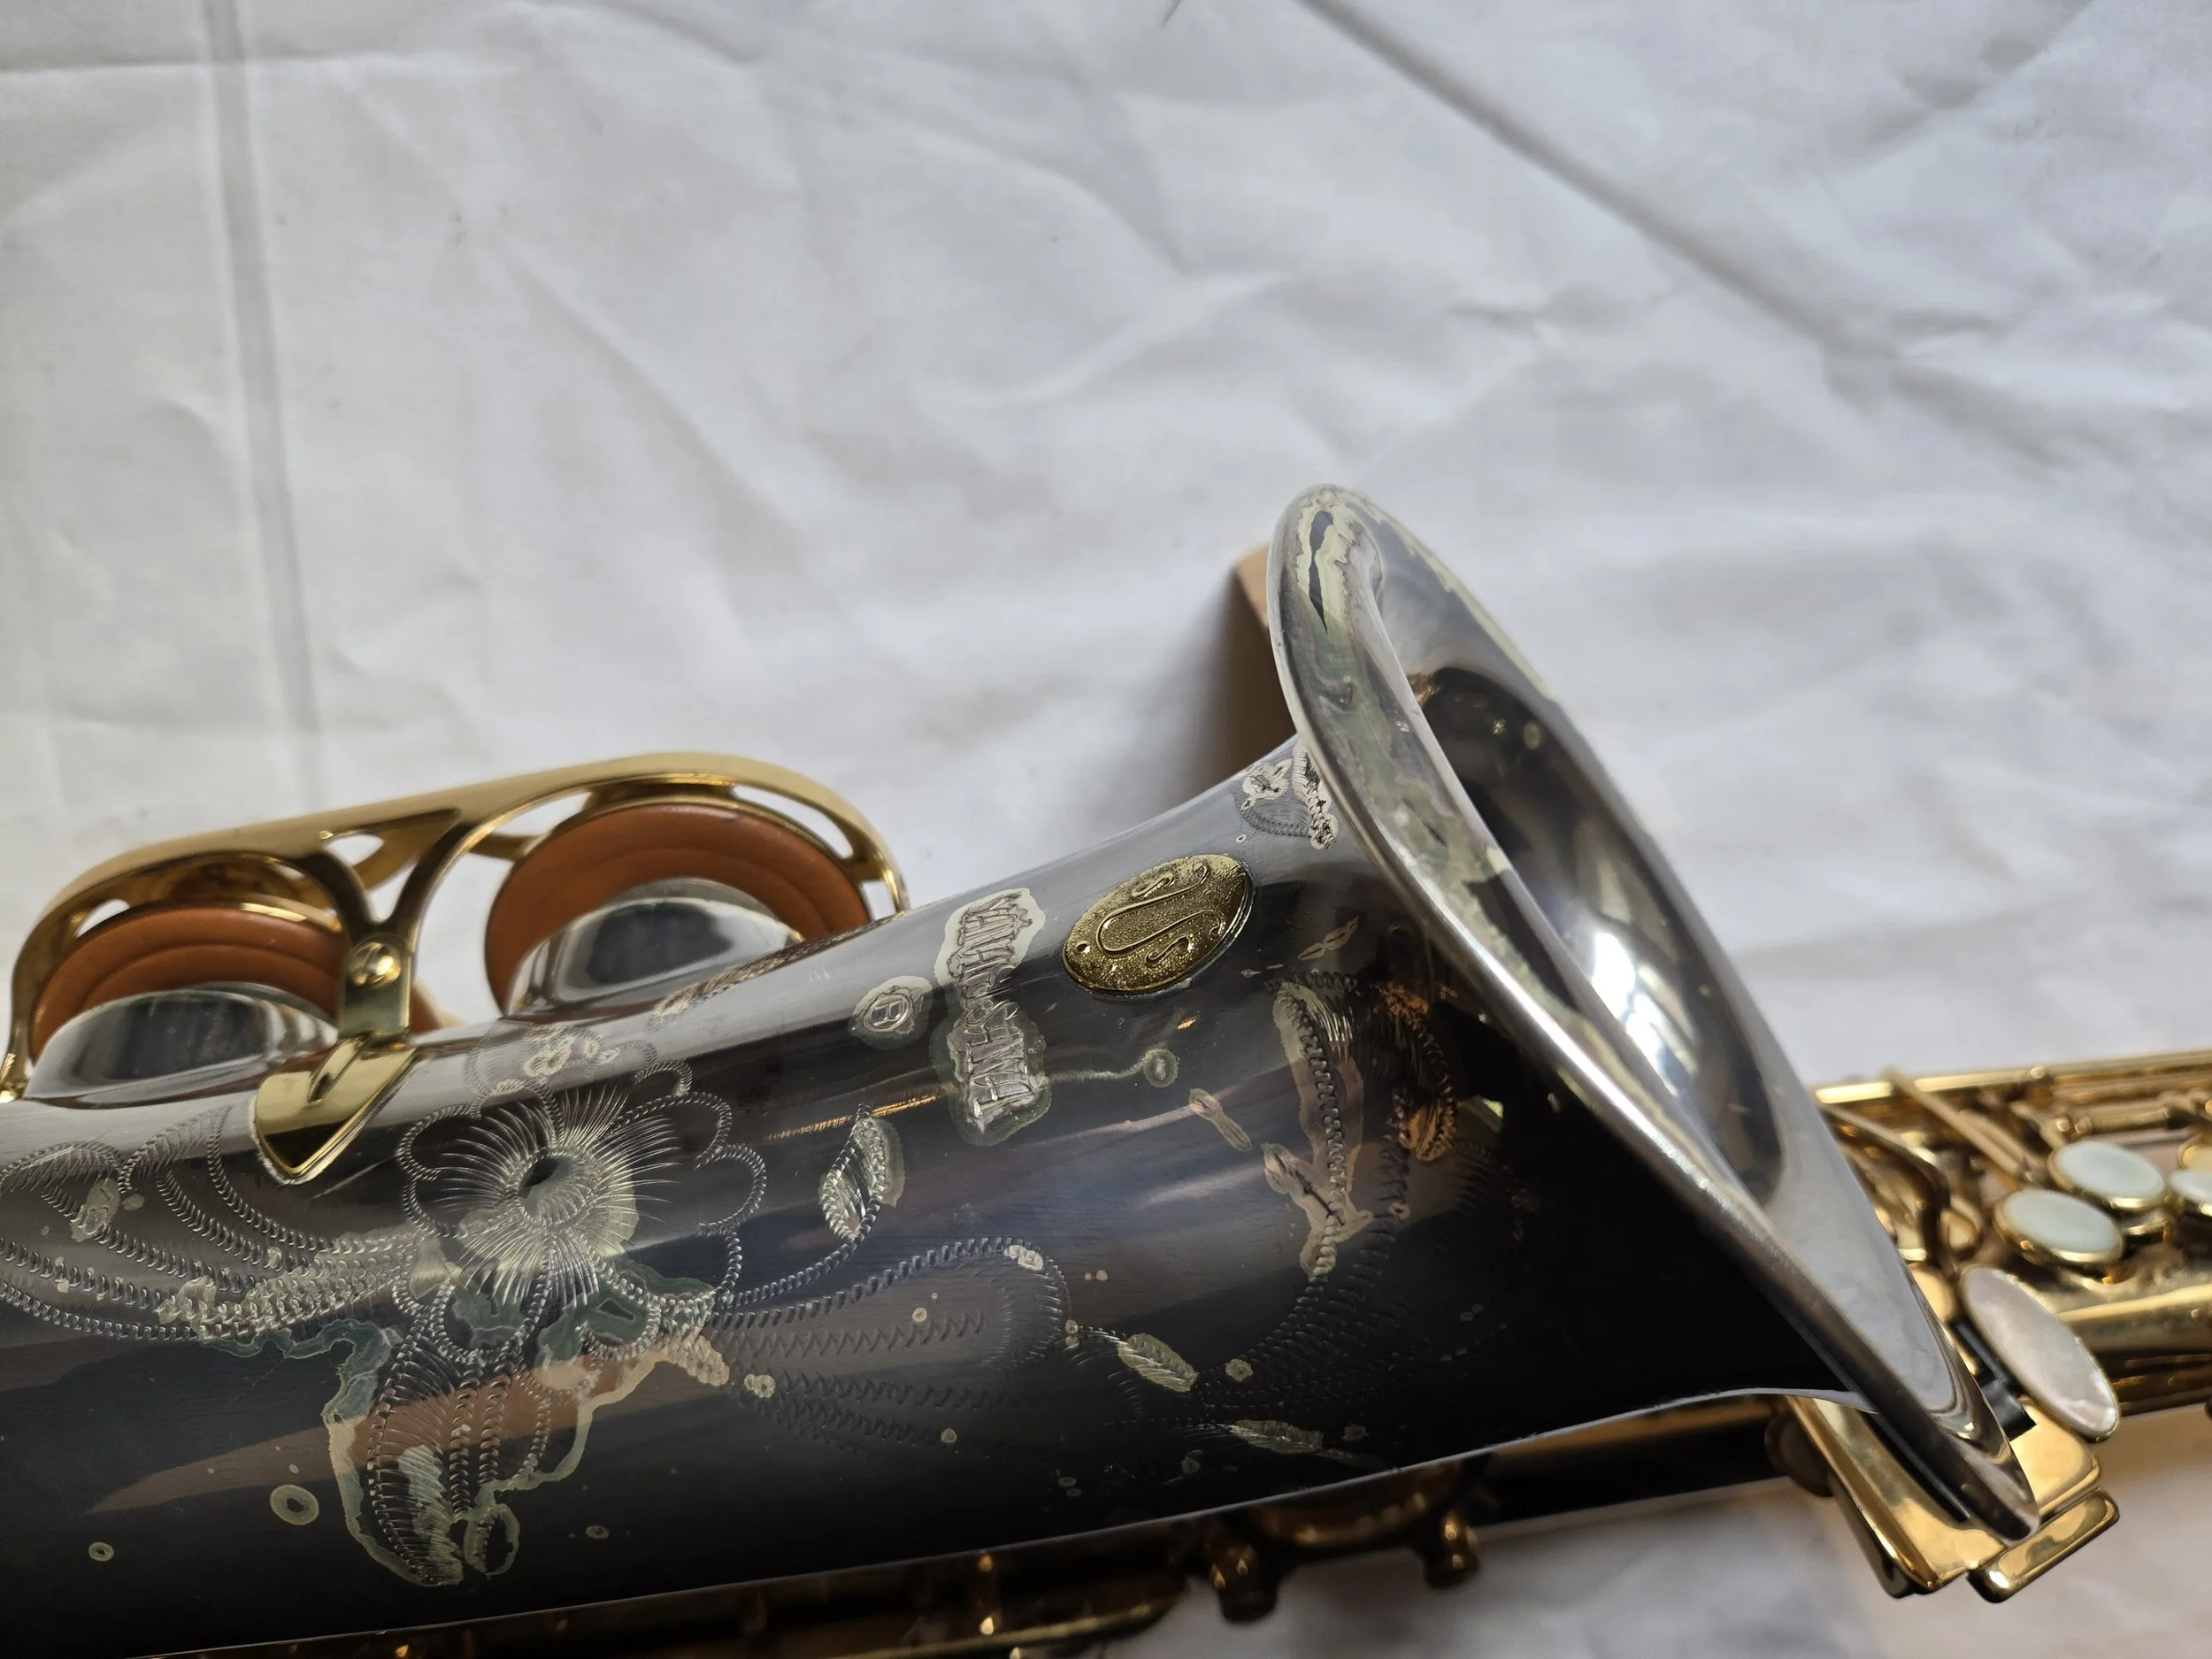
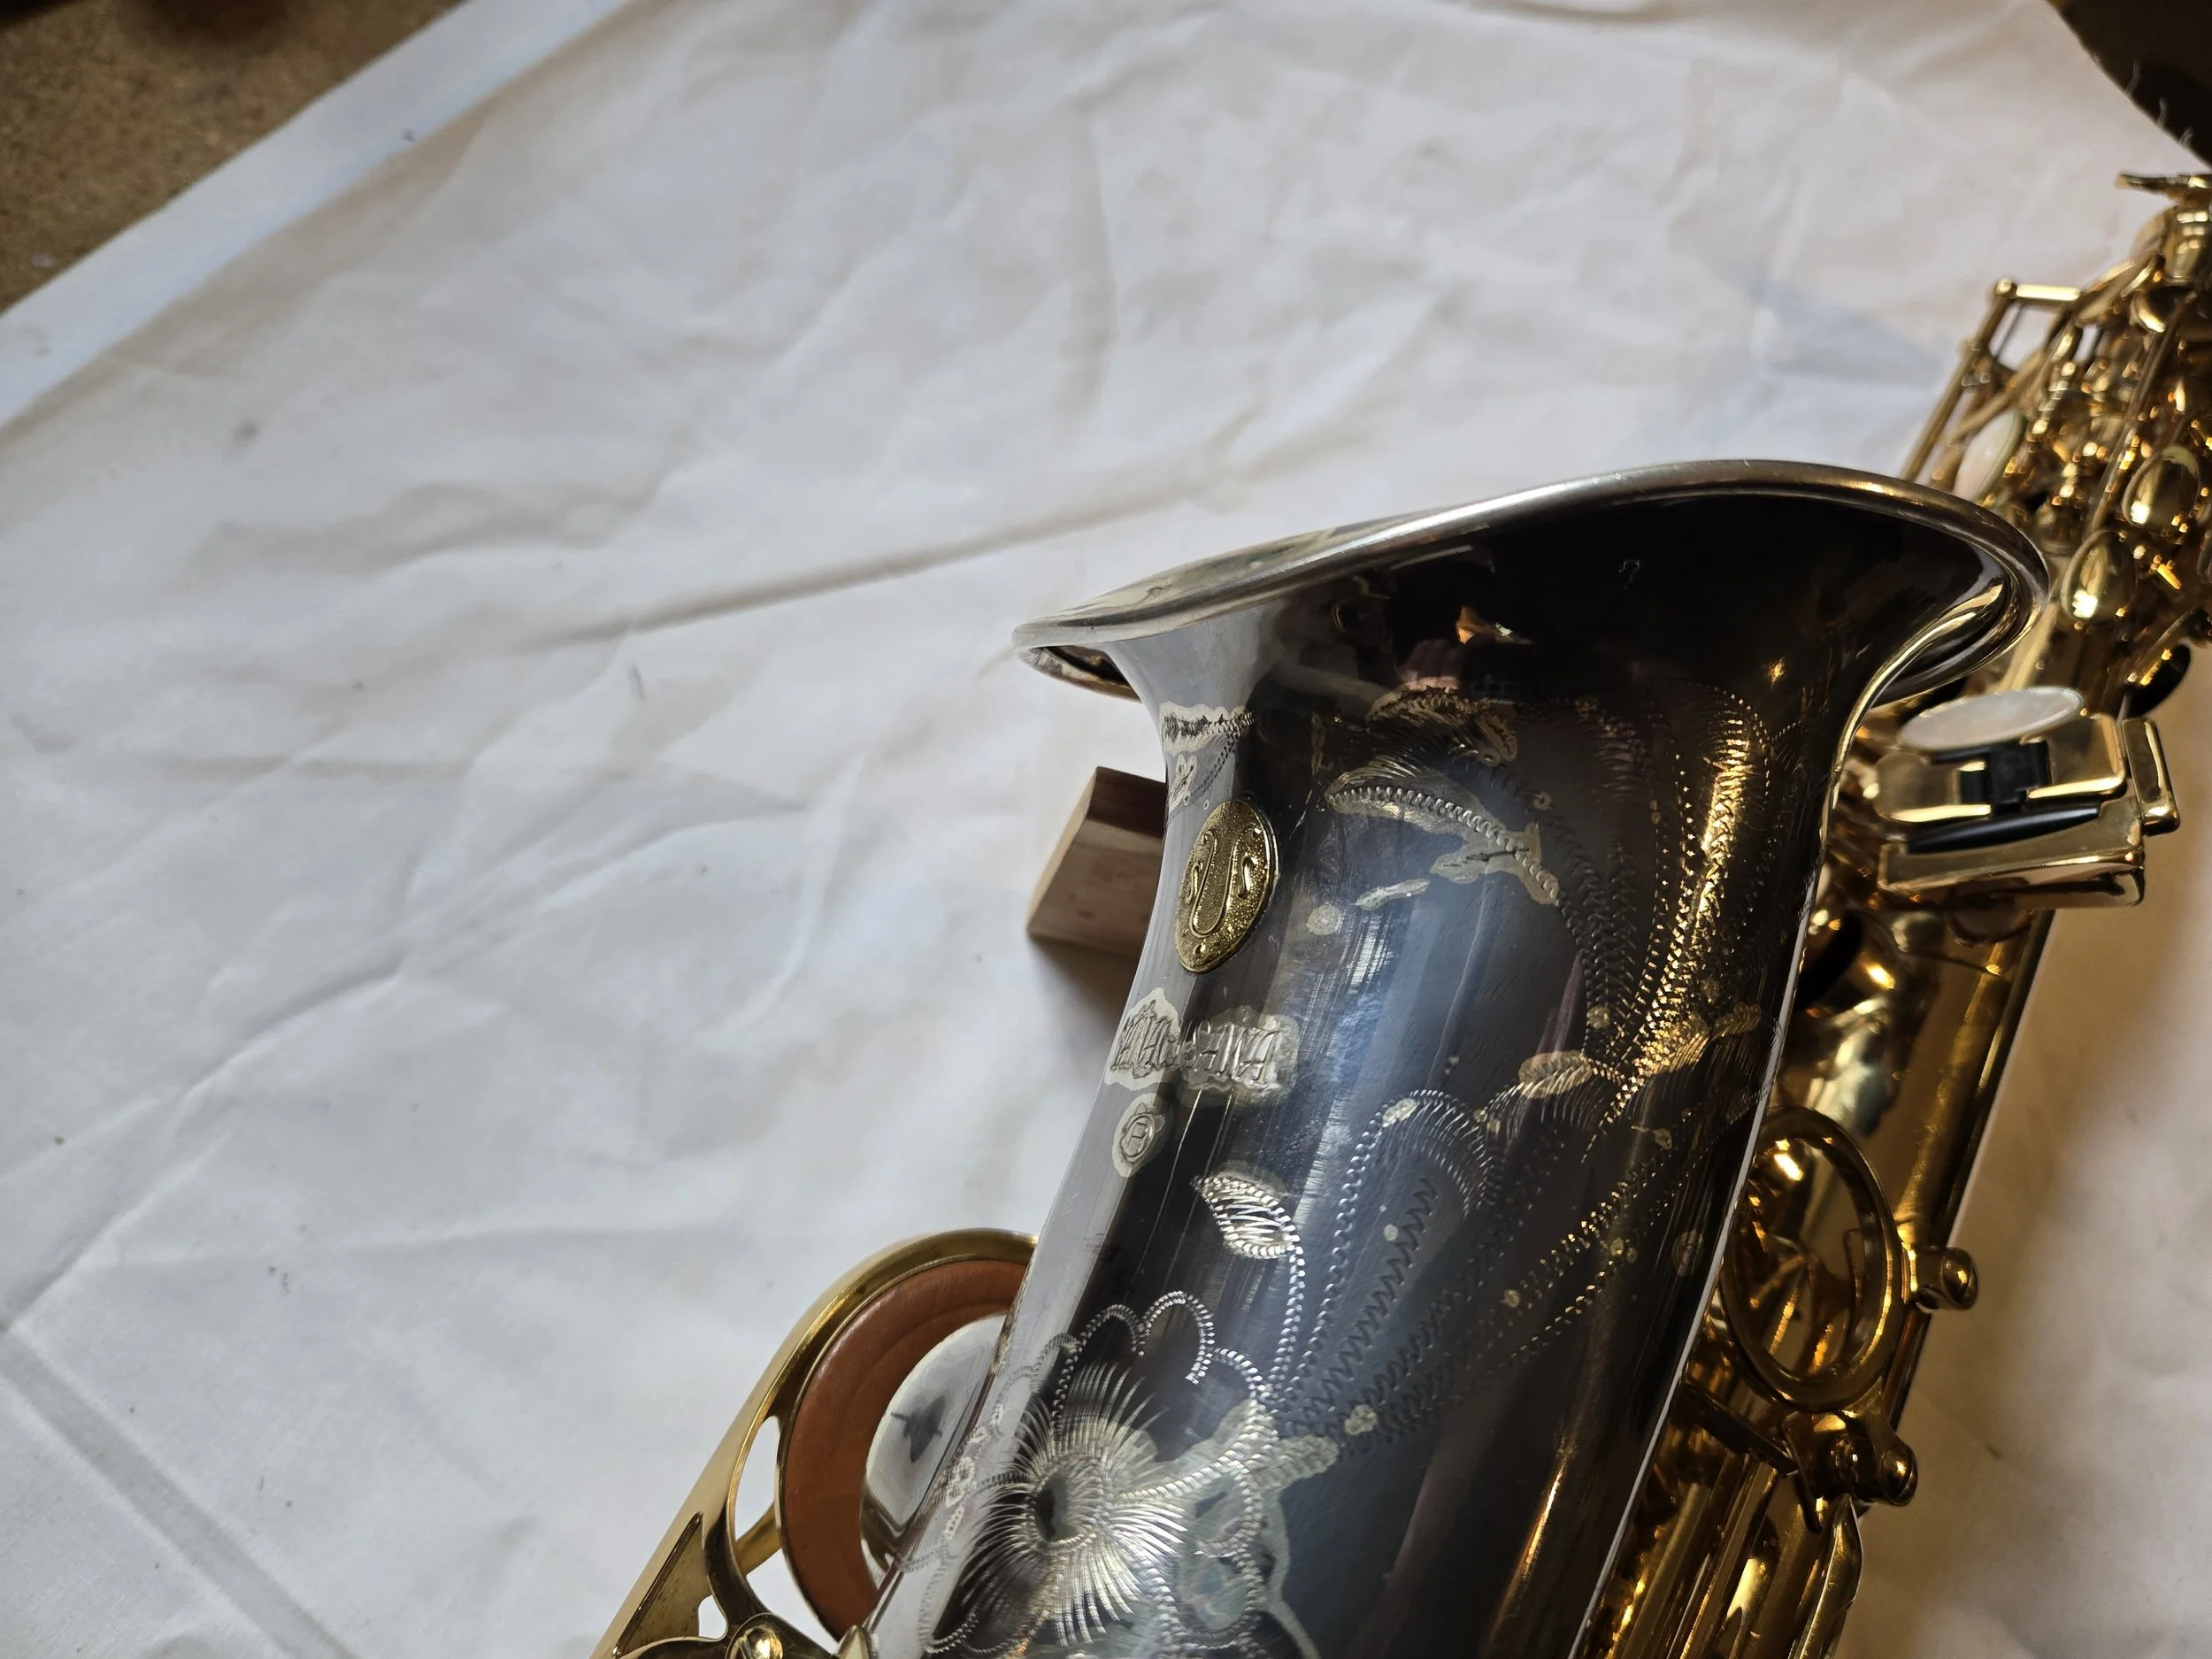
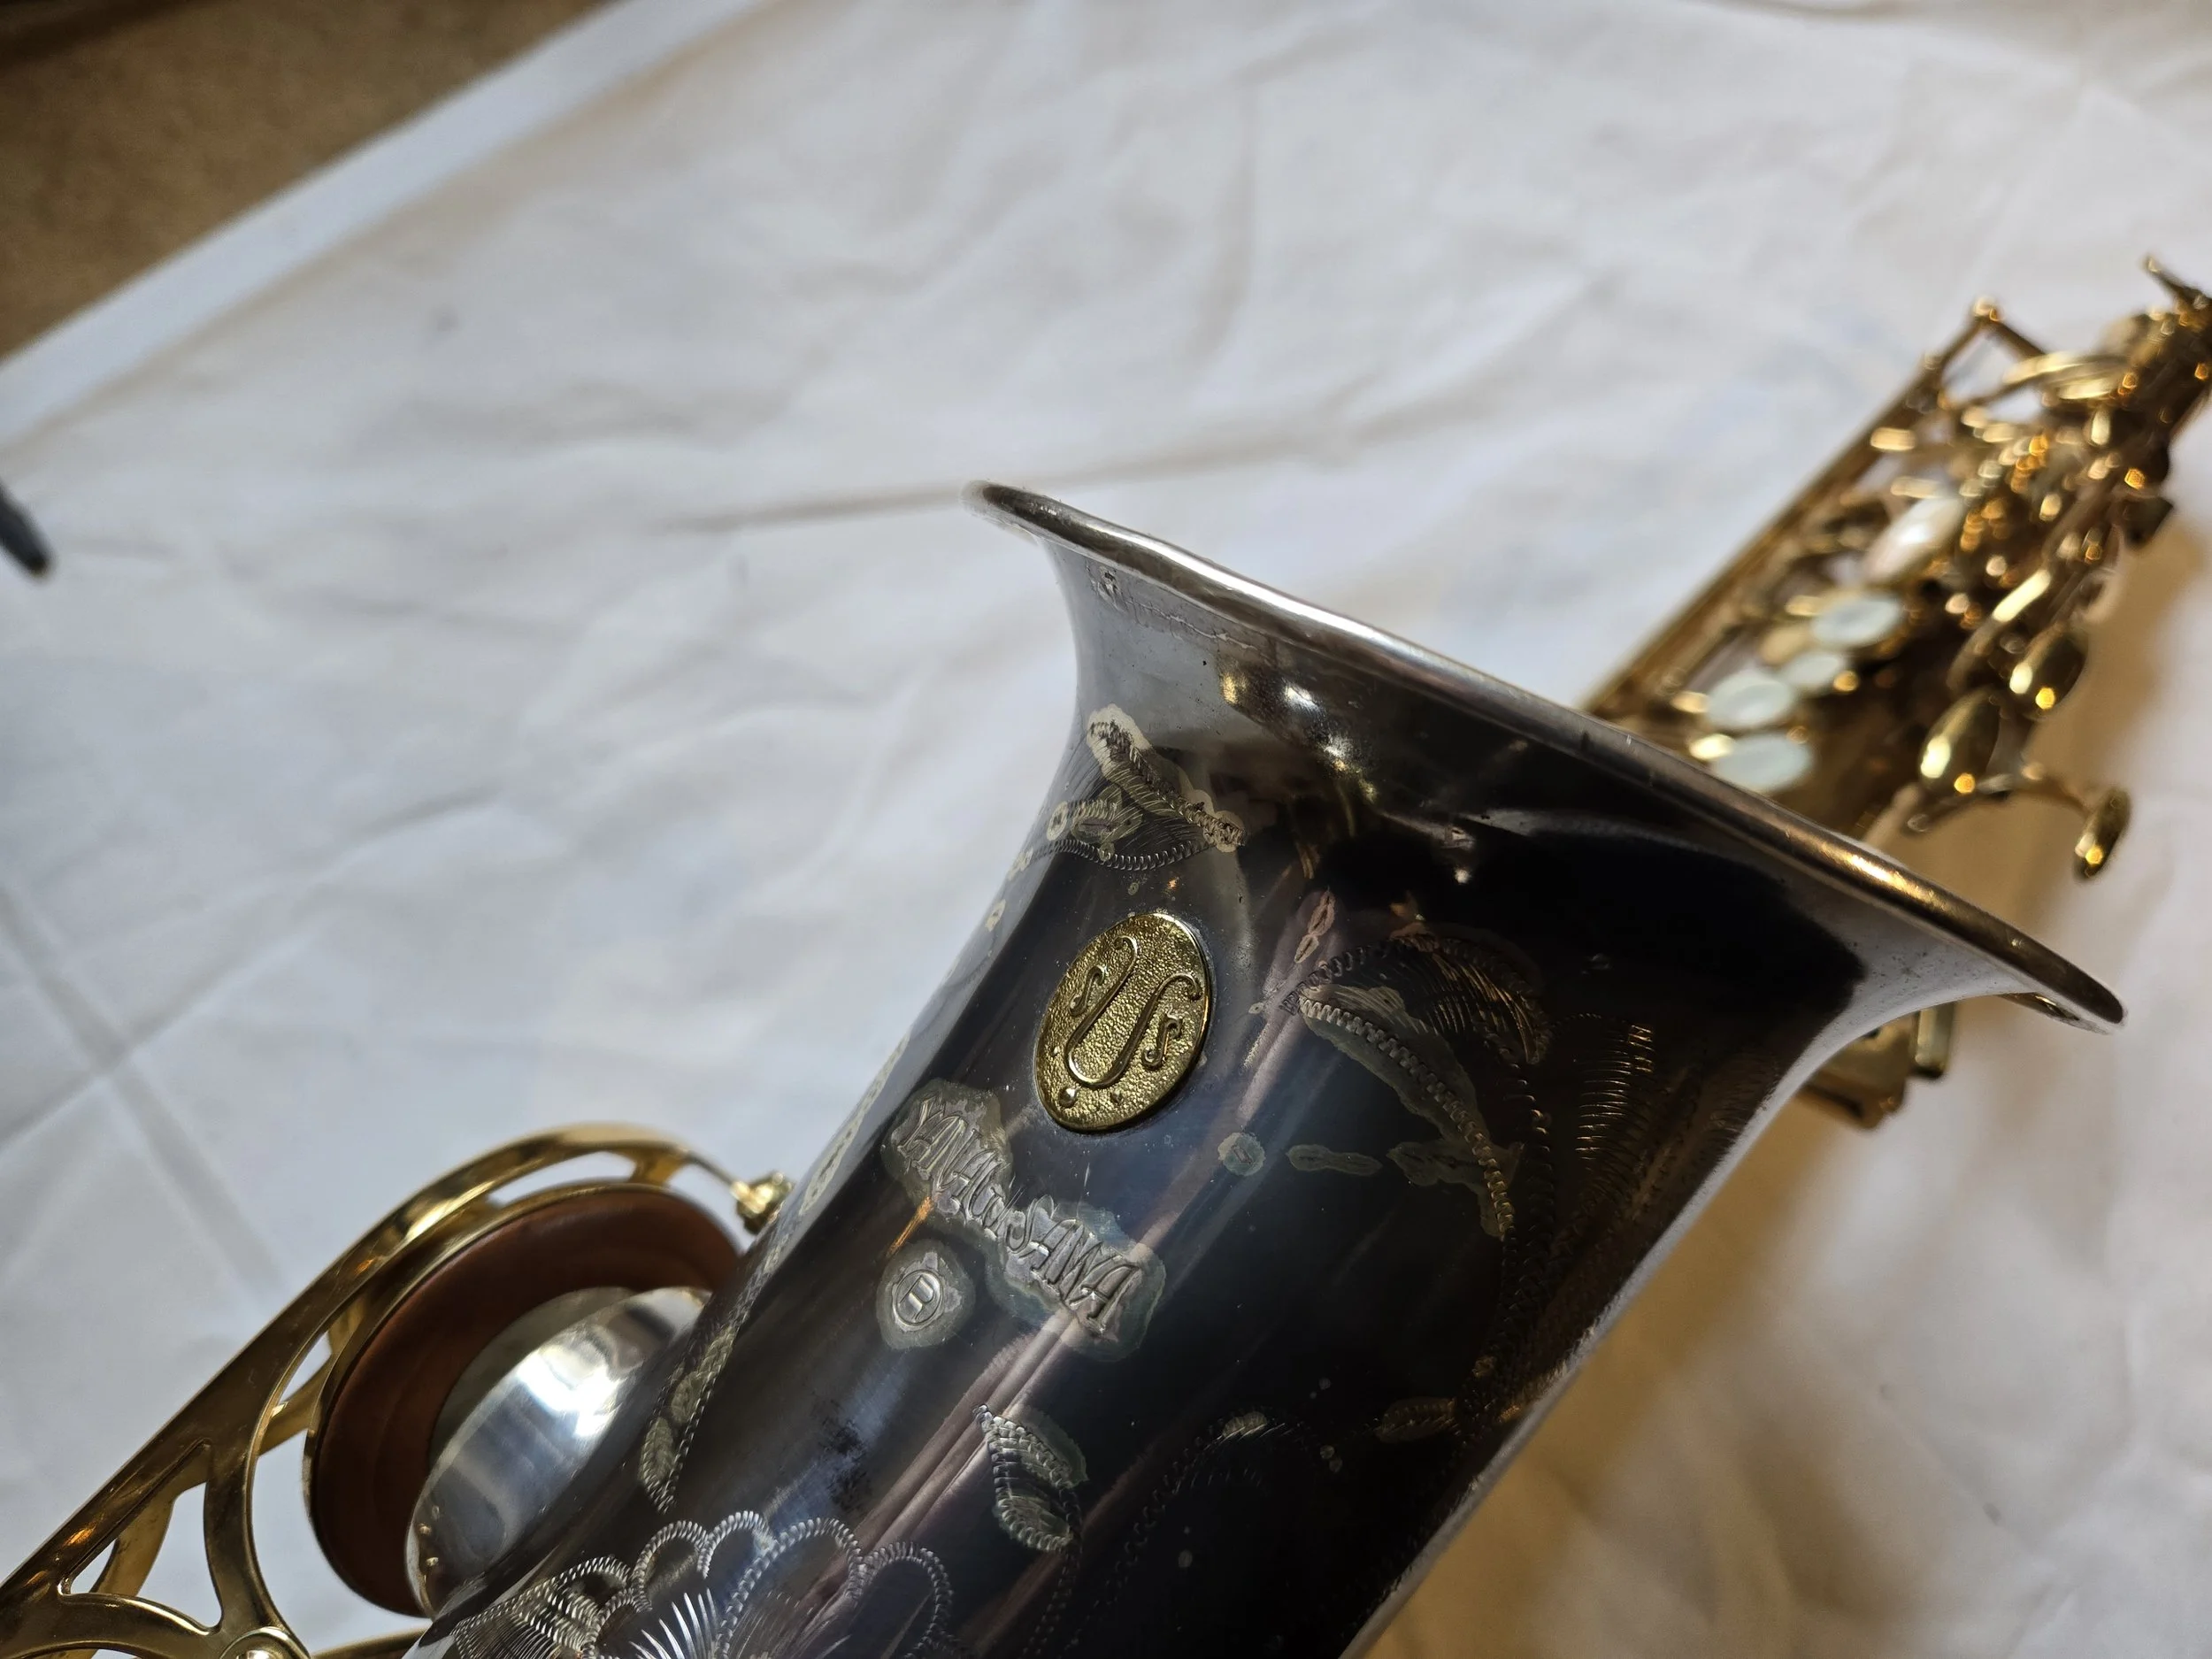
Ahh, it looks much better now.
Here it is from a slightly different angle.
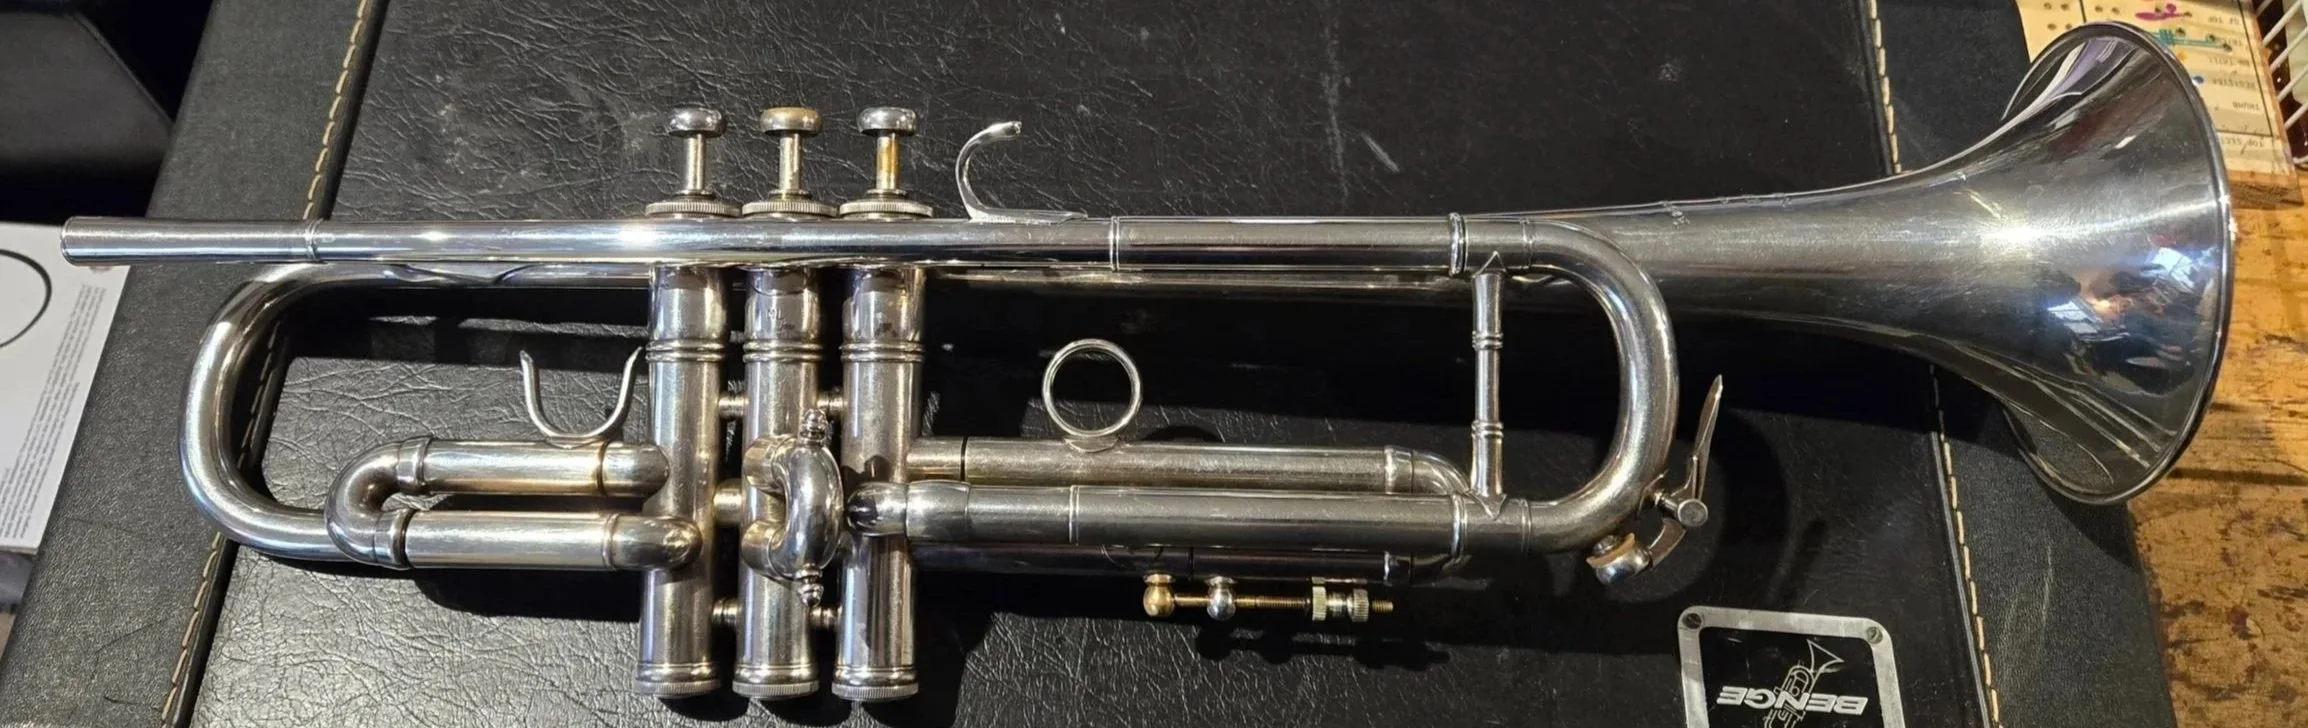
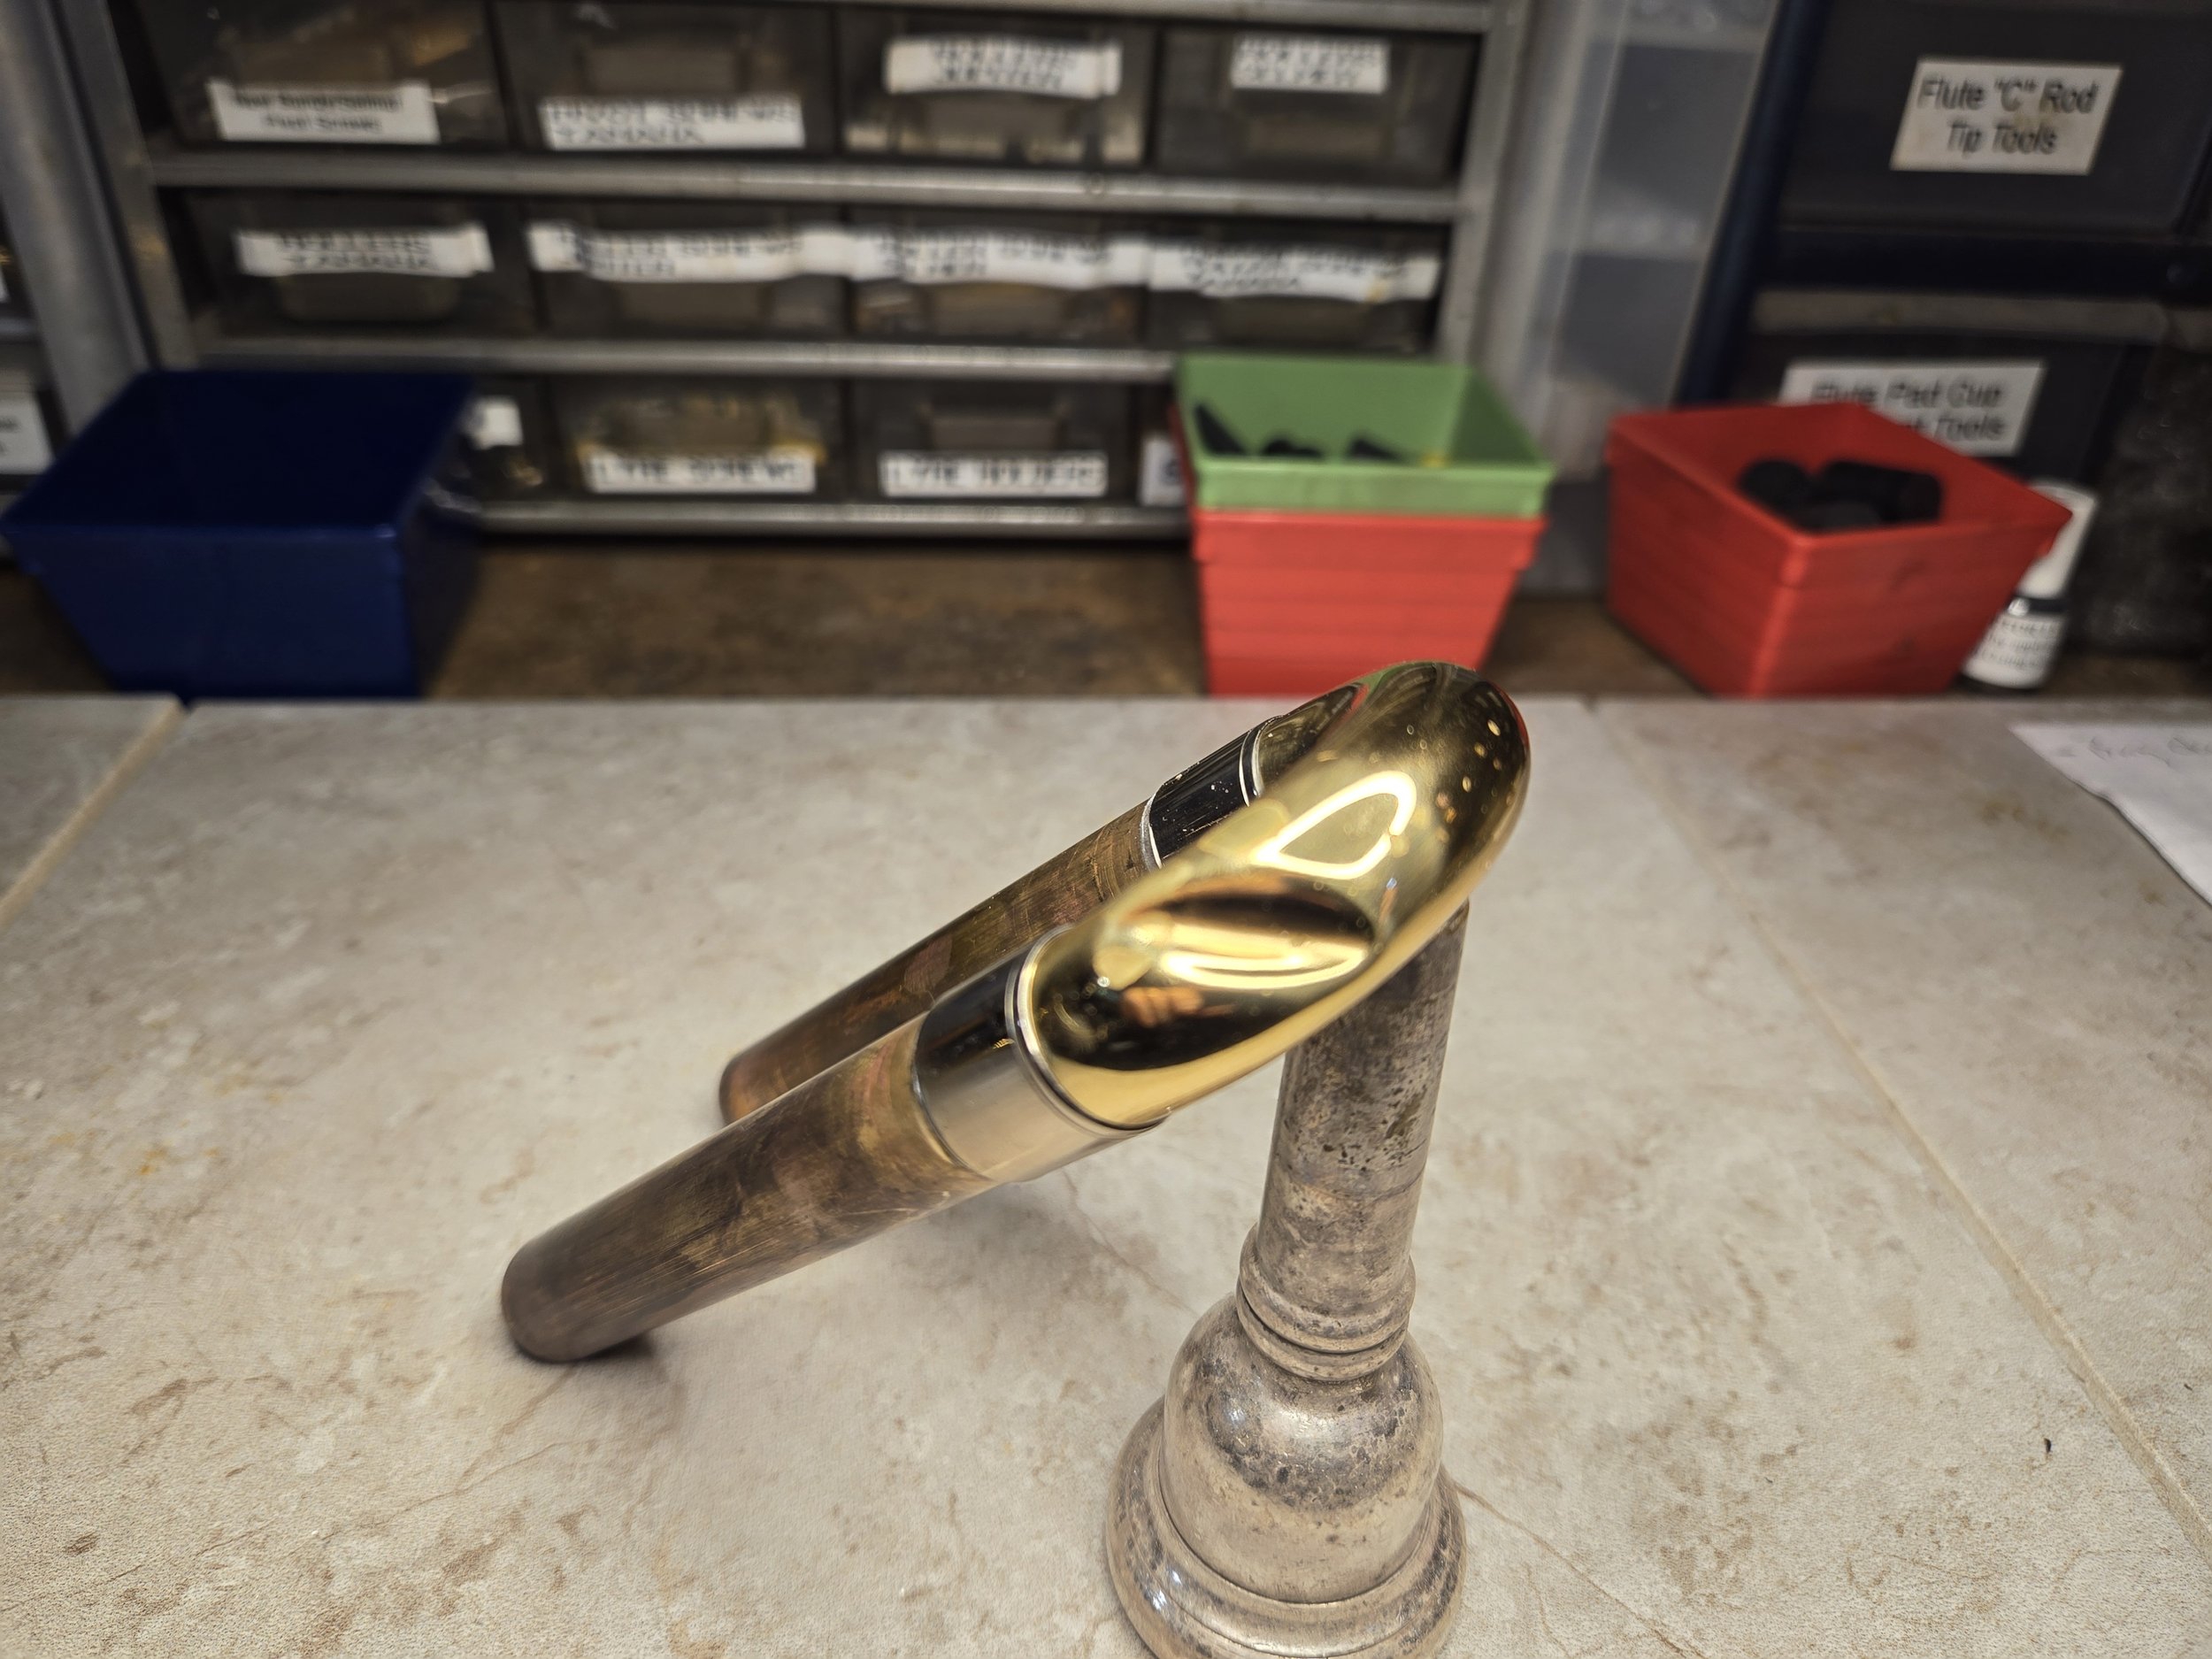
Changing a Lead pipe on a silver Benge Trumpet
An early 70’s LA Benge trumpet recently came into the shop. LA meaning, Los Angeles. From 1970 to 1972 these trumpets were made in Los Angeles, California.
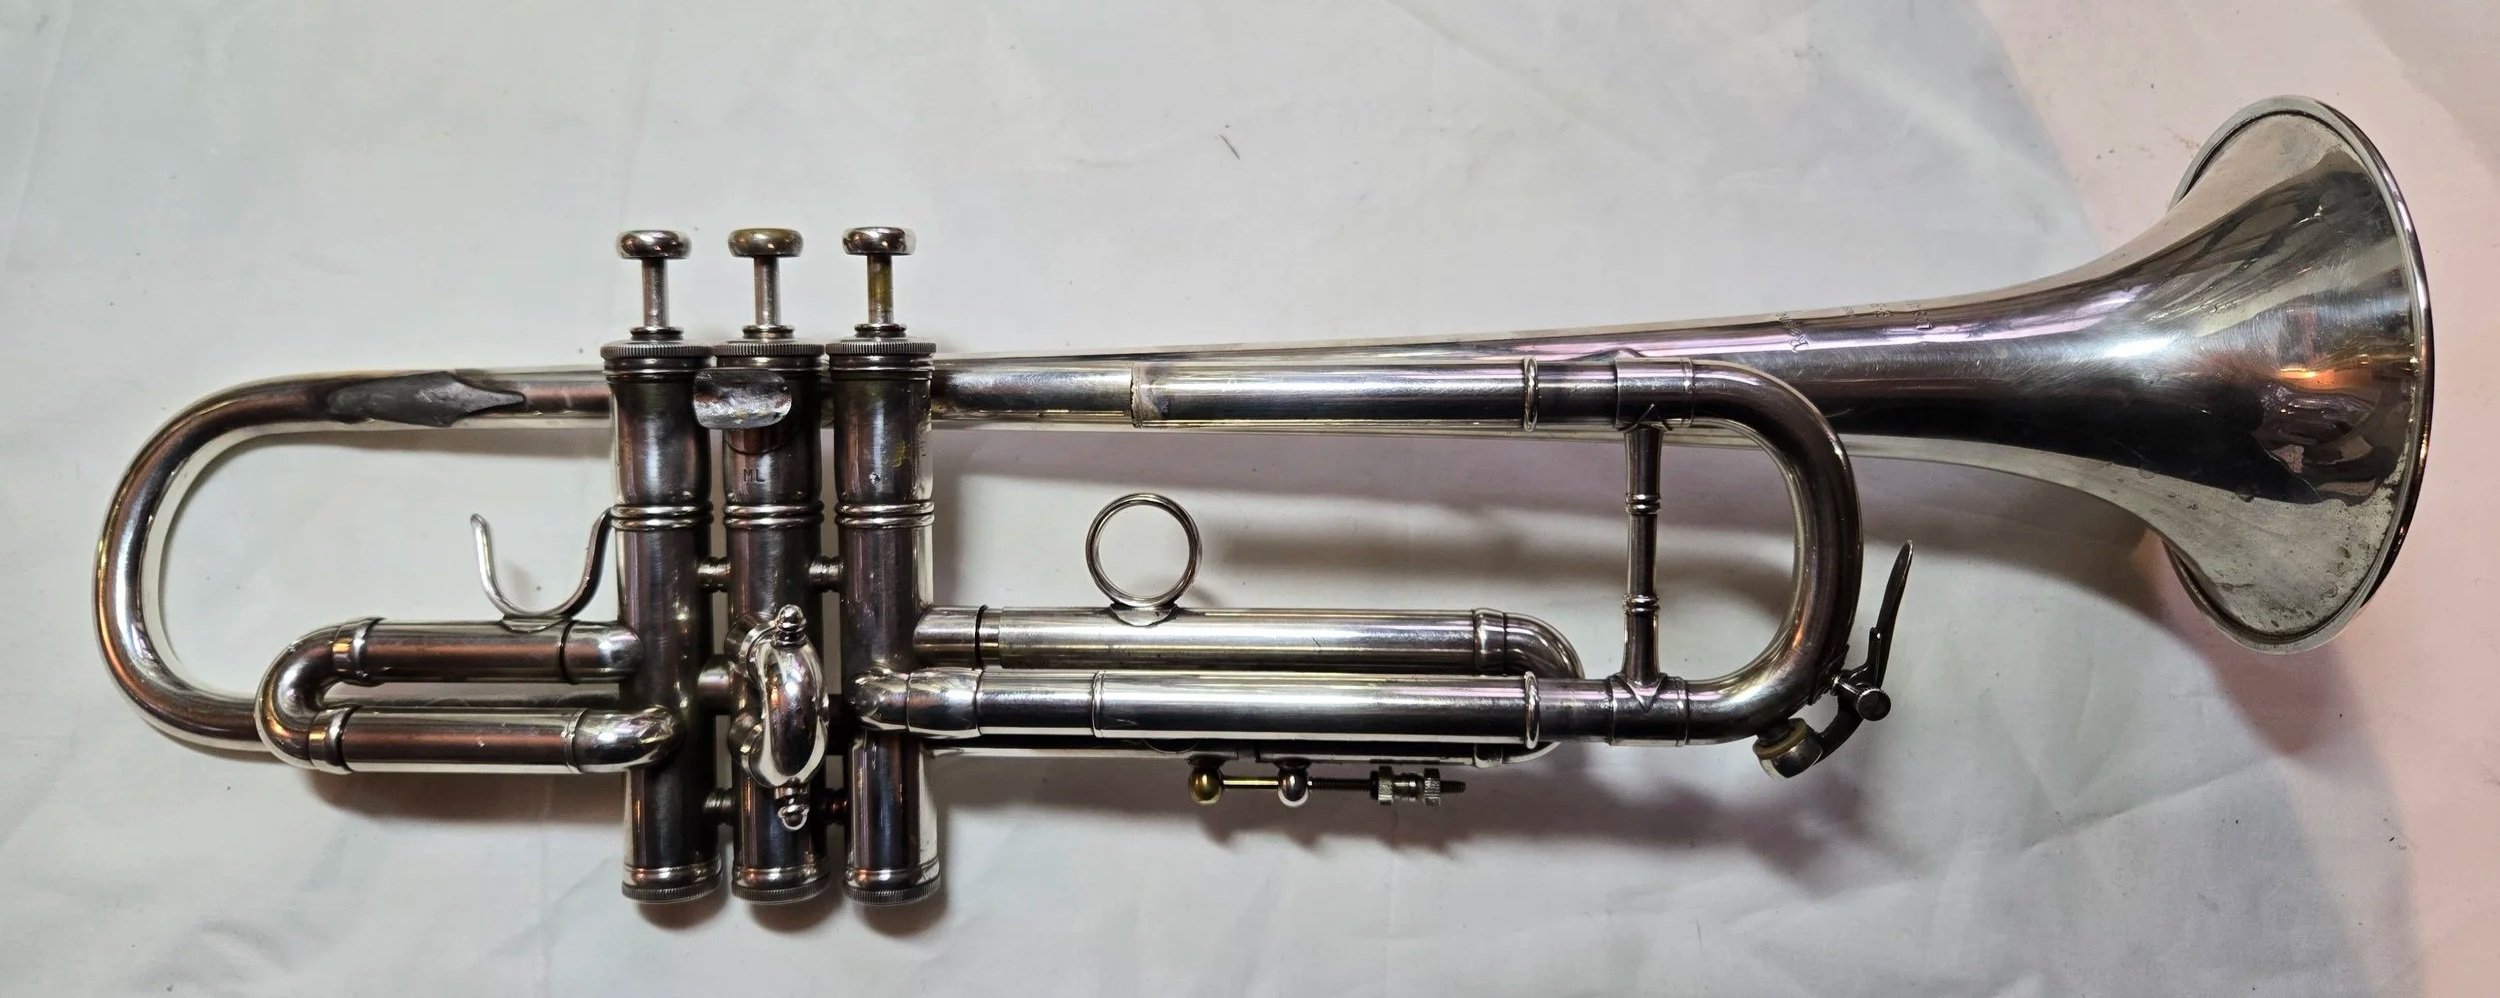
This horn is in the shop to have the lead pipe changed. The lead pipe is the straight silver-plated part with the finger hook on it, just below the valve stems. If you look closely, you can see some small imperfections, little bumps on the lead pipe. These are a product of dirt and crud on the inside of the lead pipe eating through the metal. This is sometimes referred to as “Red Rot”. Eventually, holes will form which will cause leaks. So, the customer asked me to replace the lead pipe.
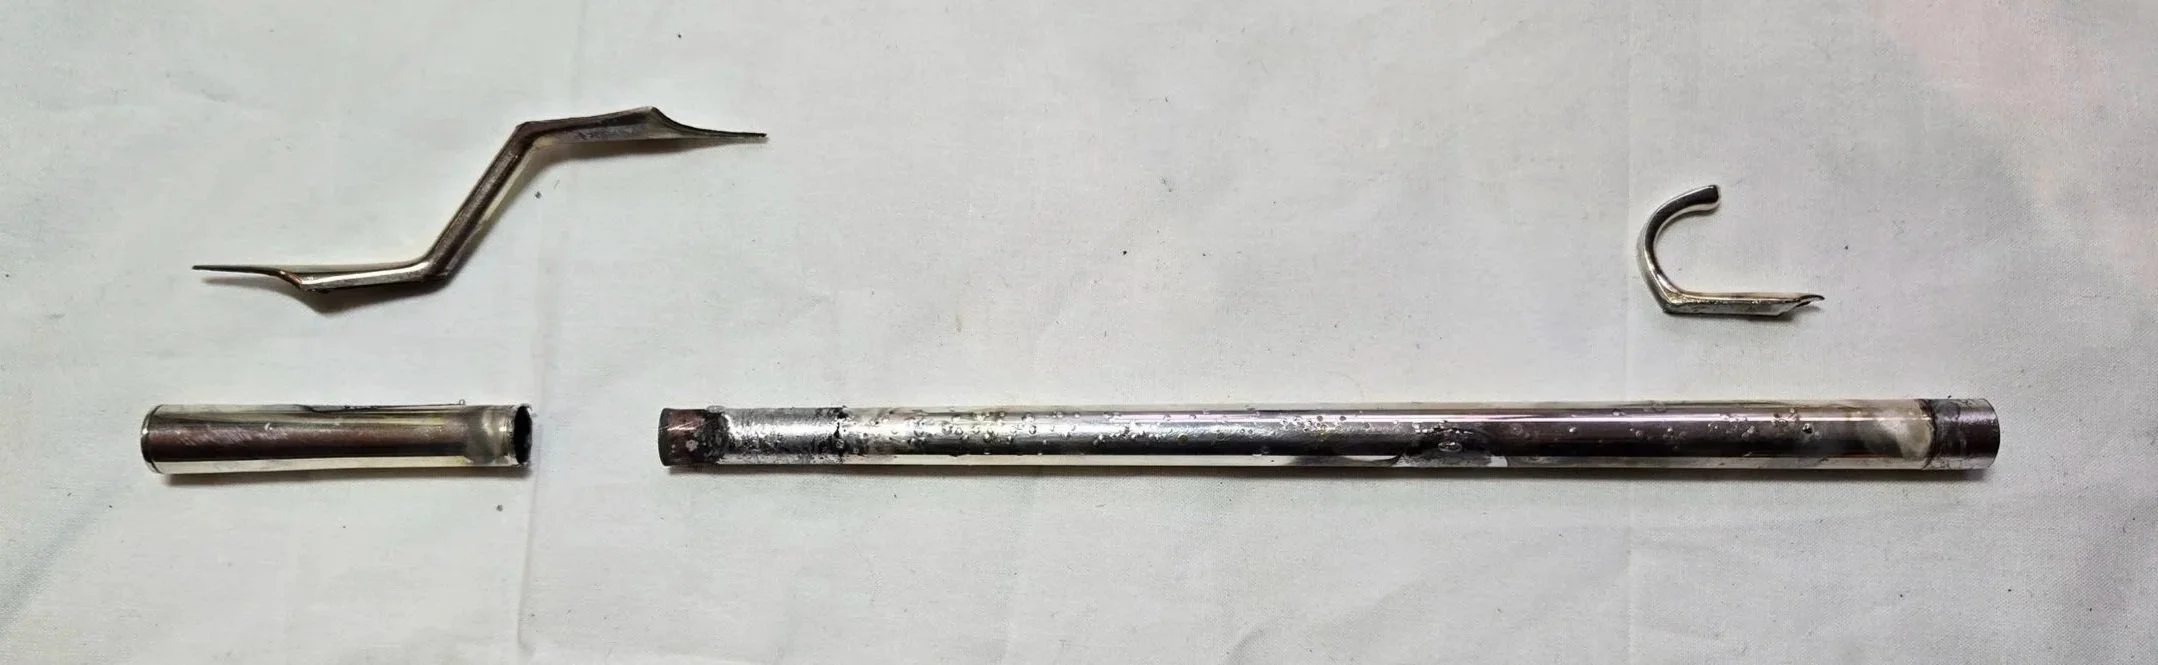
And here are the aforementioned parts that I removed, the lead pipe, mouthpiece receiver, one brace and the fingerhook.
In the photo below you can really see the imperfections on the original lead pipe. Of course, below it is the new lead pipe that I will install.
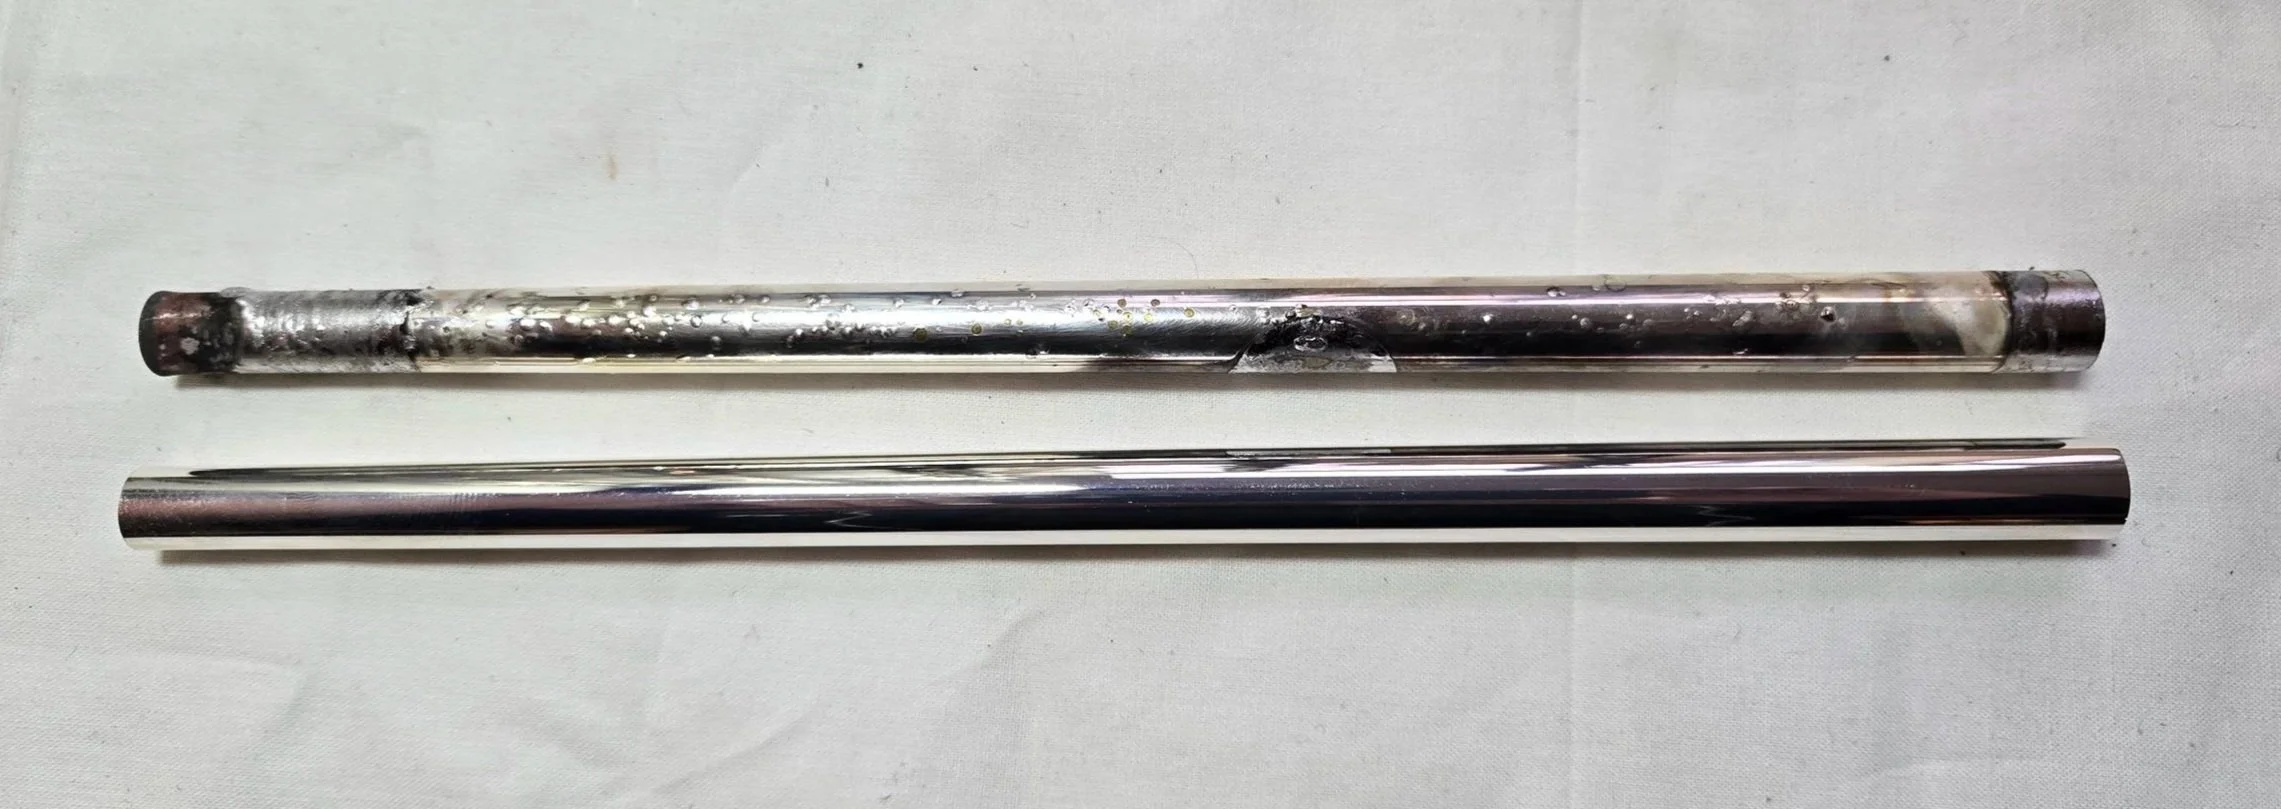
In this last photo below, you can see the finished product. Of course, I replaced the lead pipe plus I re-installed the mouthpiece receiver, the brace, the finger hook and resoldered two more brace spots. I think it came out looking pretty good and more importantly, the customer was happy.
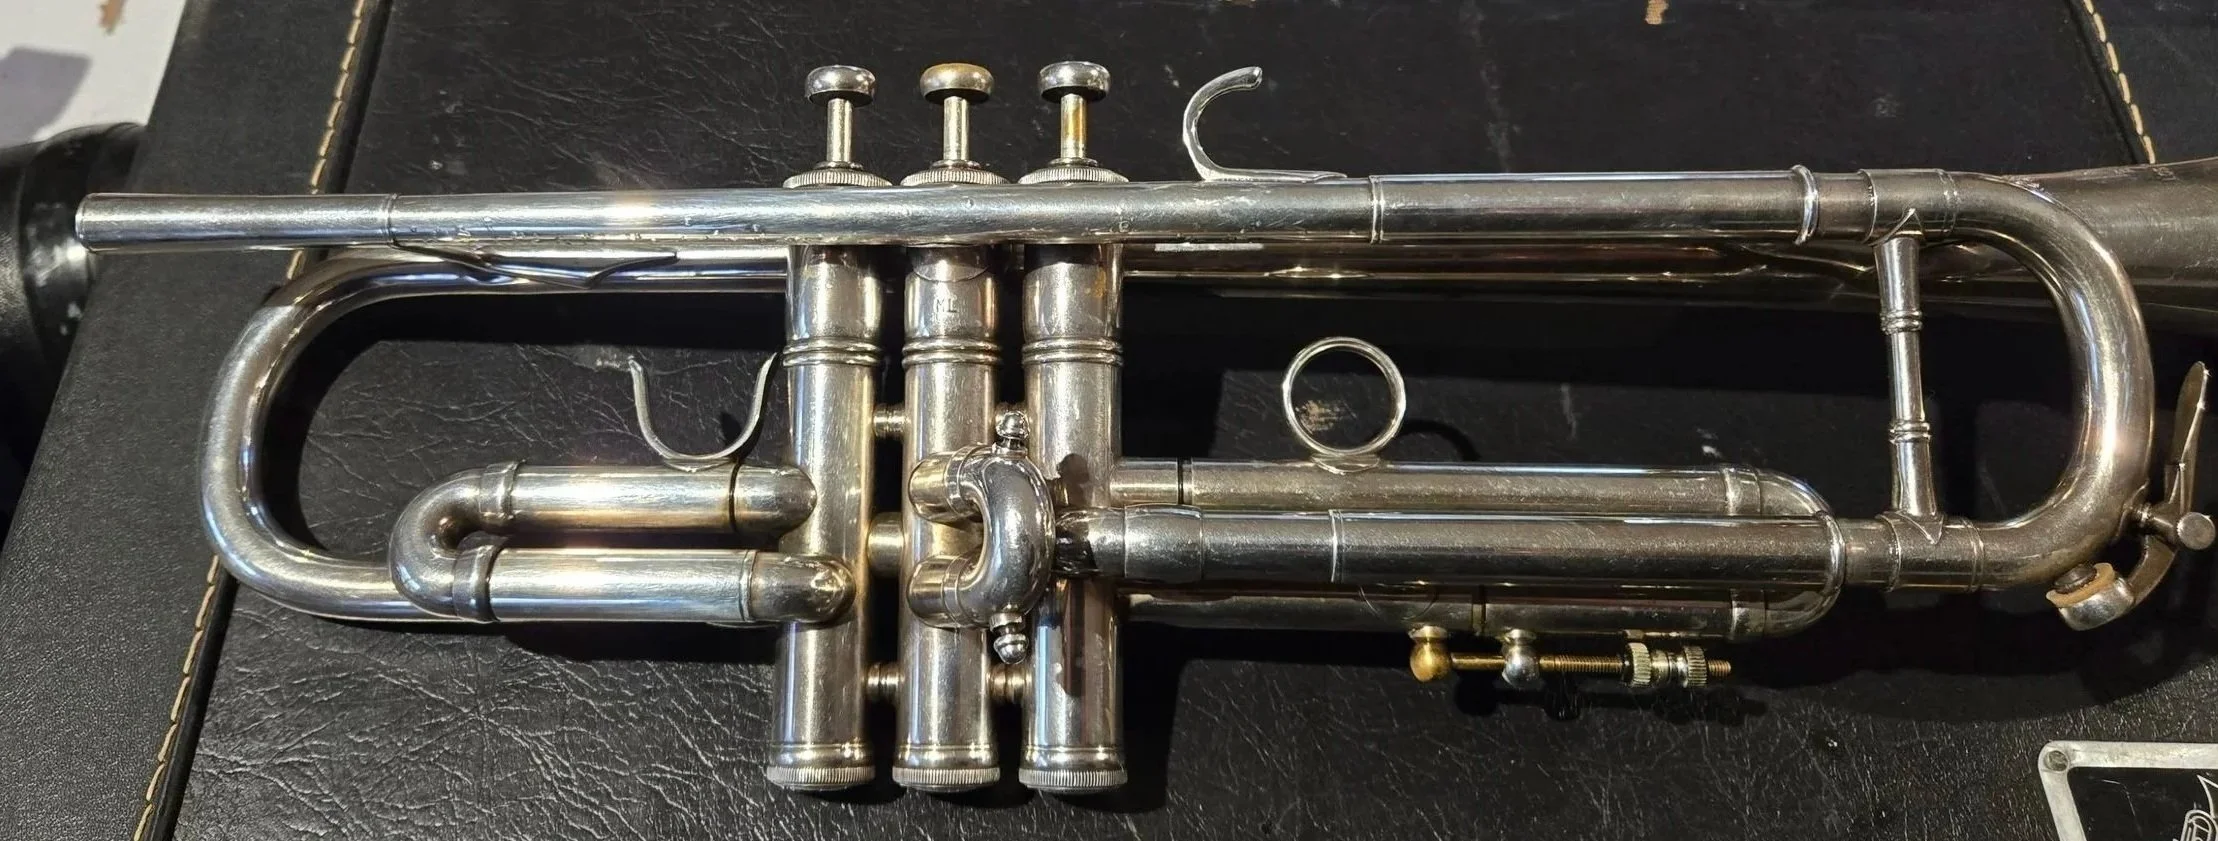
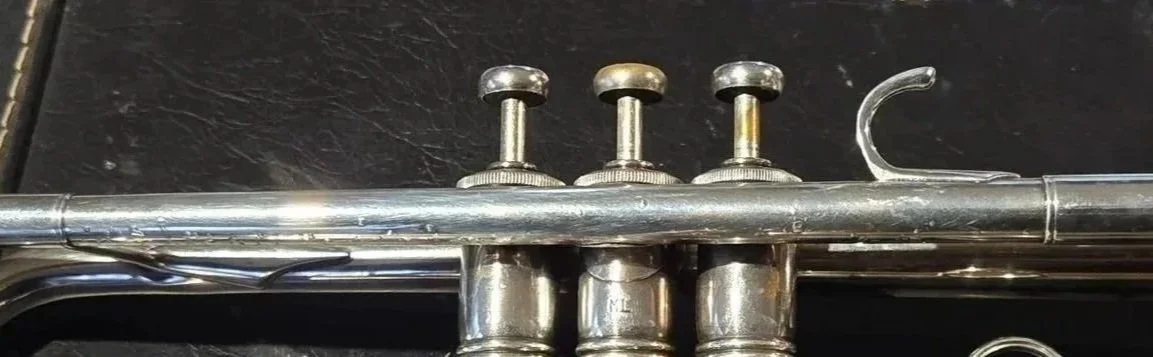
Here is a little better close-up of the lead pipe so you can, hopefully, see what I’m talking about.
In this photo below I have removed the bad lead pipe plus the mouthpiece receiver, one brace and the finger hook.
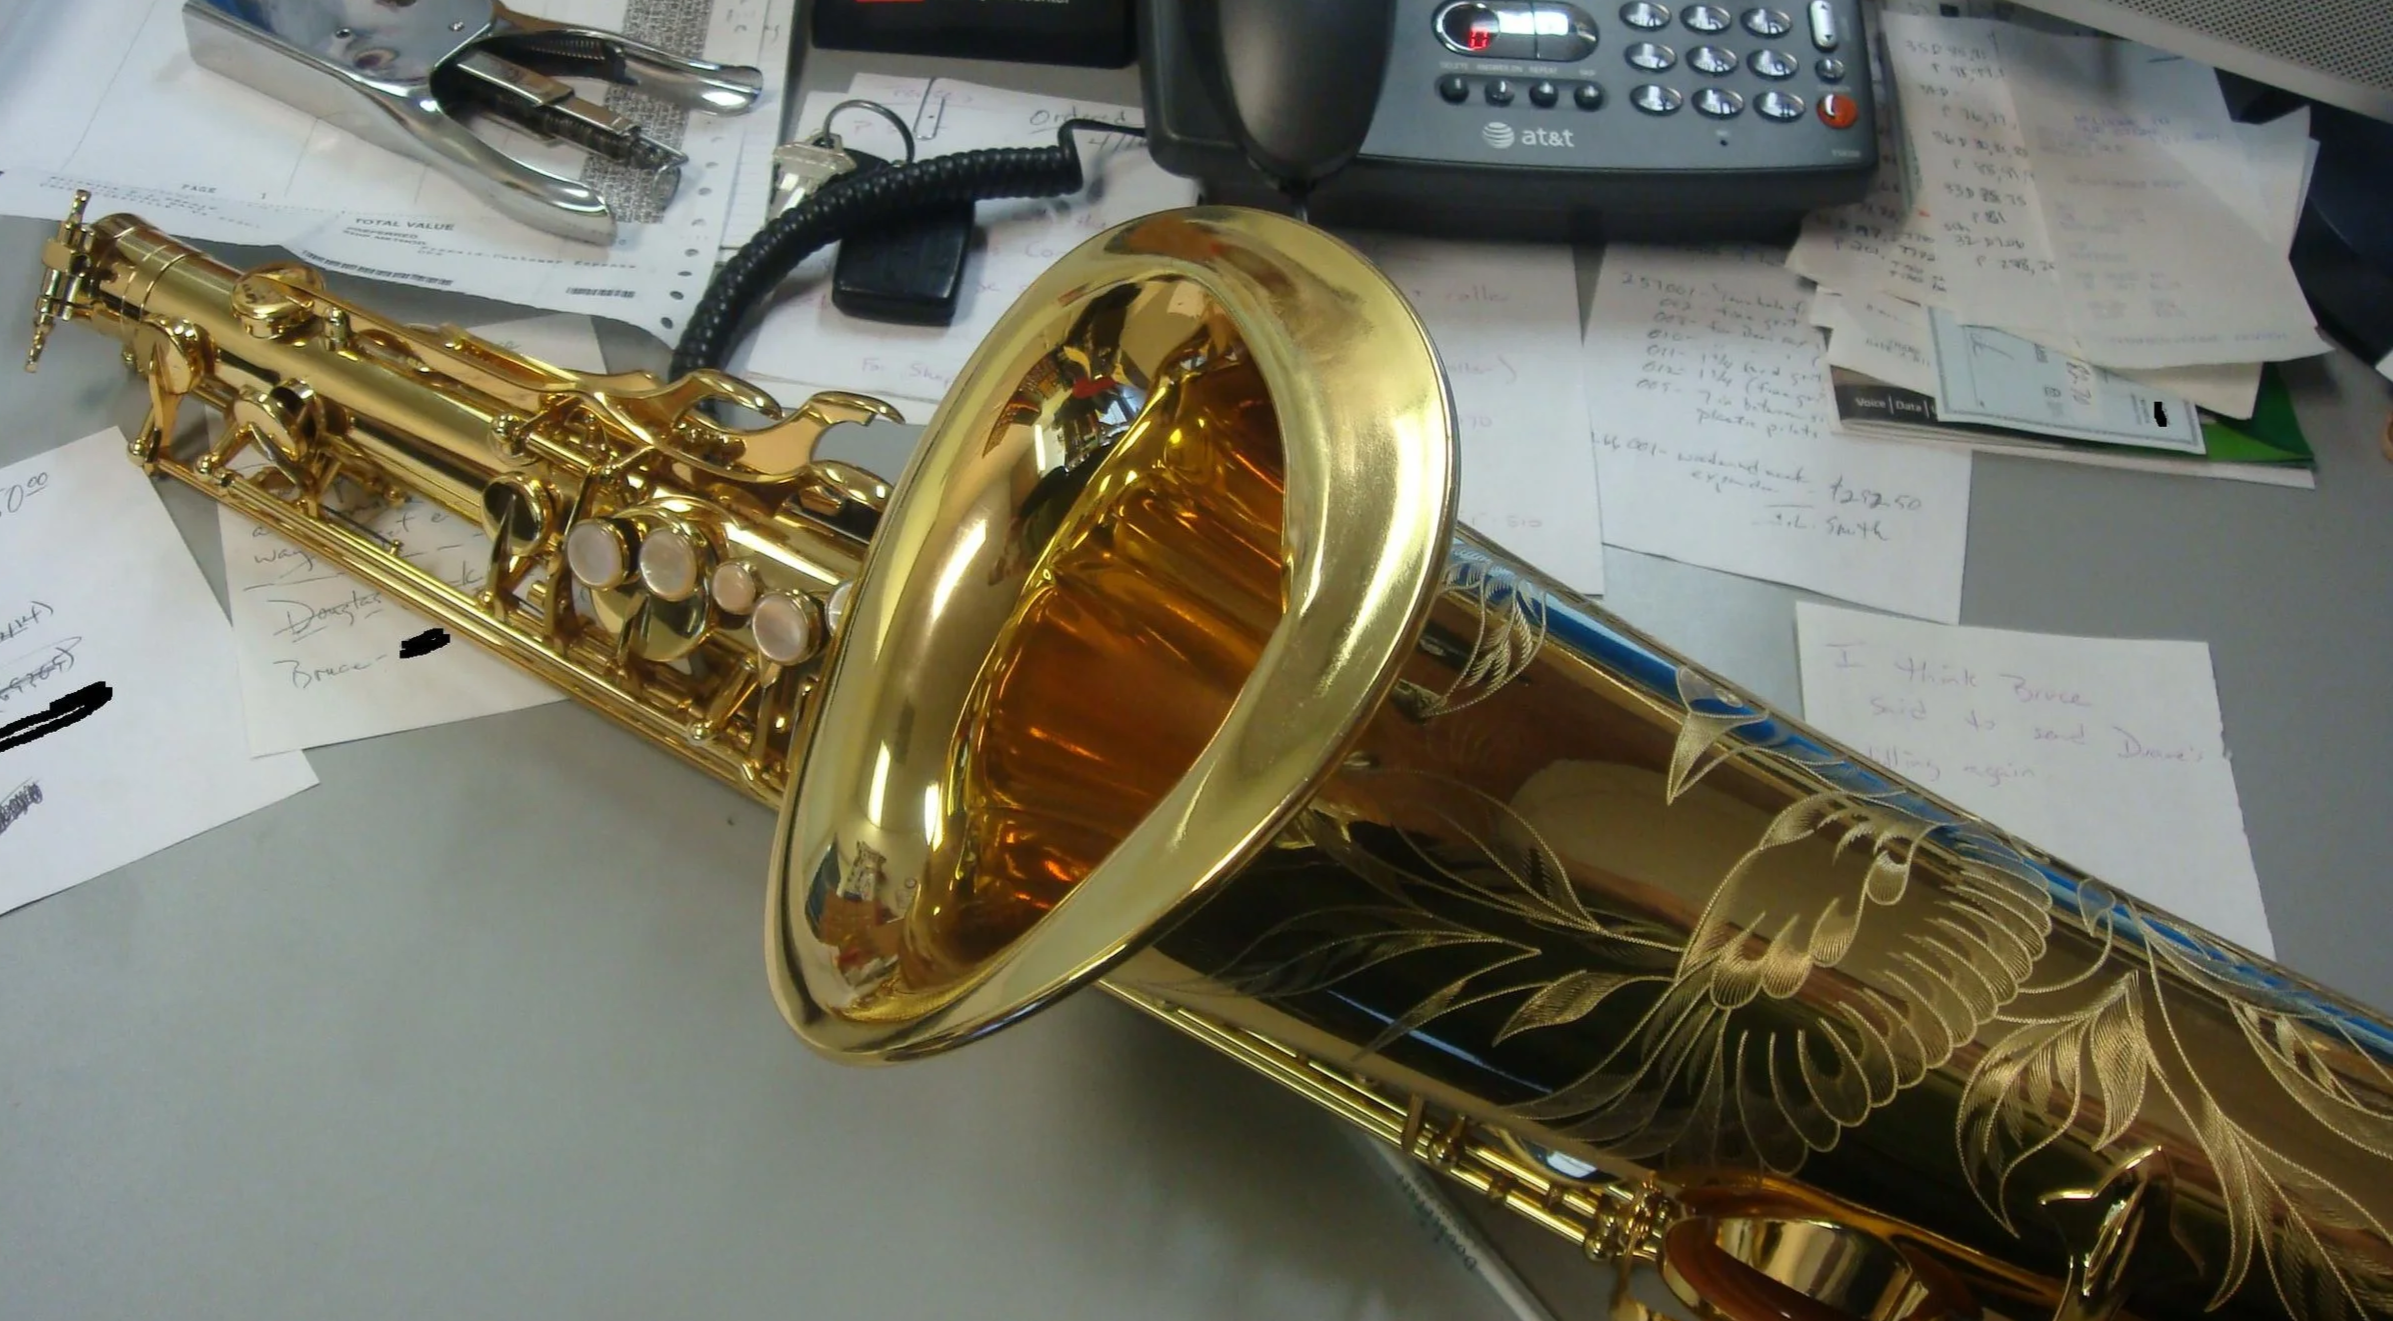
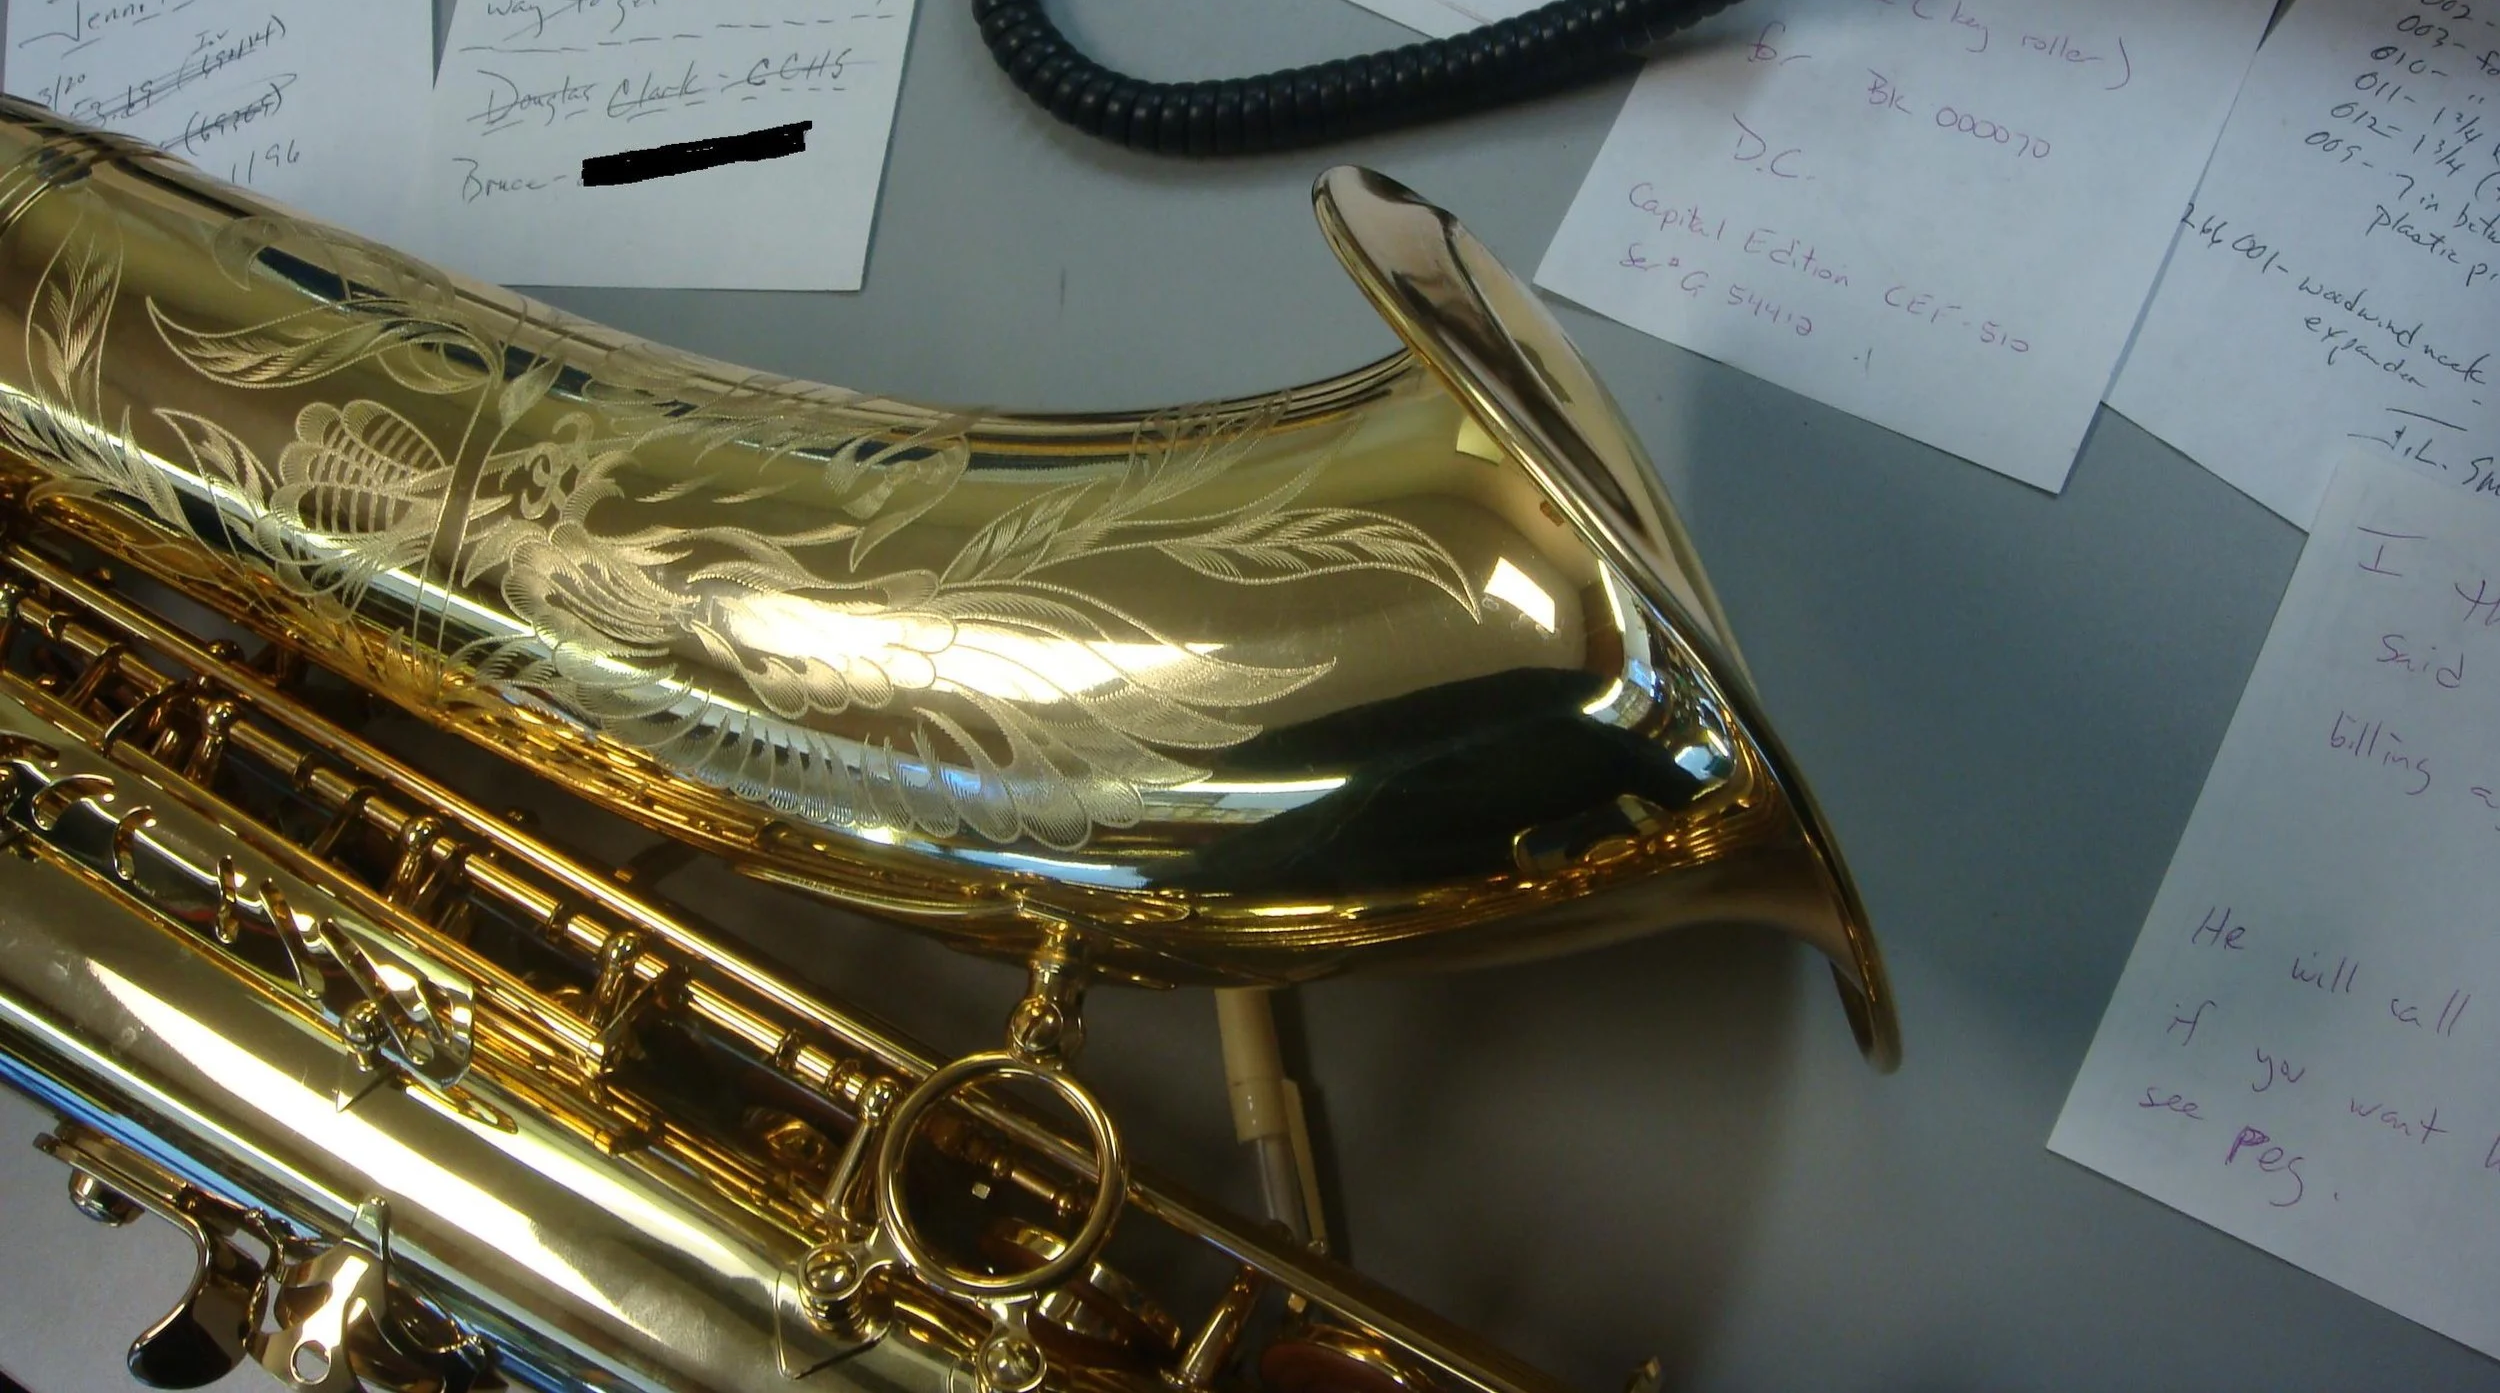
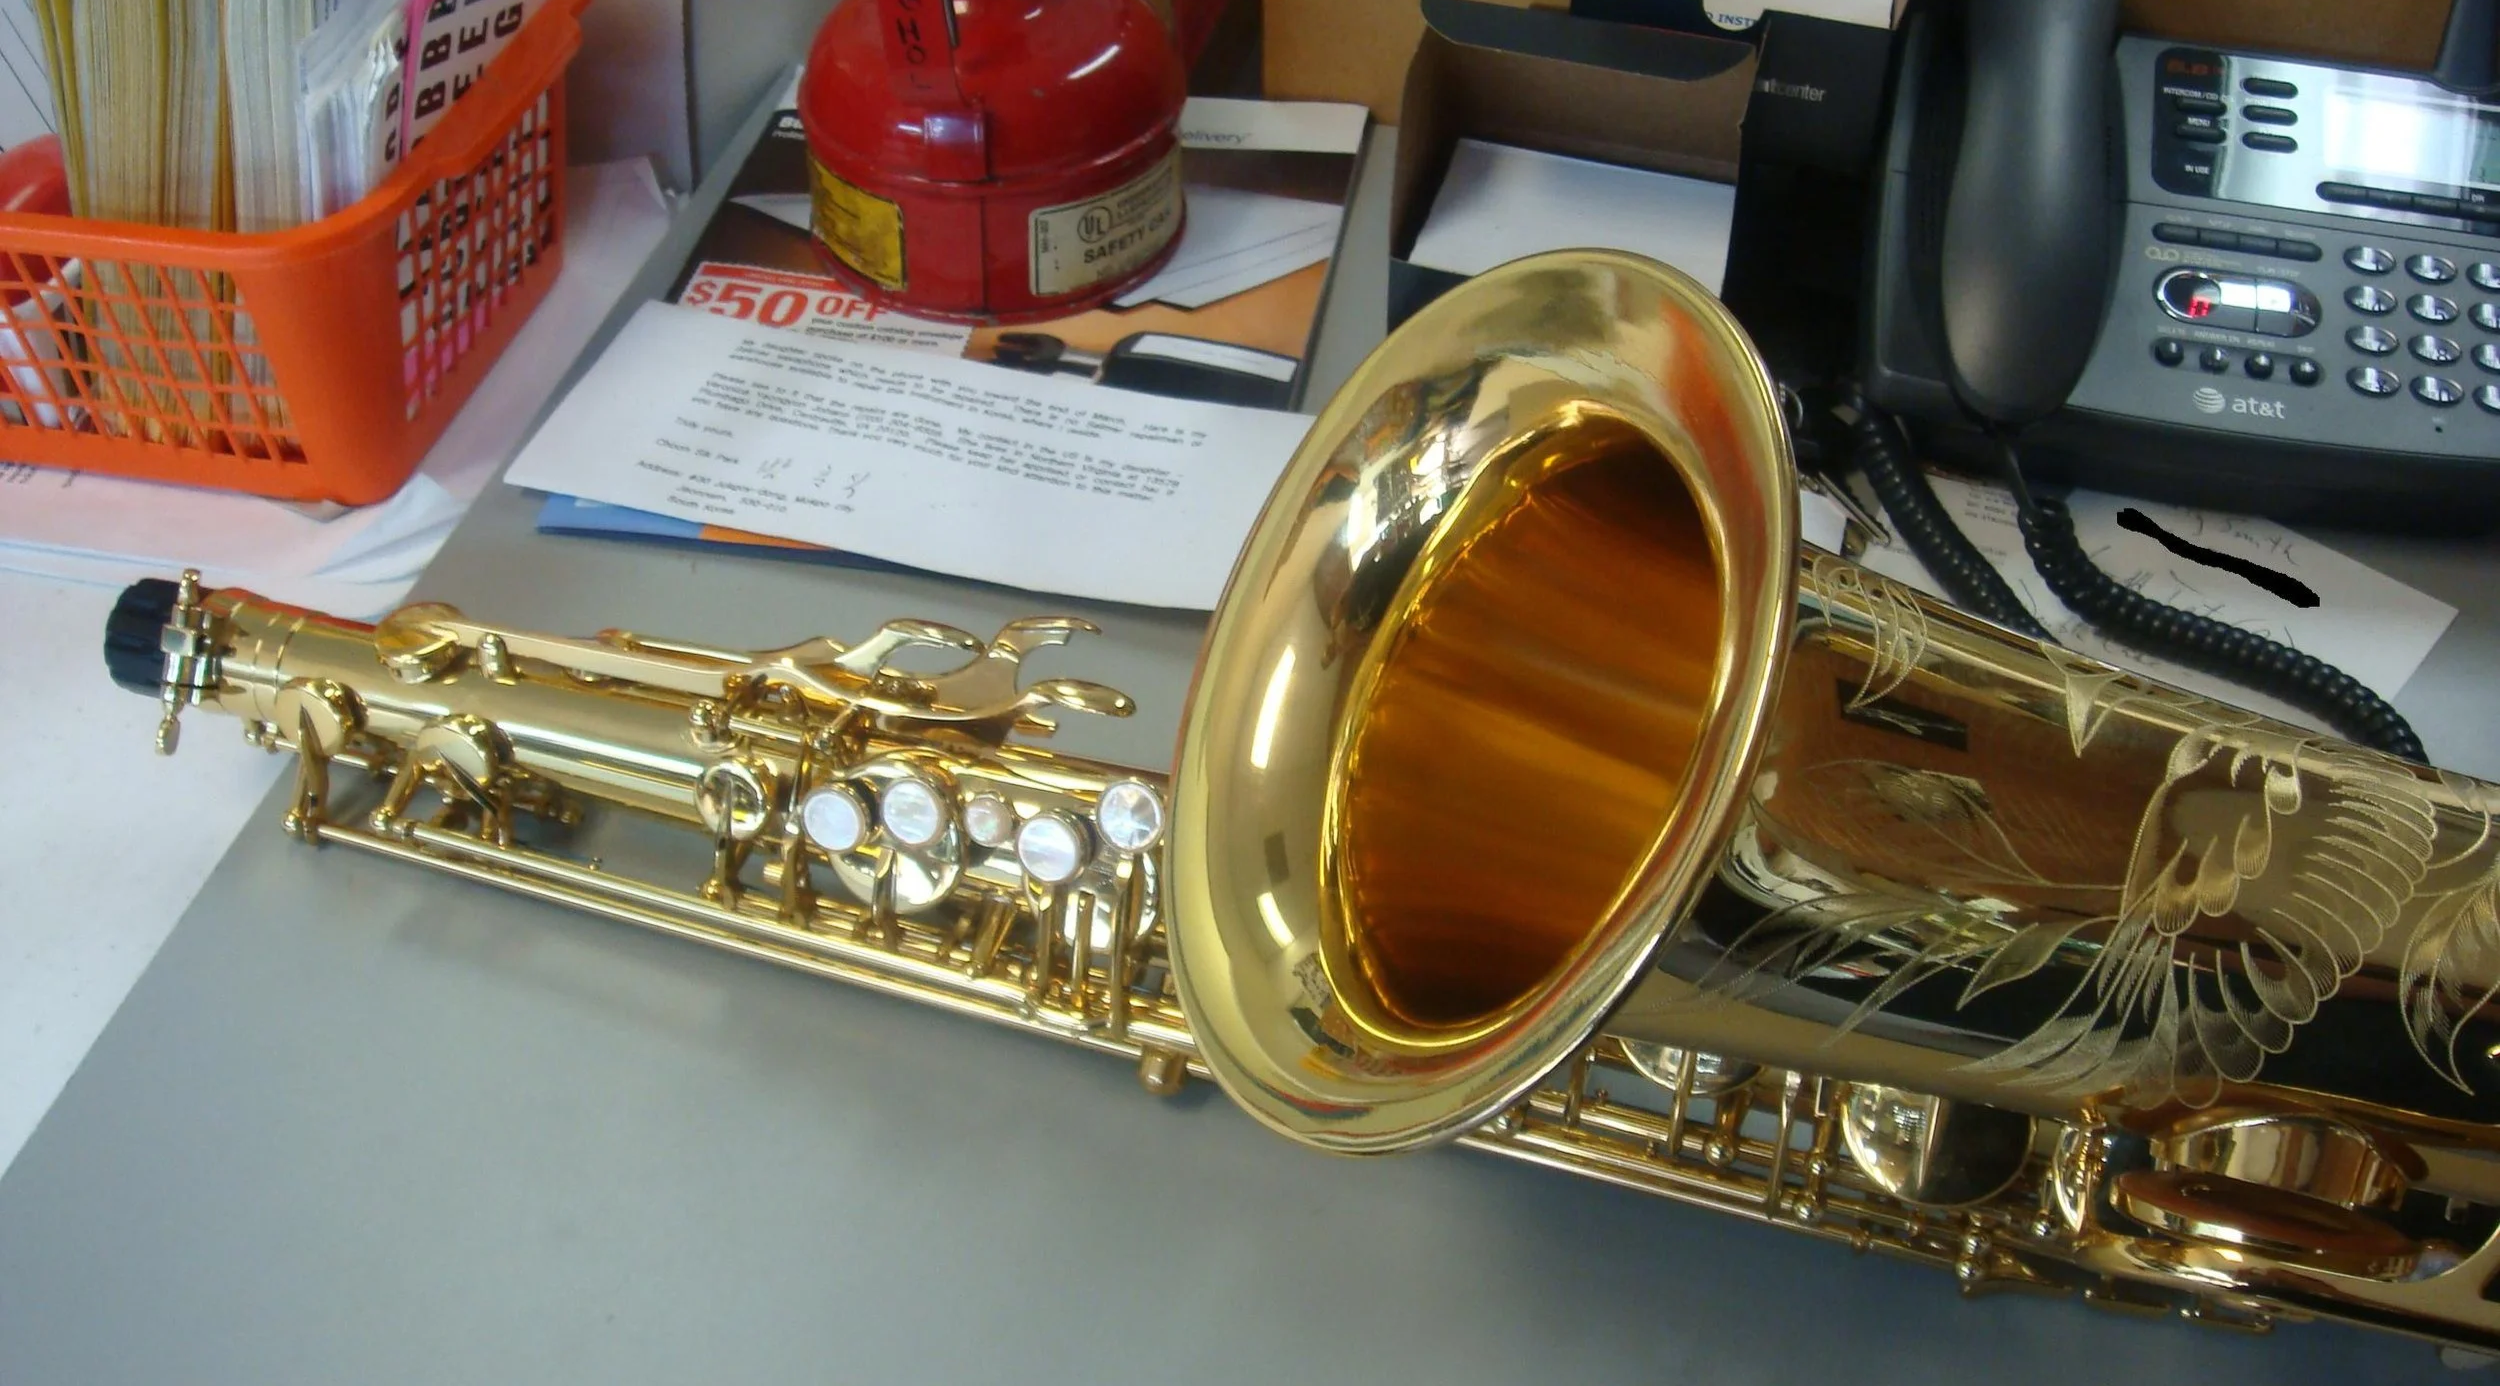
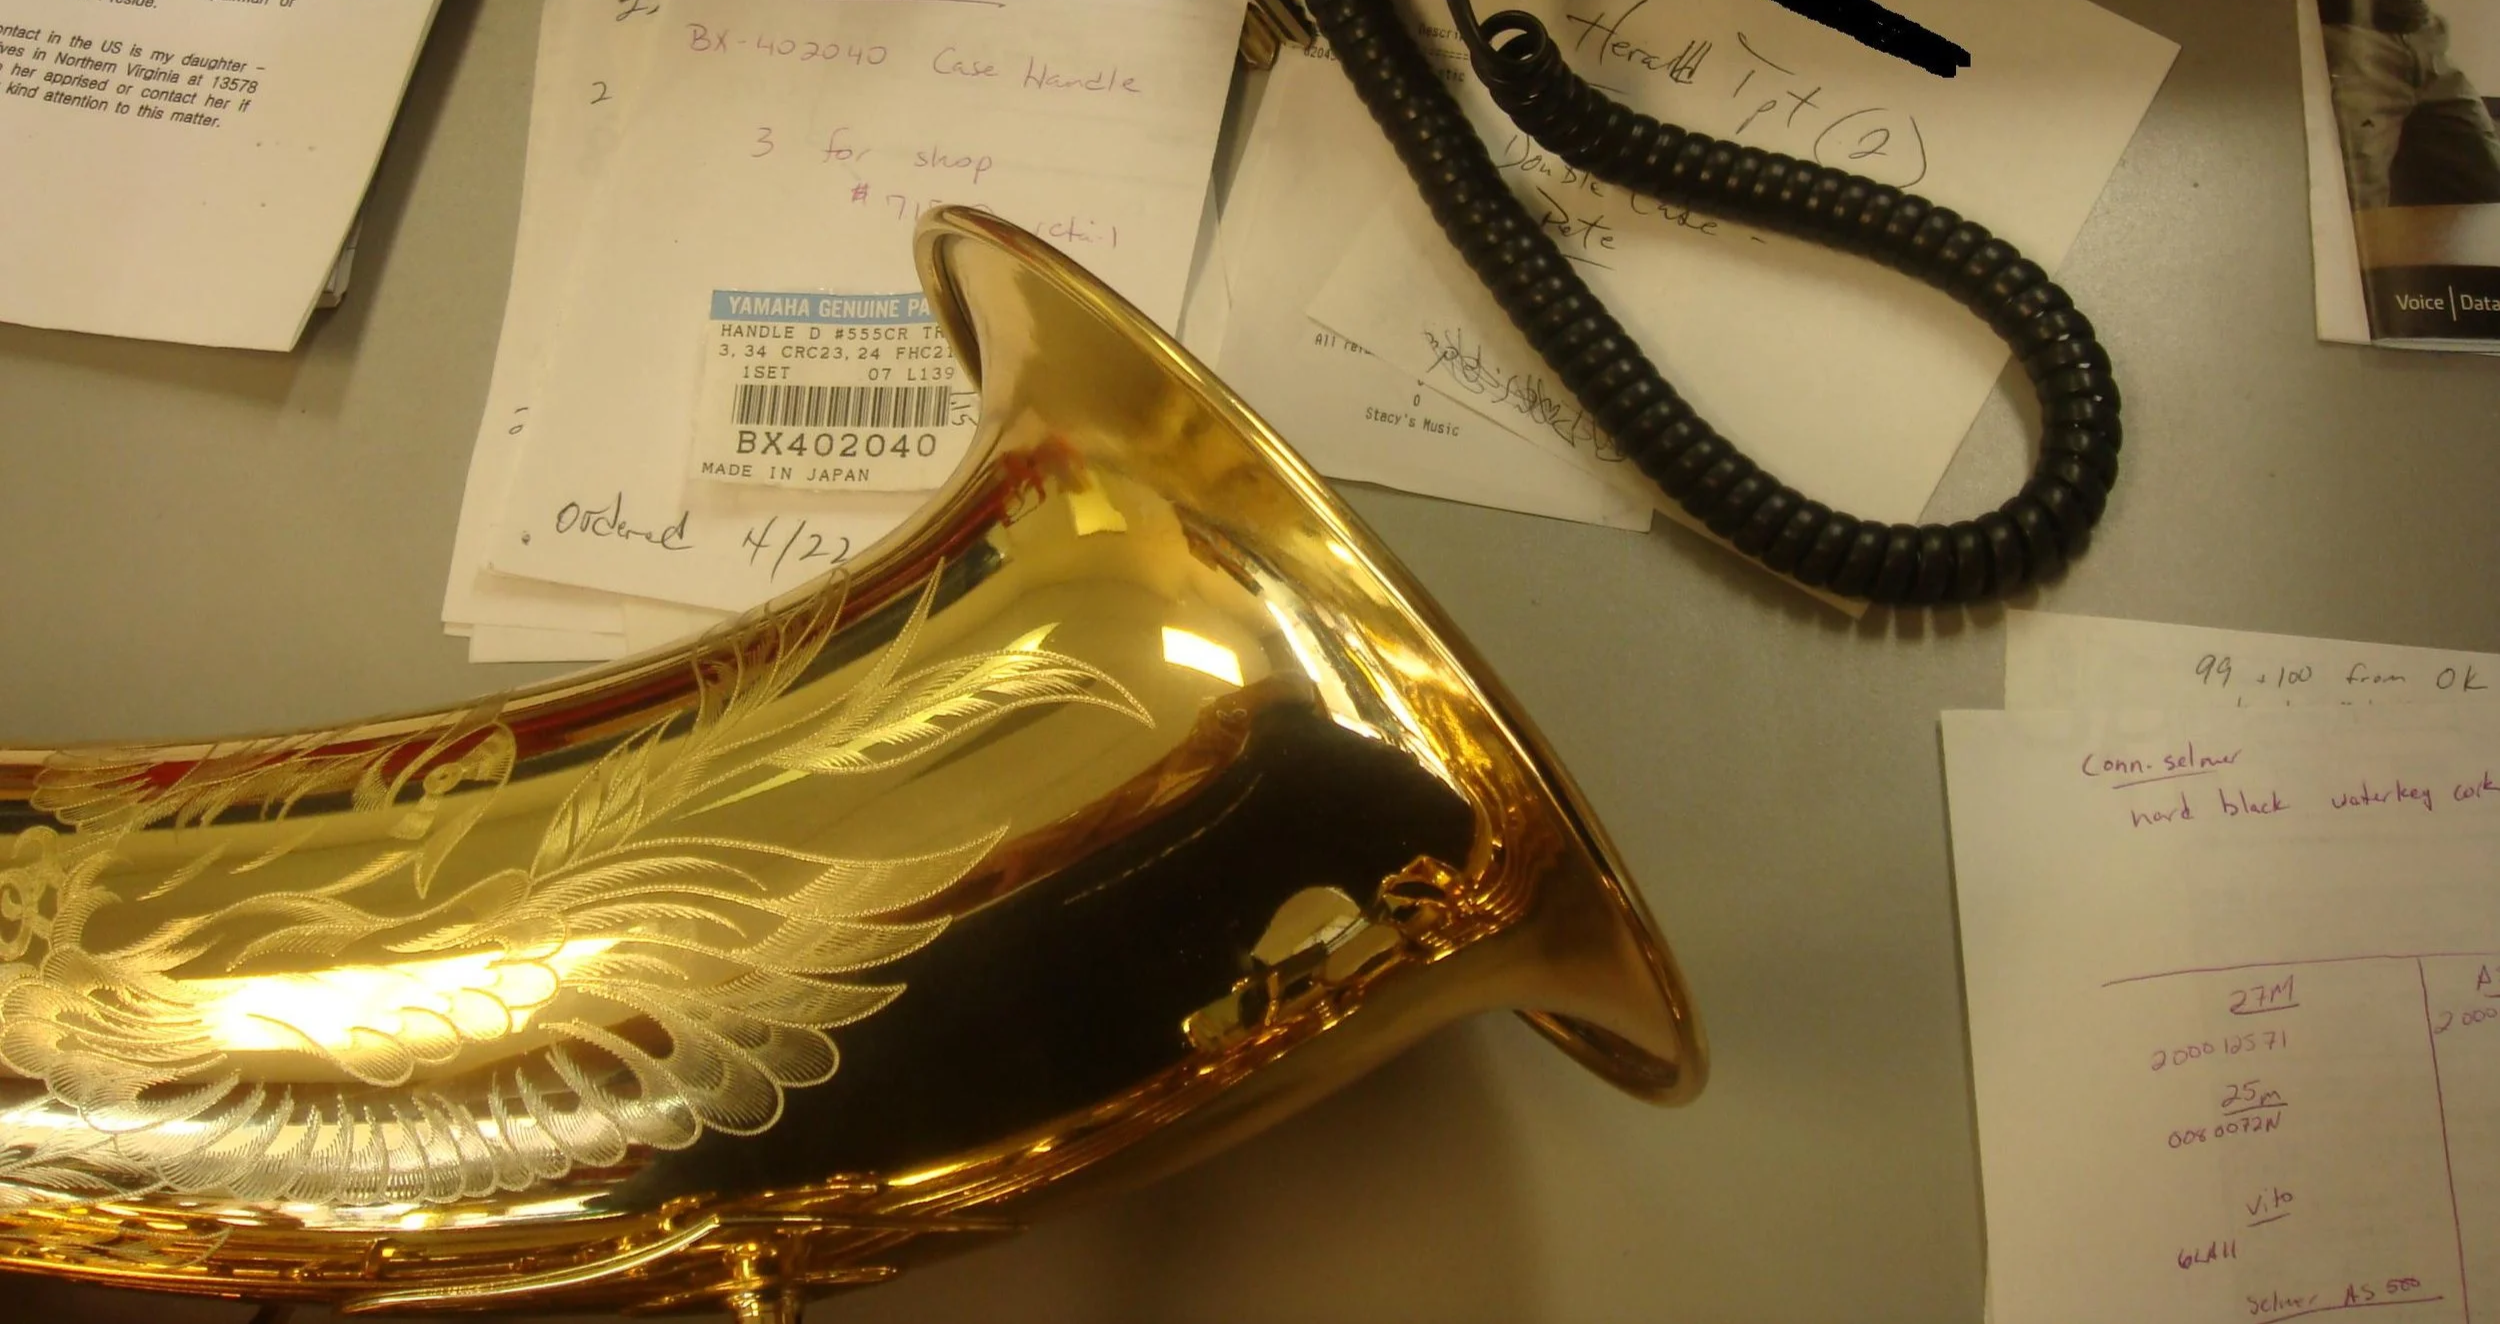
Don’t bend the bell of your brand-new sax!!!
This was a post that I put on here sometime back. I recently saw it again and thought it deserved a re-posting because of the dramatic improvement from “damaged” to “repaired”.
This is a Selmer Reference 54 tenor sax which is a professional model instrument that costs about $7000.00! Not only did the bell rim get bent but the bell was knocked out of alignment. This means that the 3 lowest keys on the horn, low C#, low B & low Bb were unable to cover the tone holes that they are supposed to cover. This means you couldn’t play those notes. So, the repair was more extensive than just a bent bell rim and more involved that what you see at first glance.
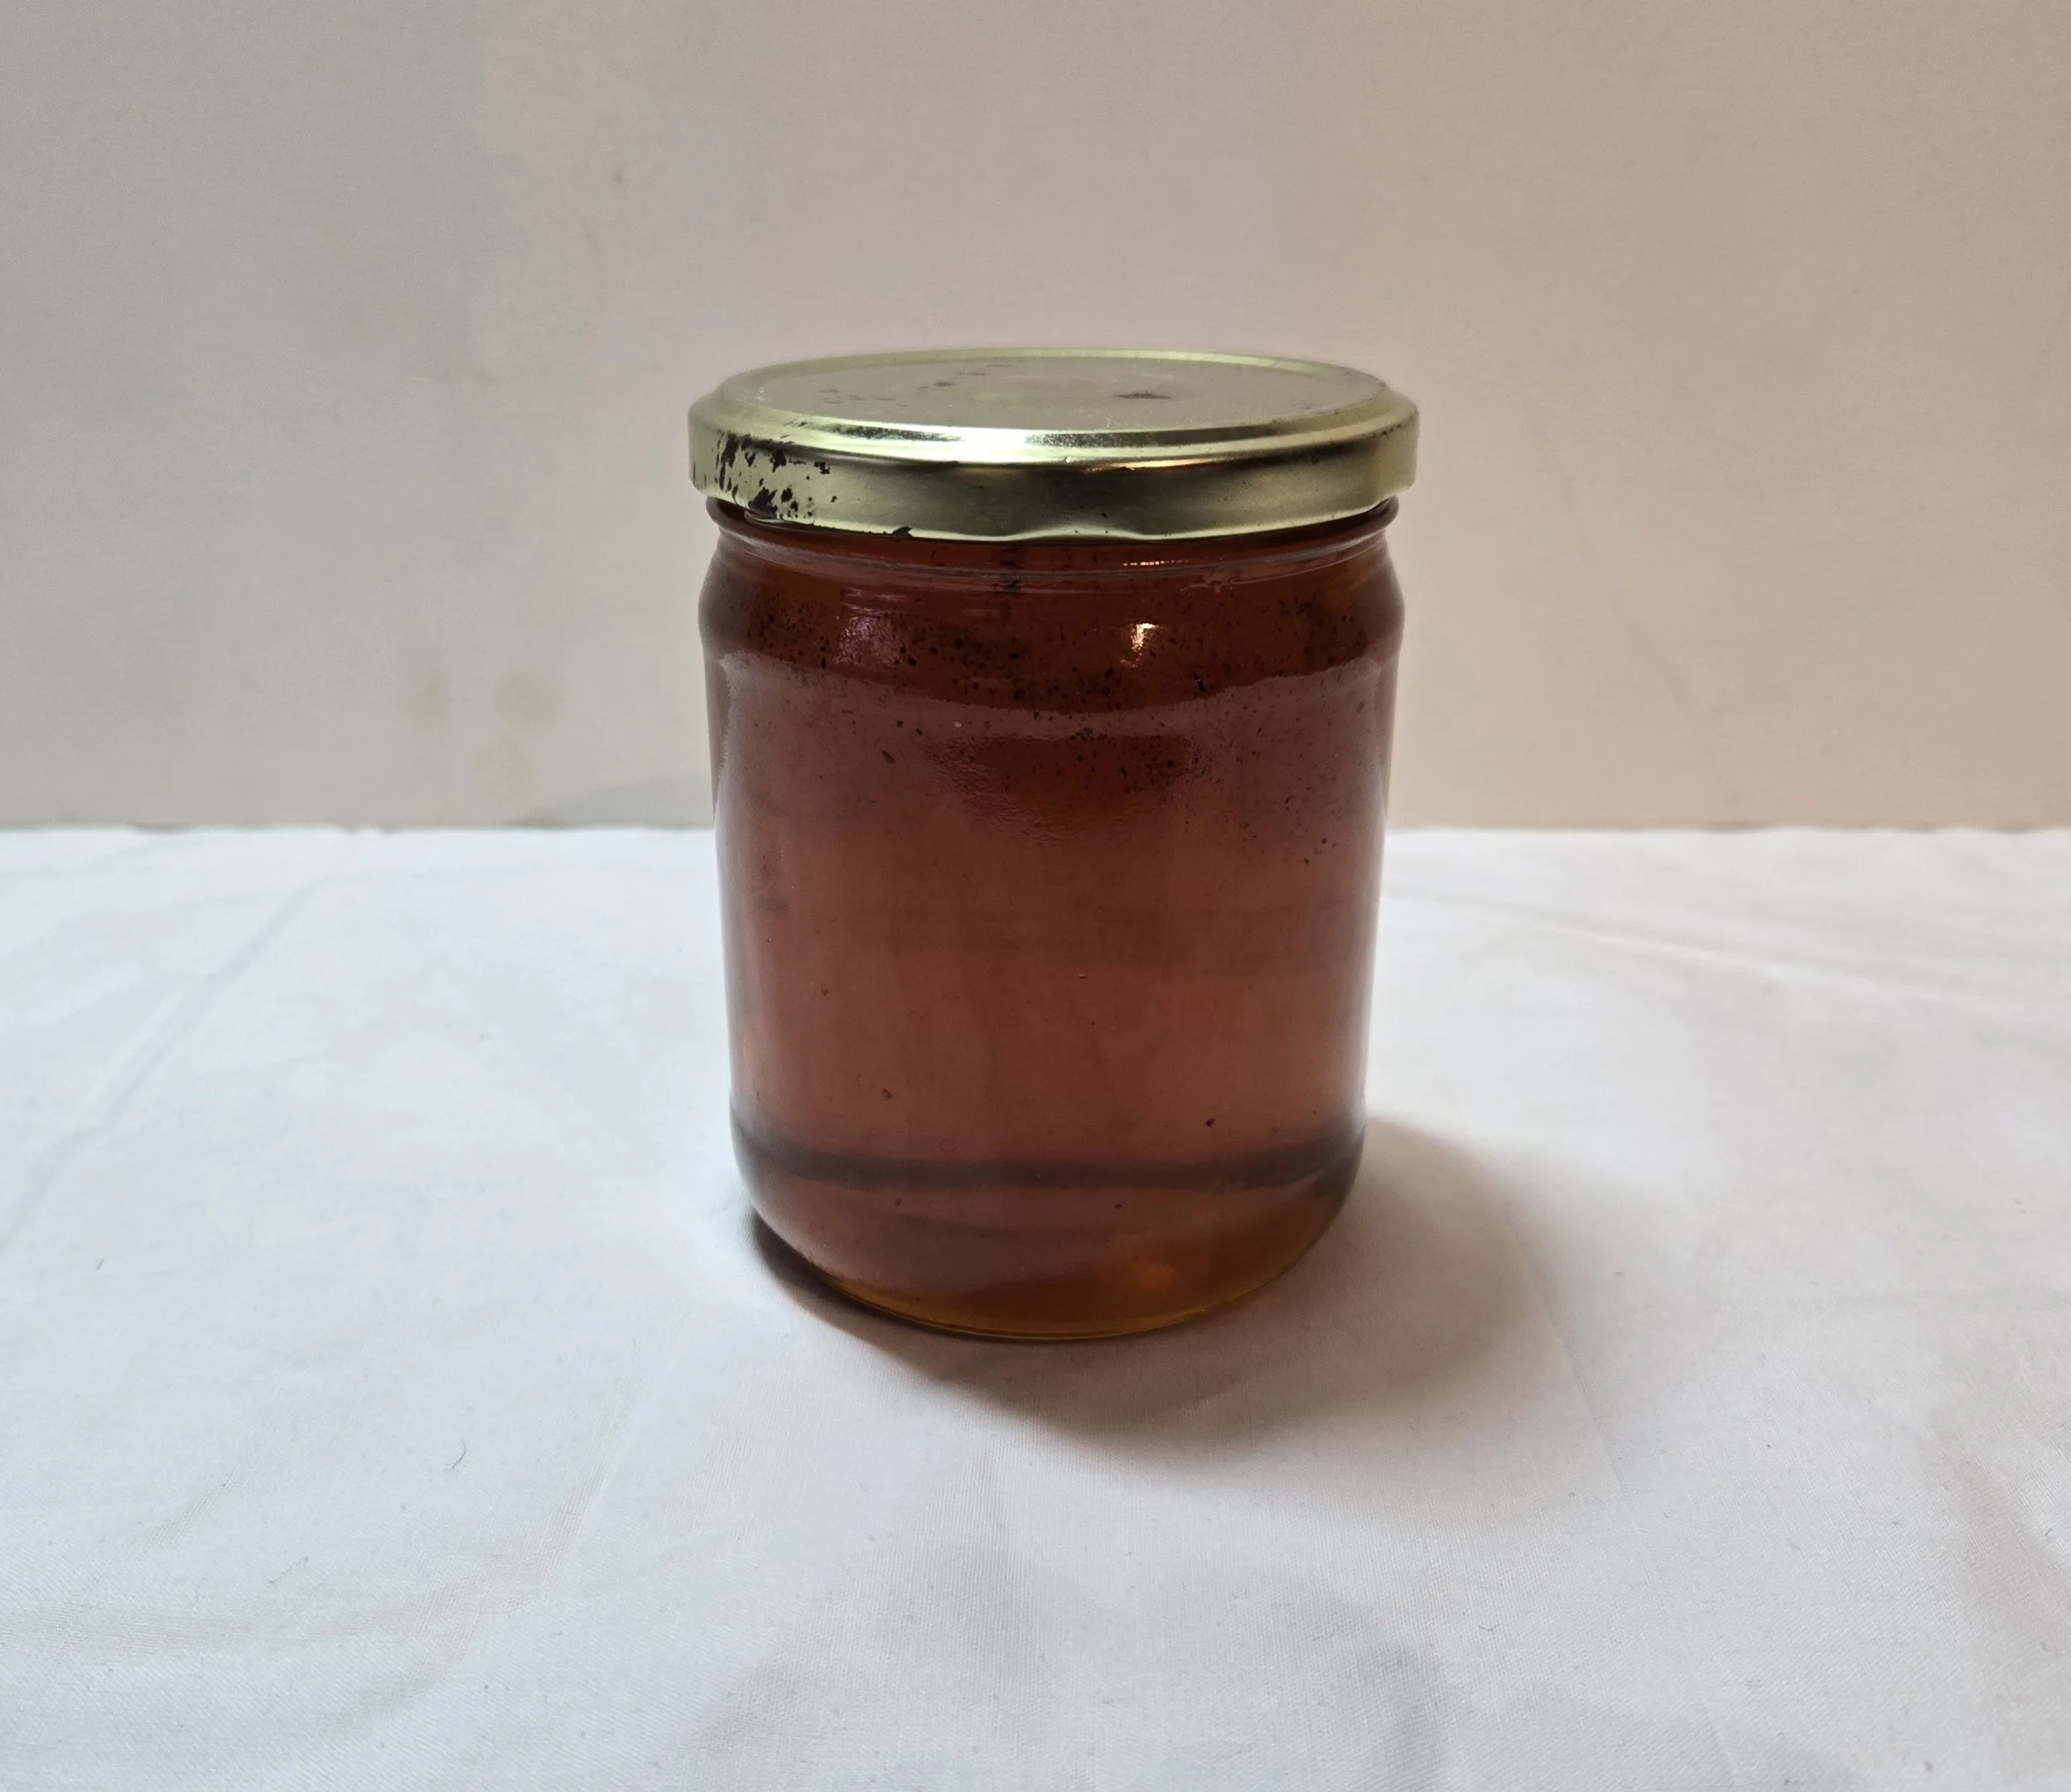
Unexpected Gifts That Come My Way
This morning, I had a customer come to the shop to pick up a tenor saxophone that I had repaired for him. As soon as he walked in the door, he handed me this jar of honey from his personal apiary. I am a big fan of using honey. Before I hit the road to ride my bicycle, I always take a spoonful of honey. I feel like it really helps my breathing because I have a touch of asthma. I really appreciate this gesture.
Musicians that come to my shop!!!
This will be an ongoing, constantly updated group of photos. Also, my comments about each of these musicians is just a speck of what they do. If you think that I missed mentioning something about a particular musician, you’re probably right, but I only have so much time to write about each of them. Keep an eye out for local performances because everyone listed here is a performing musician.
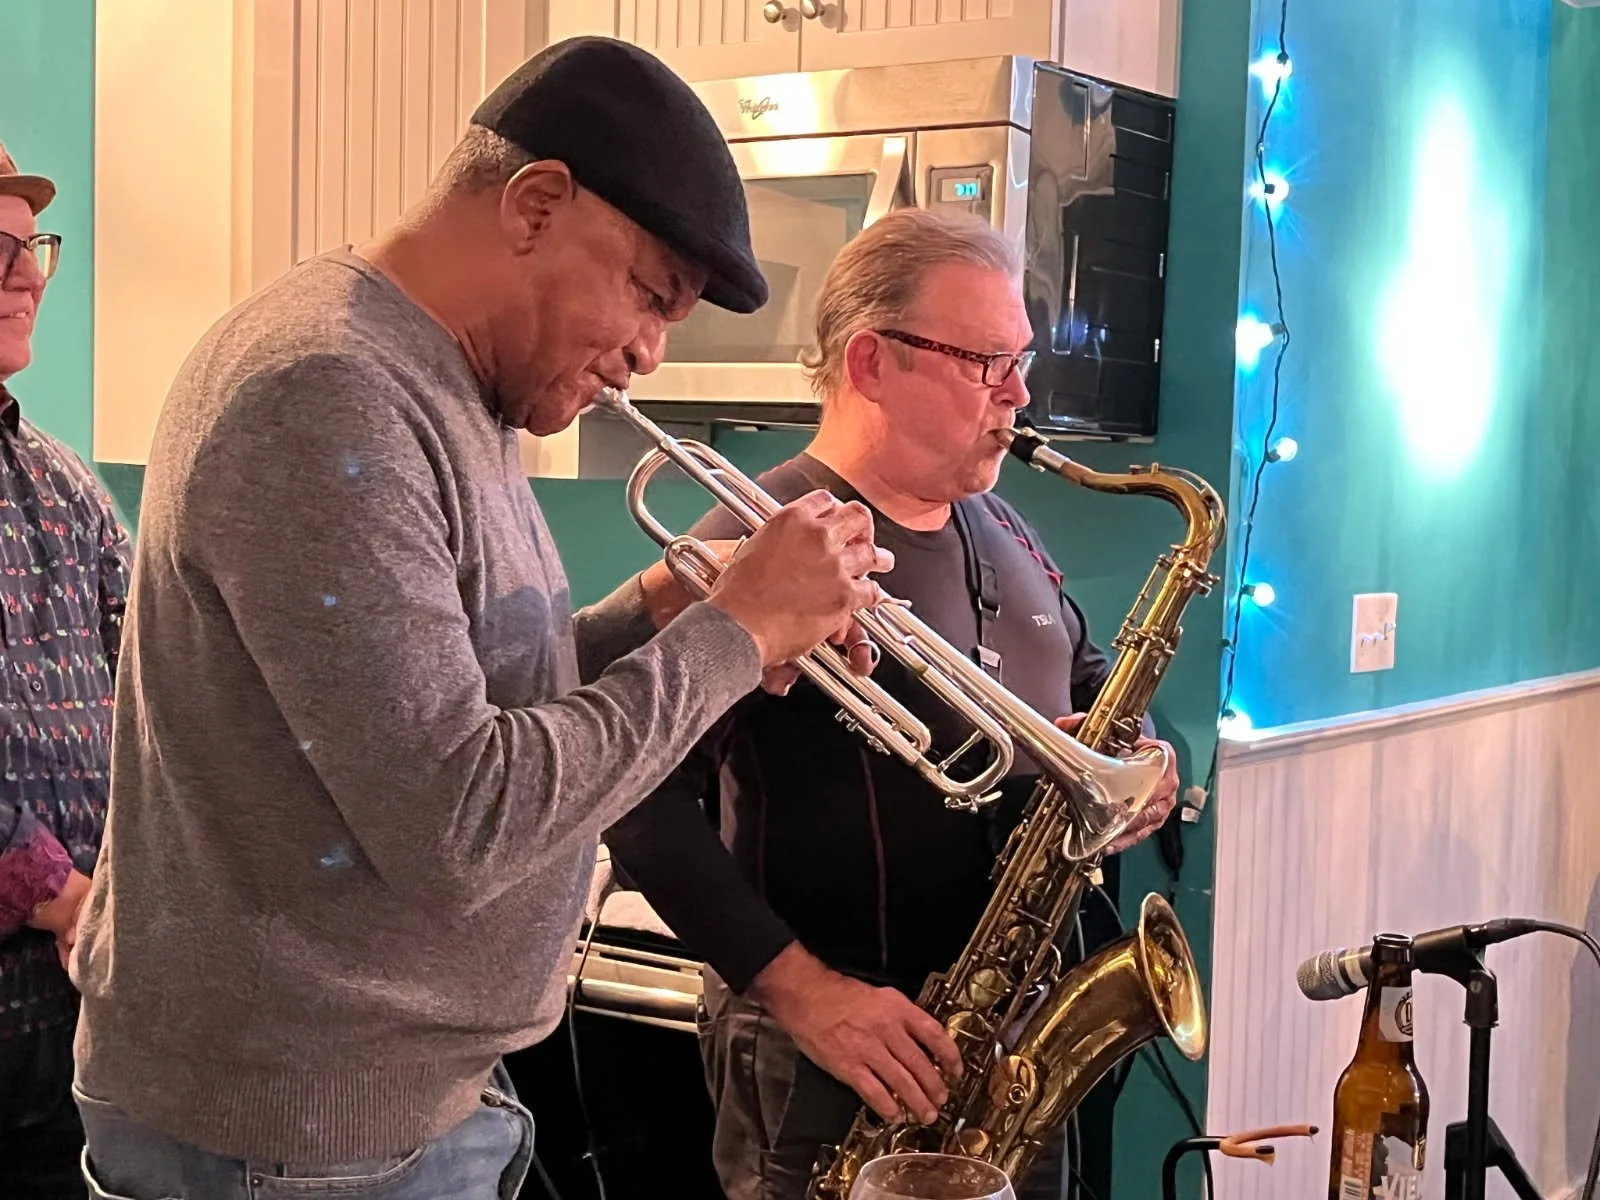
This is Charles Owens, and he is a saxophone player, teacher, band leader & composer. Usually, he is seen playing tenor sax, but he periodically plays alto sax and he’s a very good piano player. I put Charles first in this illustrious list of musicians because I see him more than any single player in the area. Why? Because he plays his sax about 19 hours a day and it needs a lot of work! Also, because he’s a discriminating player and he can tell when the smallest problem arises with his instrument. And he wants his saxes playing in top notch condition all the time. As a shameless plug, I sold Charles the tenor sax and alto sax that he now plays.

This is Jake Vanaman, and he is the sax player with Kendall Street Company which is a Charlottesville band. Jake was just in here a couple of weeks ago so I could tighten up a few issues with 2 of his tenor saxes. The band was heading out that same day for a short tour that started in New Orleans and worked its way back to C’ville. I’m glad to see good, young players coming into the mainstream of local music.
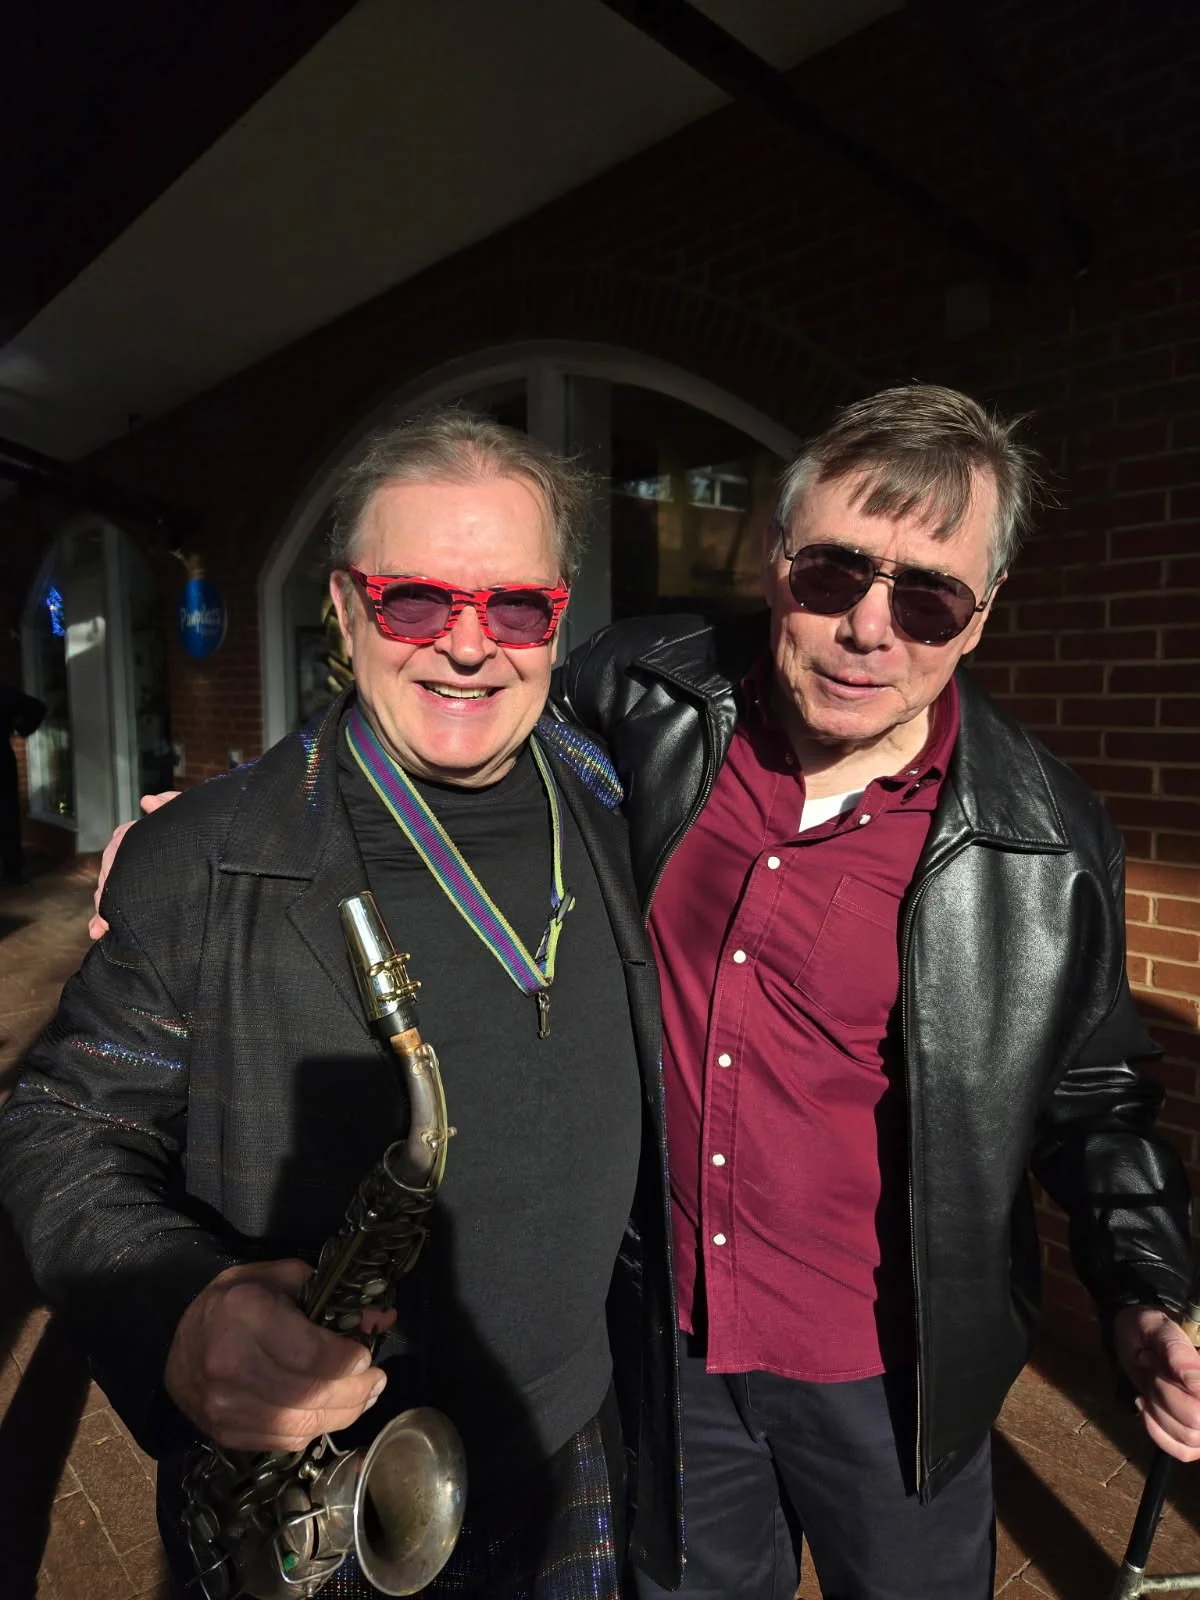
Of course, this is John D’earth. I have known John since the very early 80’s. He is a tremendous trumpet player, teacher, band leader and composer. He recently retired from being Director of Jazz Performance at the University of Virginia, but he still performs around C’ville and I’m sure many other cities and venues. Actually, I recently sold John another trumpet.
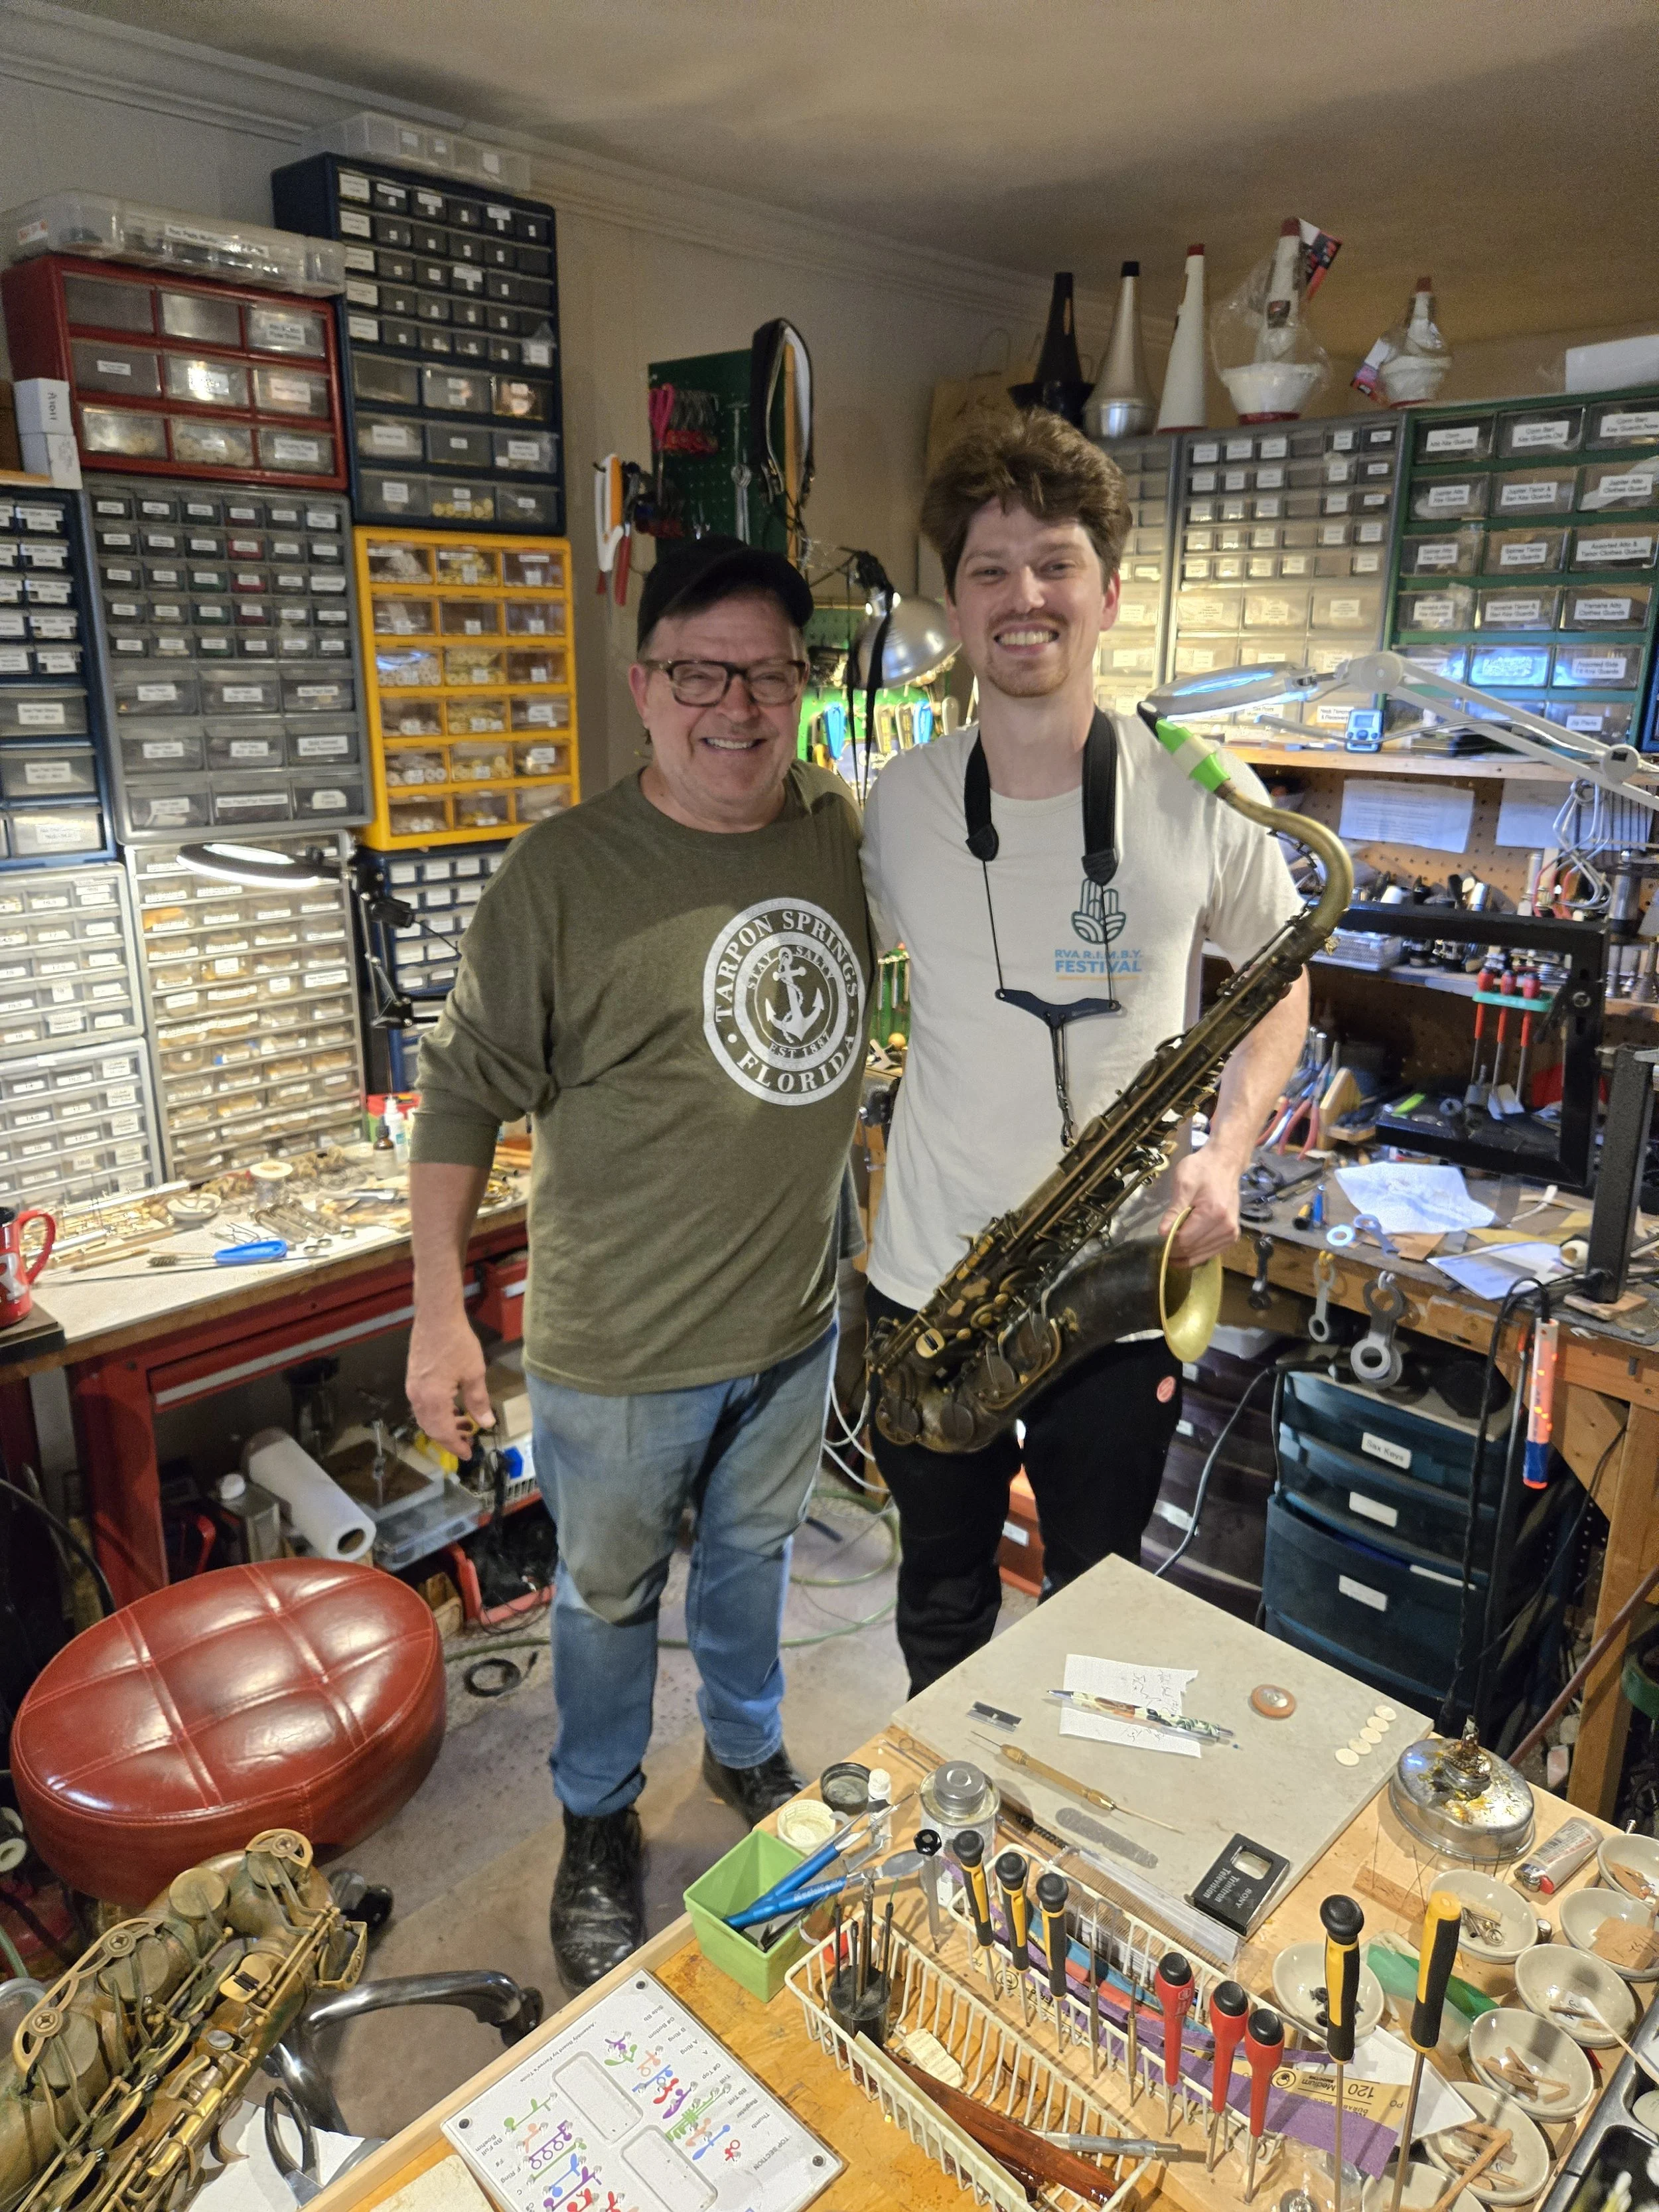
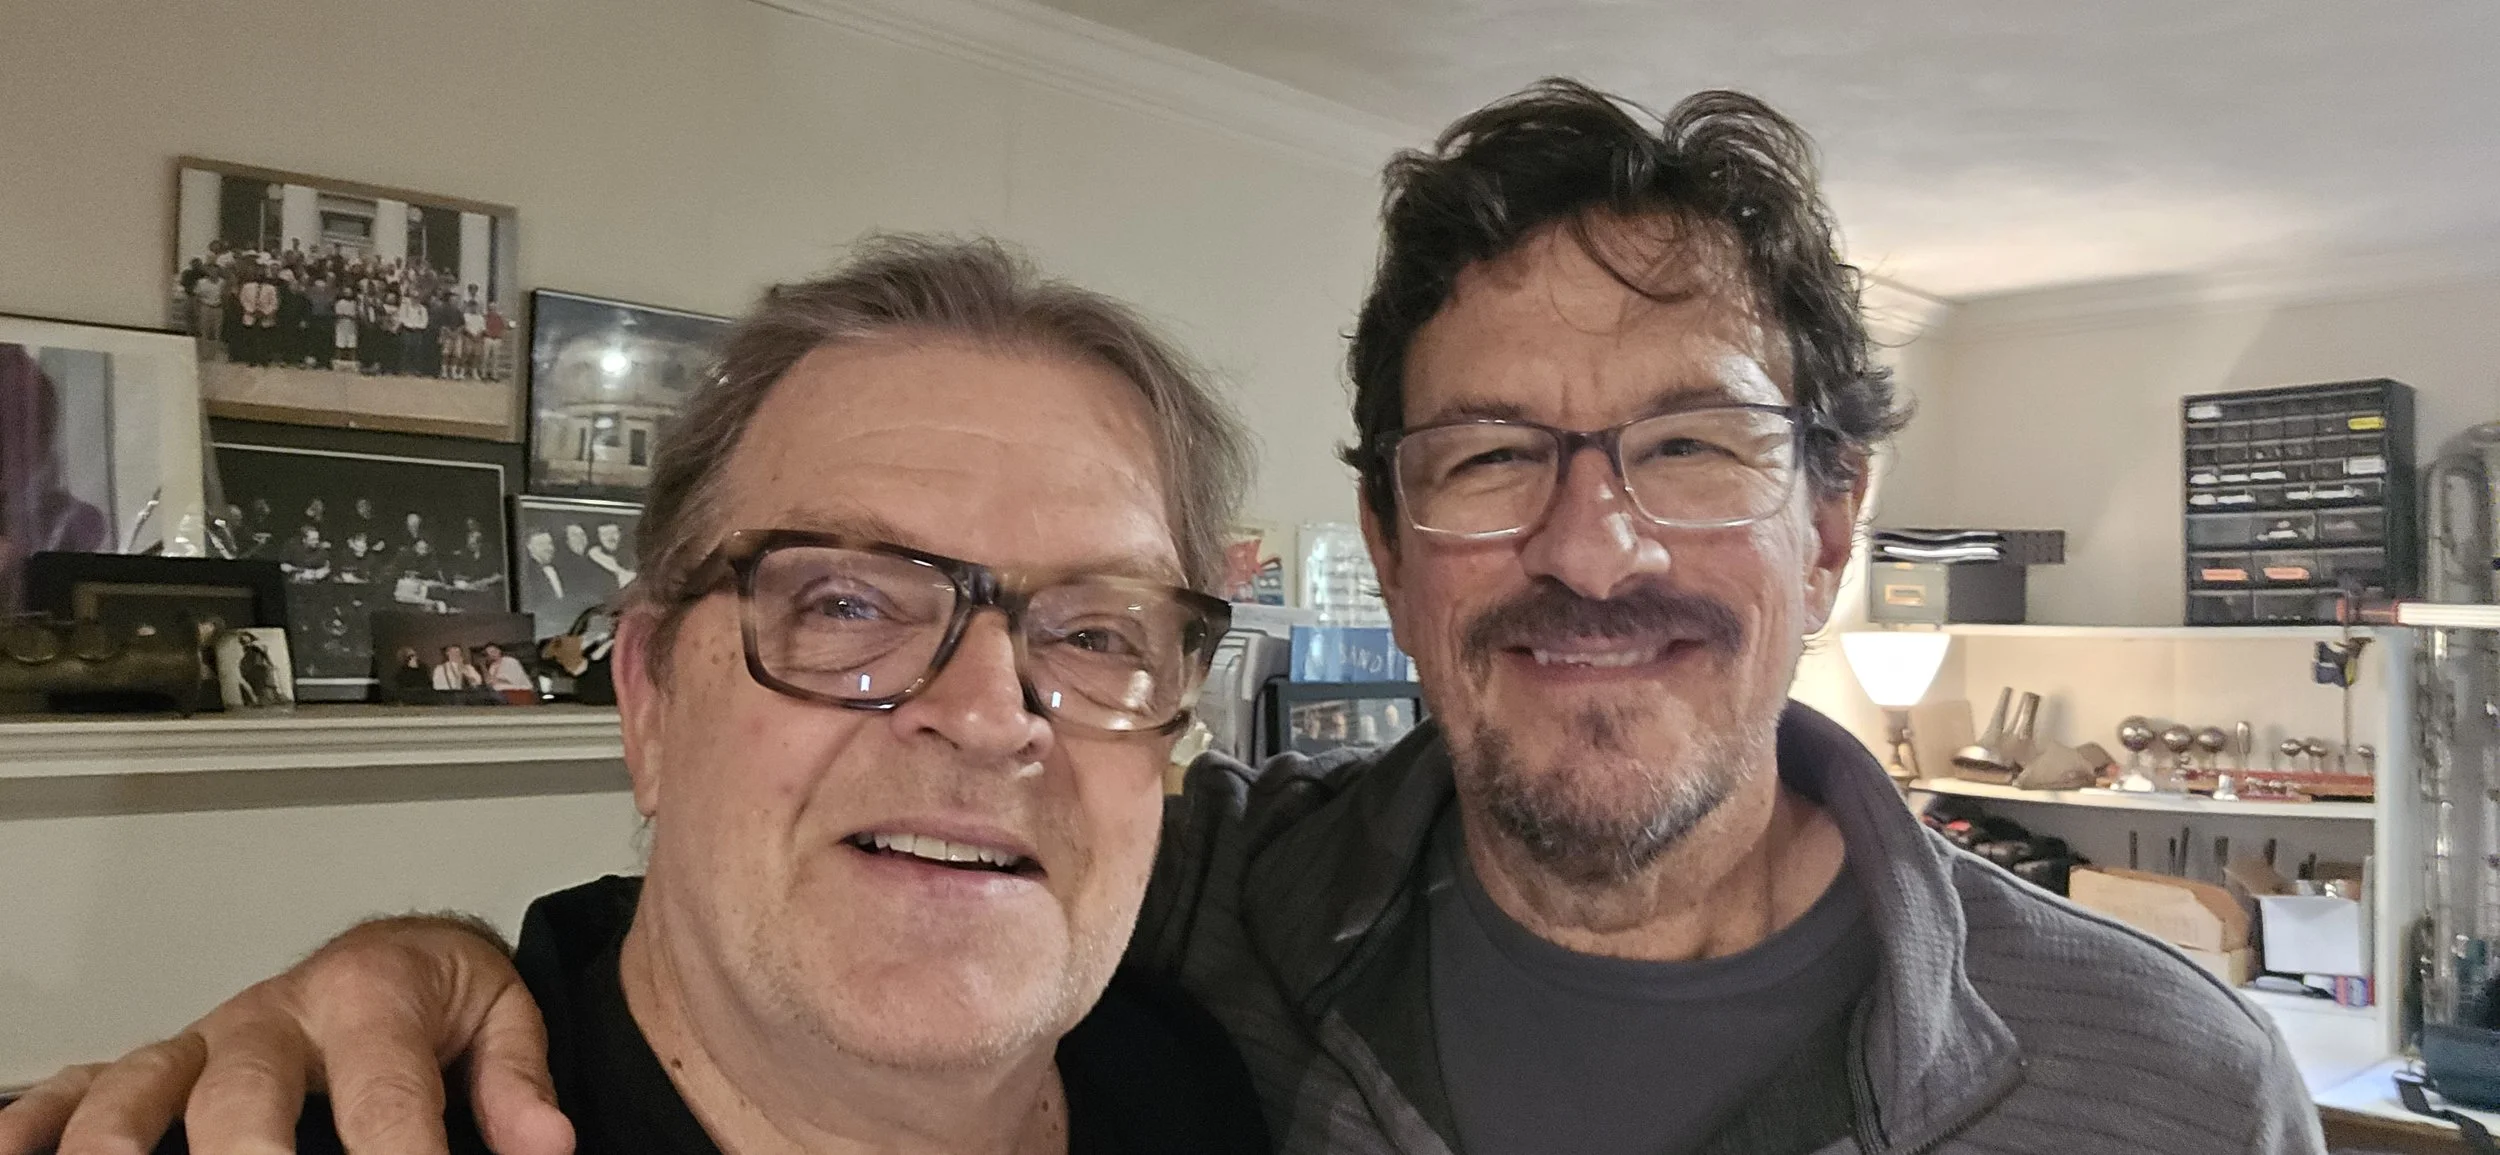
Here is a saxophone player that lives in Richmond. This is Walt Weiskopf who is a not only a sax player but a multi-intrumentalist, teacher, band leader, composer & author. He certainly tours and records with his own group all over the world plus he is the sax player for Steely Dan!
This is Max Hoecker. He is a DJ, guitar player, sax player and singer. I help keep his alto and tenor saxes functioning. Also, periodically I sit-in with a band that he performs with called Cherry Red. They are a Rolling Stones tribute band. Max is a very musical dude on every instrument that he plays.
This is Mark Maynard. A great trombonist, singer and all-around great guy. Over the years we have performed together numerous times.
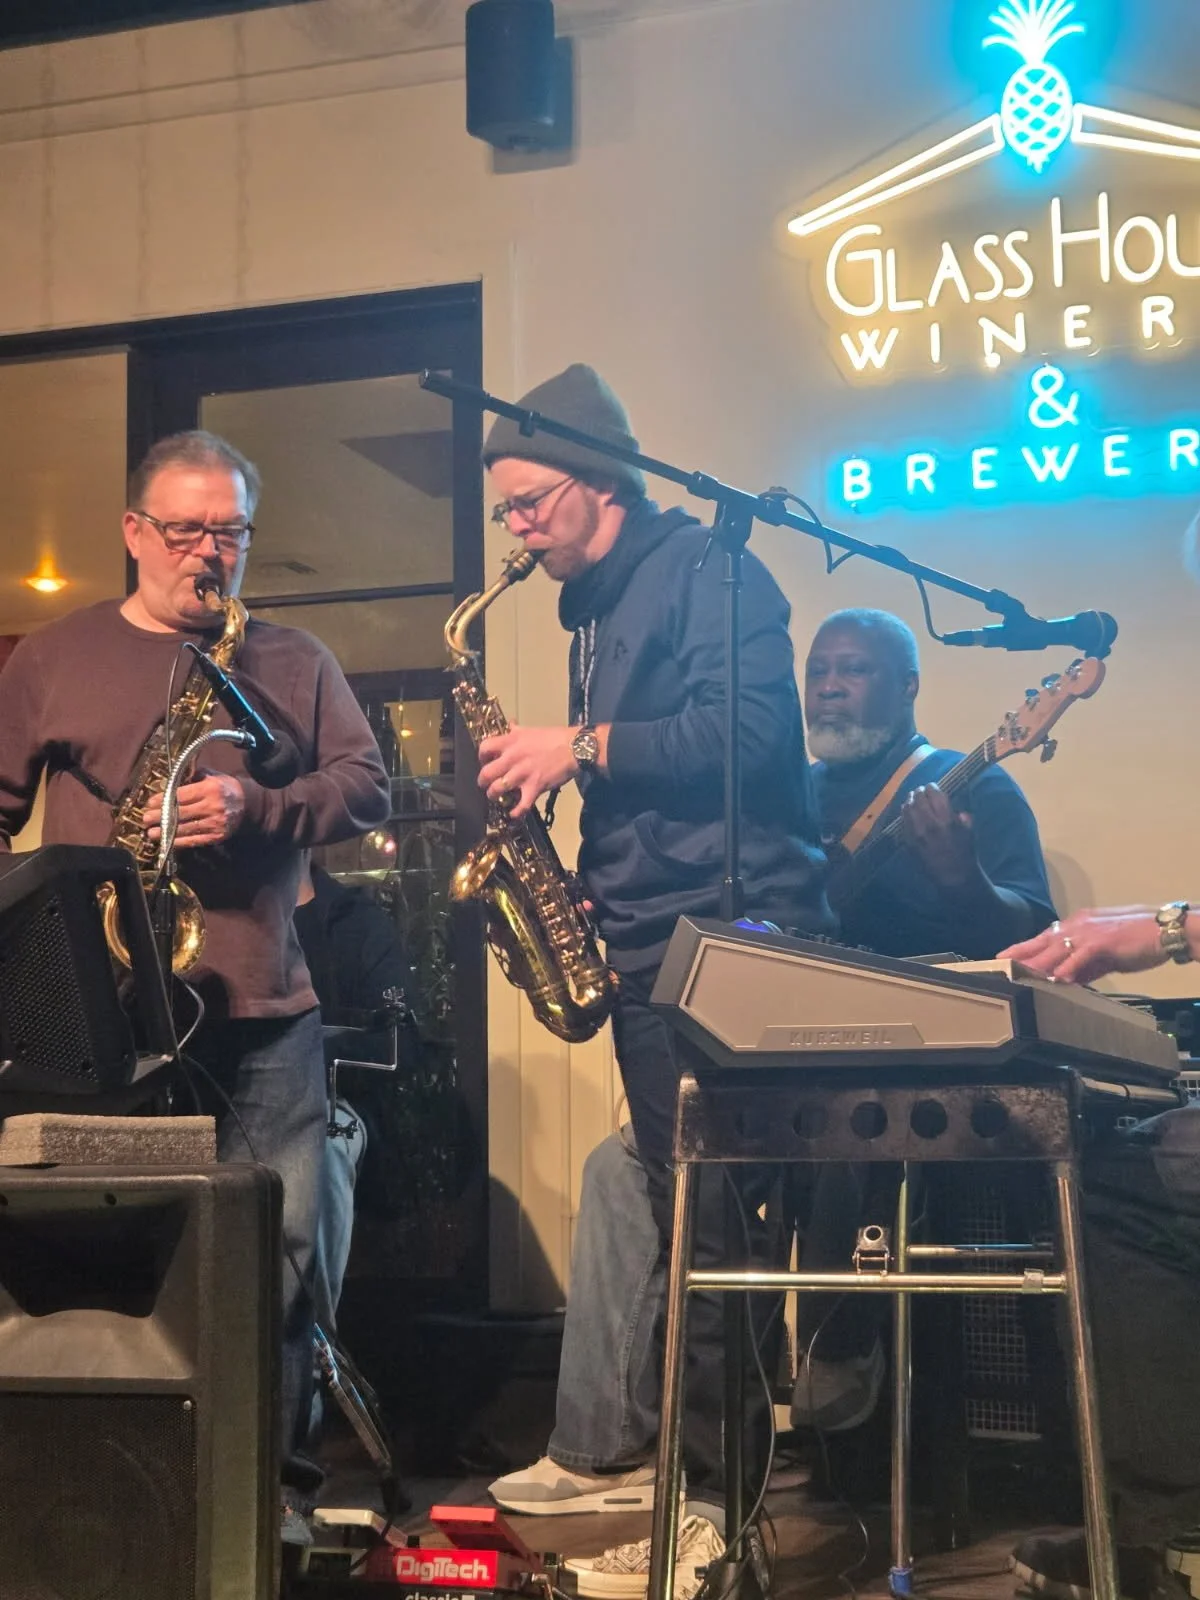
This saxophonist is Jack Sheehan. He’s a grad from Berkeley School of Music in Boston, Mass. He moved here several years ago and has been performing all over the area. In this photo Jack is on stage with The Chickenhead Blues band, the band he regularly performs with, at Glass House Winery. Of course, I couldn’t help but “horn-in” for a few tunes.
This is Kit French from the band Parachute. He plays sax, keyboards and sings. I see him once in a blue moon when the band is playing in town.
Where we have Clara Mincer who used to be the 1st chair French horn player for The C’ville Band, formerly known as The Charlottesville Municipal Band. Clara performs in the area and teaches privately.
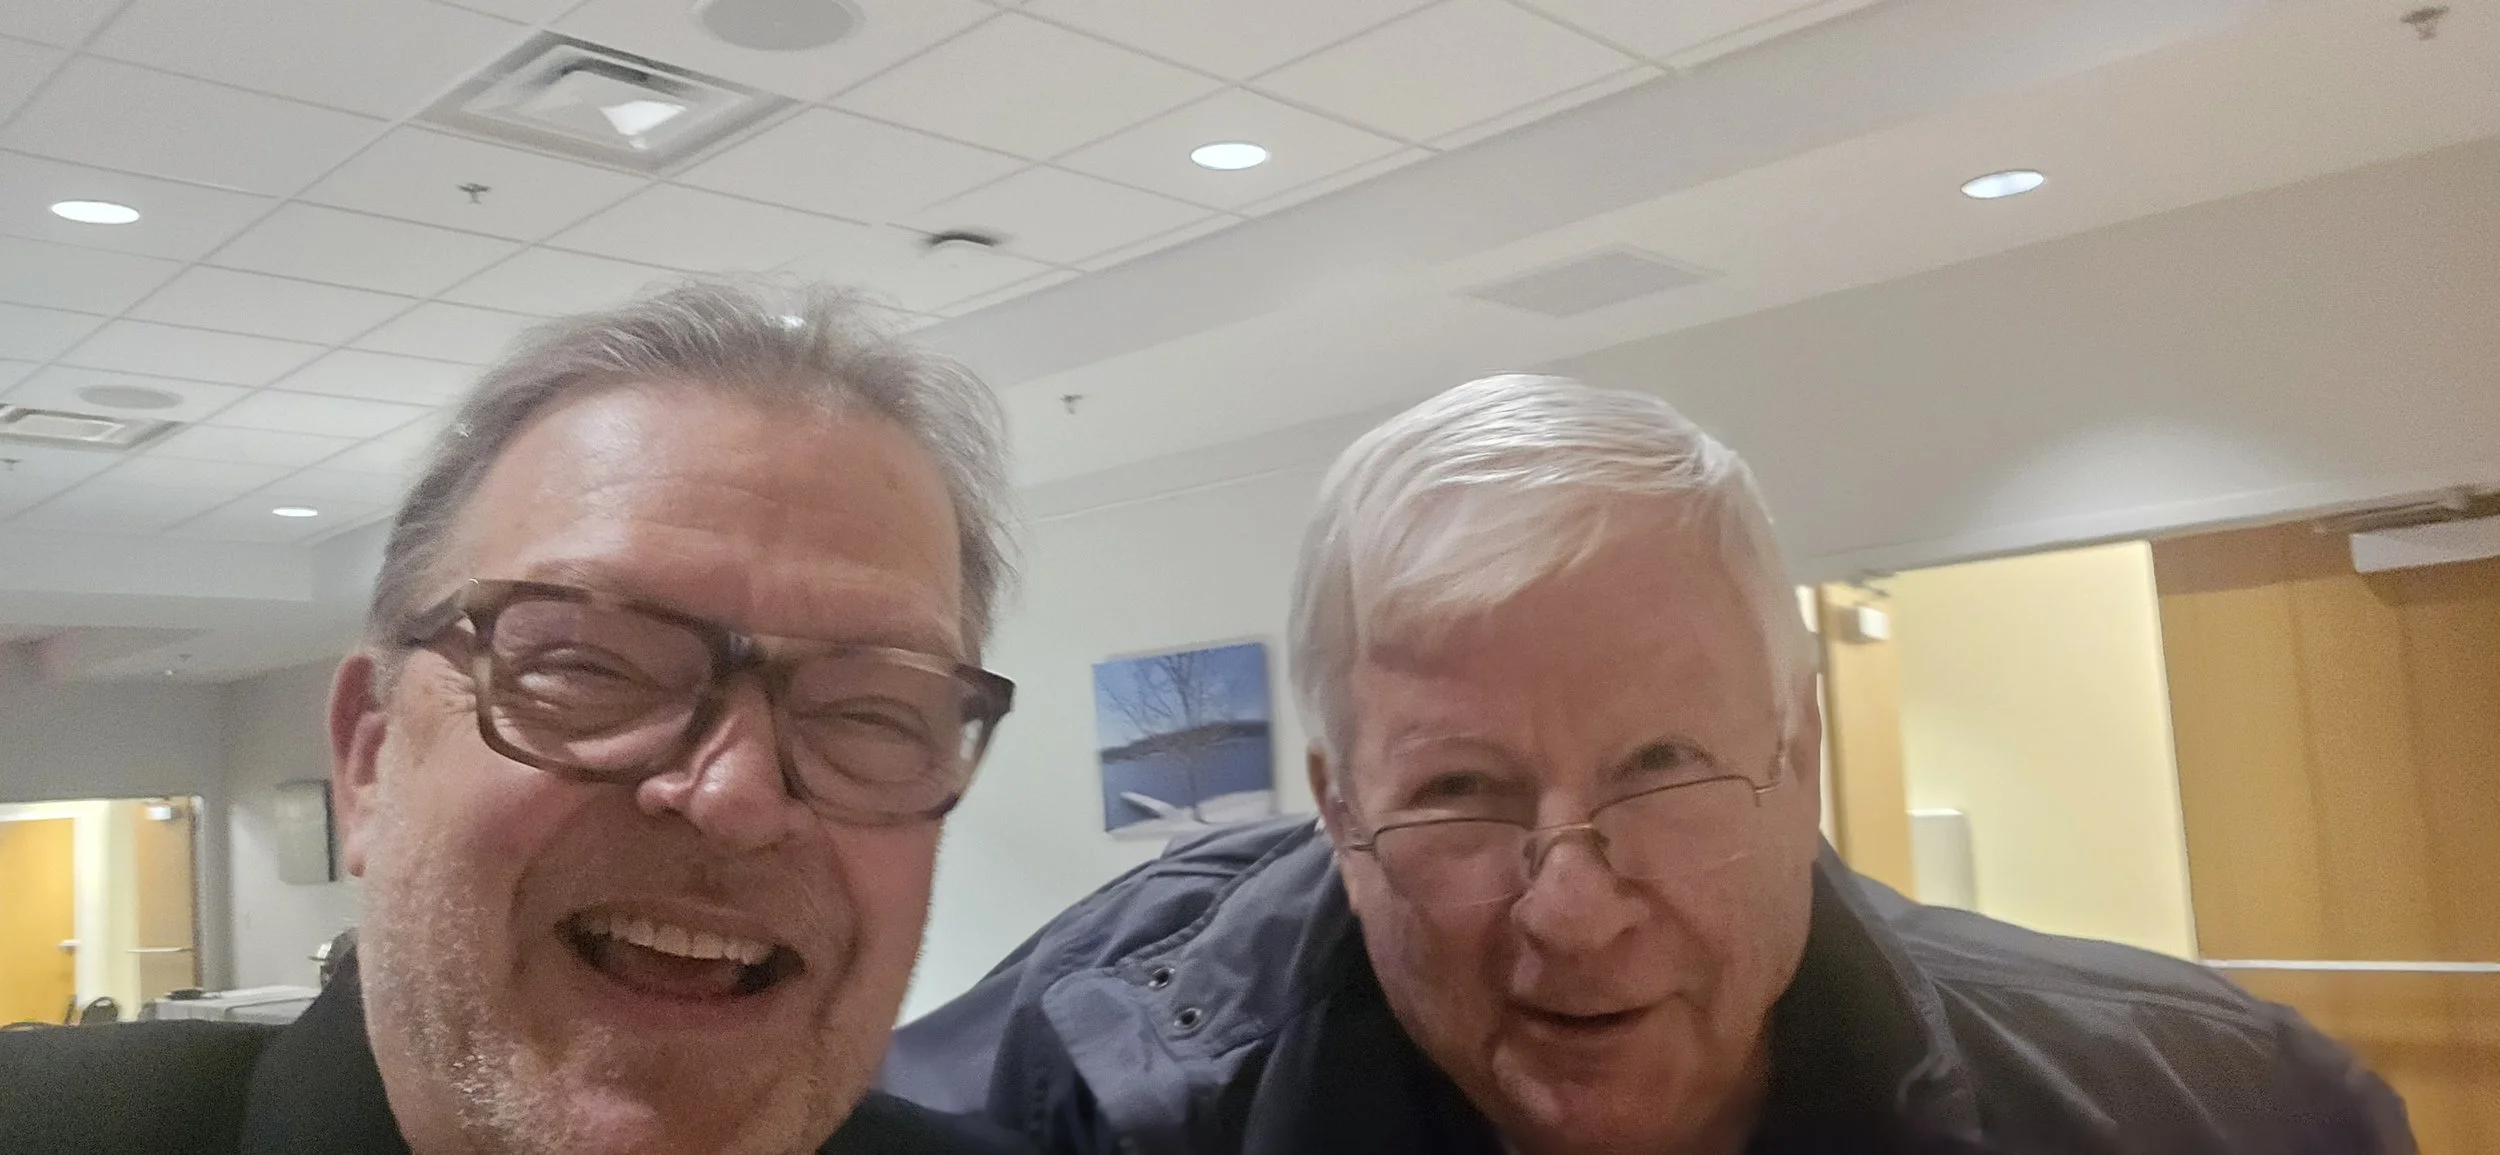
This is John Jensen who is the retired lead trombonist from the U.S. Navy Commodores. I think that falls under “bad to the bone” category. See what I did there? Here John and I are marching and playing in a protest parade, Jazz Parade for Democracy, on the downtown mall in C’ville.
And this is Greg Thomas, former band director of Albemarle High School Band for about 30 or 40 years, maybe longer. I do work on his instruments periodically. We are also marching and playing in the Jazz Parade for Democracy, on the downtown mall in C’ville. Greg and I played side by side for 10 years in Big Ray & the Kool Kats. He is an outstanding educator plus he plays trumpet, Superbone and is a world class tuba player. Side note: I sold him the tuba.
I have known James Toliver for about 40 years, and he brings his trumpet(s) in here periodically for cleaning and minor repairs. You can catch him every Monday night at The Whiskey Jar performing with Baby Jo’s Boogie Band. In this photo we are playing at a private party.
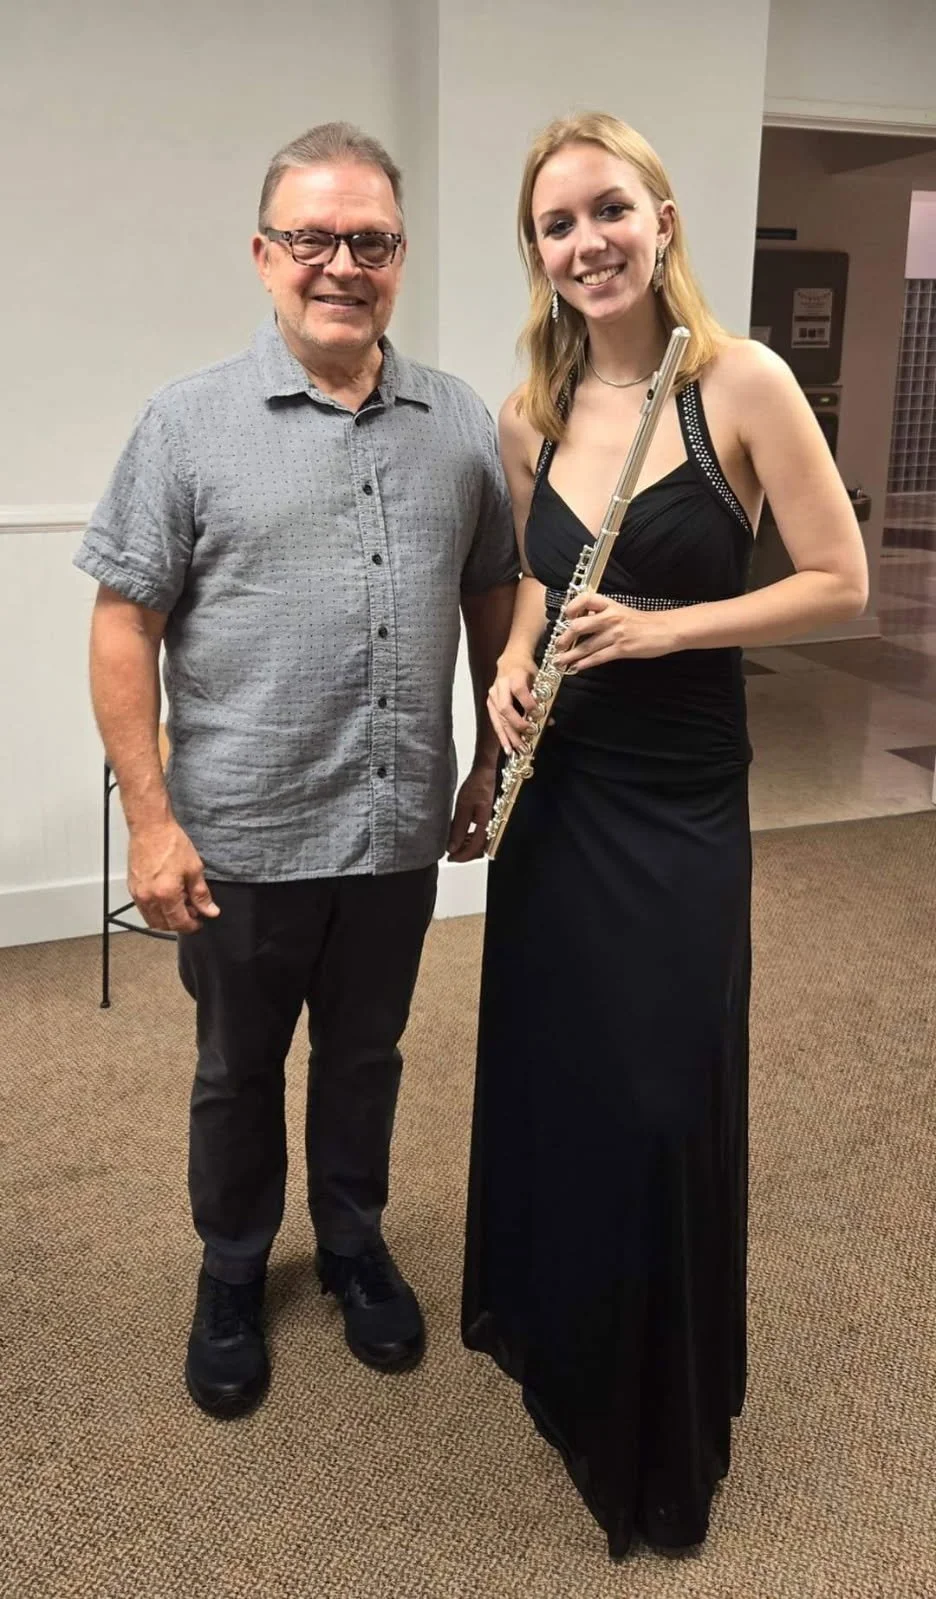
This is Micayla Rawling who has been coming to my shop to get her piccolo & flute repaired since she was in middle school. She has graduated from Interlochen Arts Academy and is now attending The Royal Danish Academy of Music in Copenhagen. This is a photo from a recital that she did in Charlottesville a few years ago.
This is Bobby Gregg, and he has been the band director at Lakeside Middle School, formerly Sutherland Middle School, for 18 years. We also play together in an 18-piece Big Band called Sentimental Journey. Bobby plays saxophone, flute and clarinet so I see his instruments in the shop from time to time.
Here we have Scott Colley who is a retired college professor, bass trombone player and leader of the Sentimental Journey Big Band that I previously mentioned. Scott recently brought in a carbon-fiber bass trombone for me to repair. That’s something that you don’t see every day.
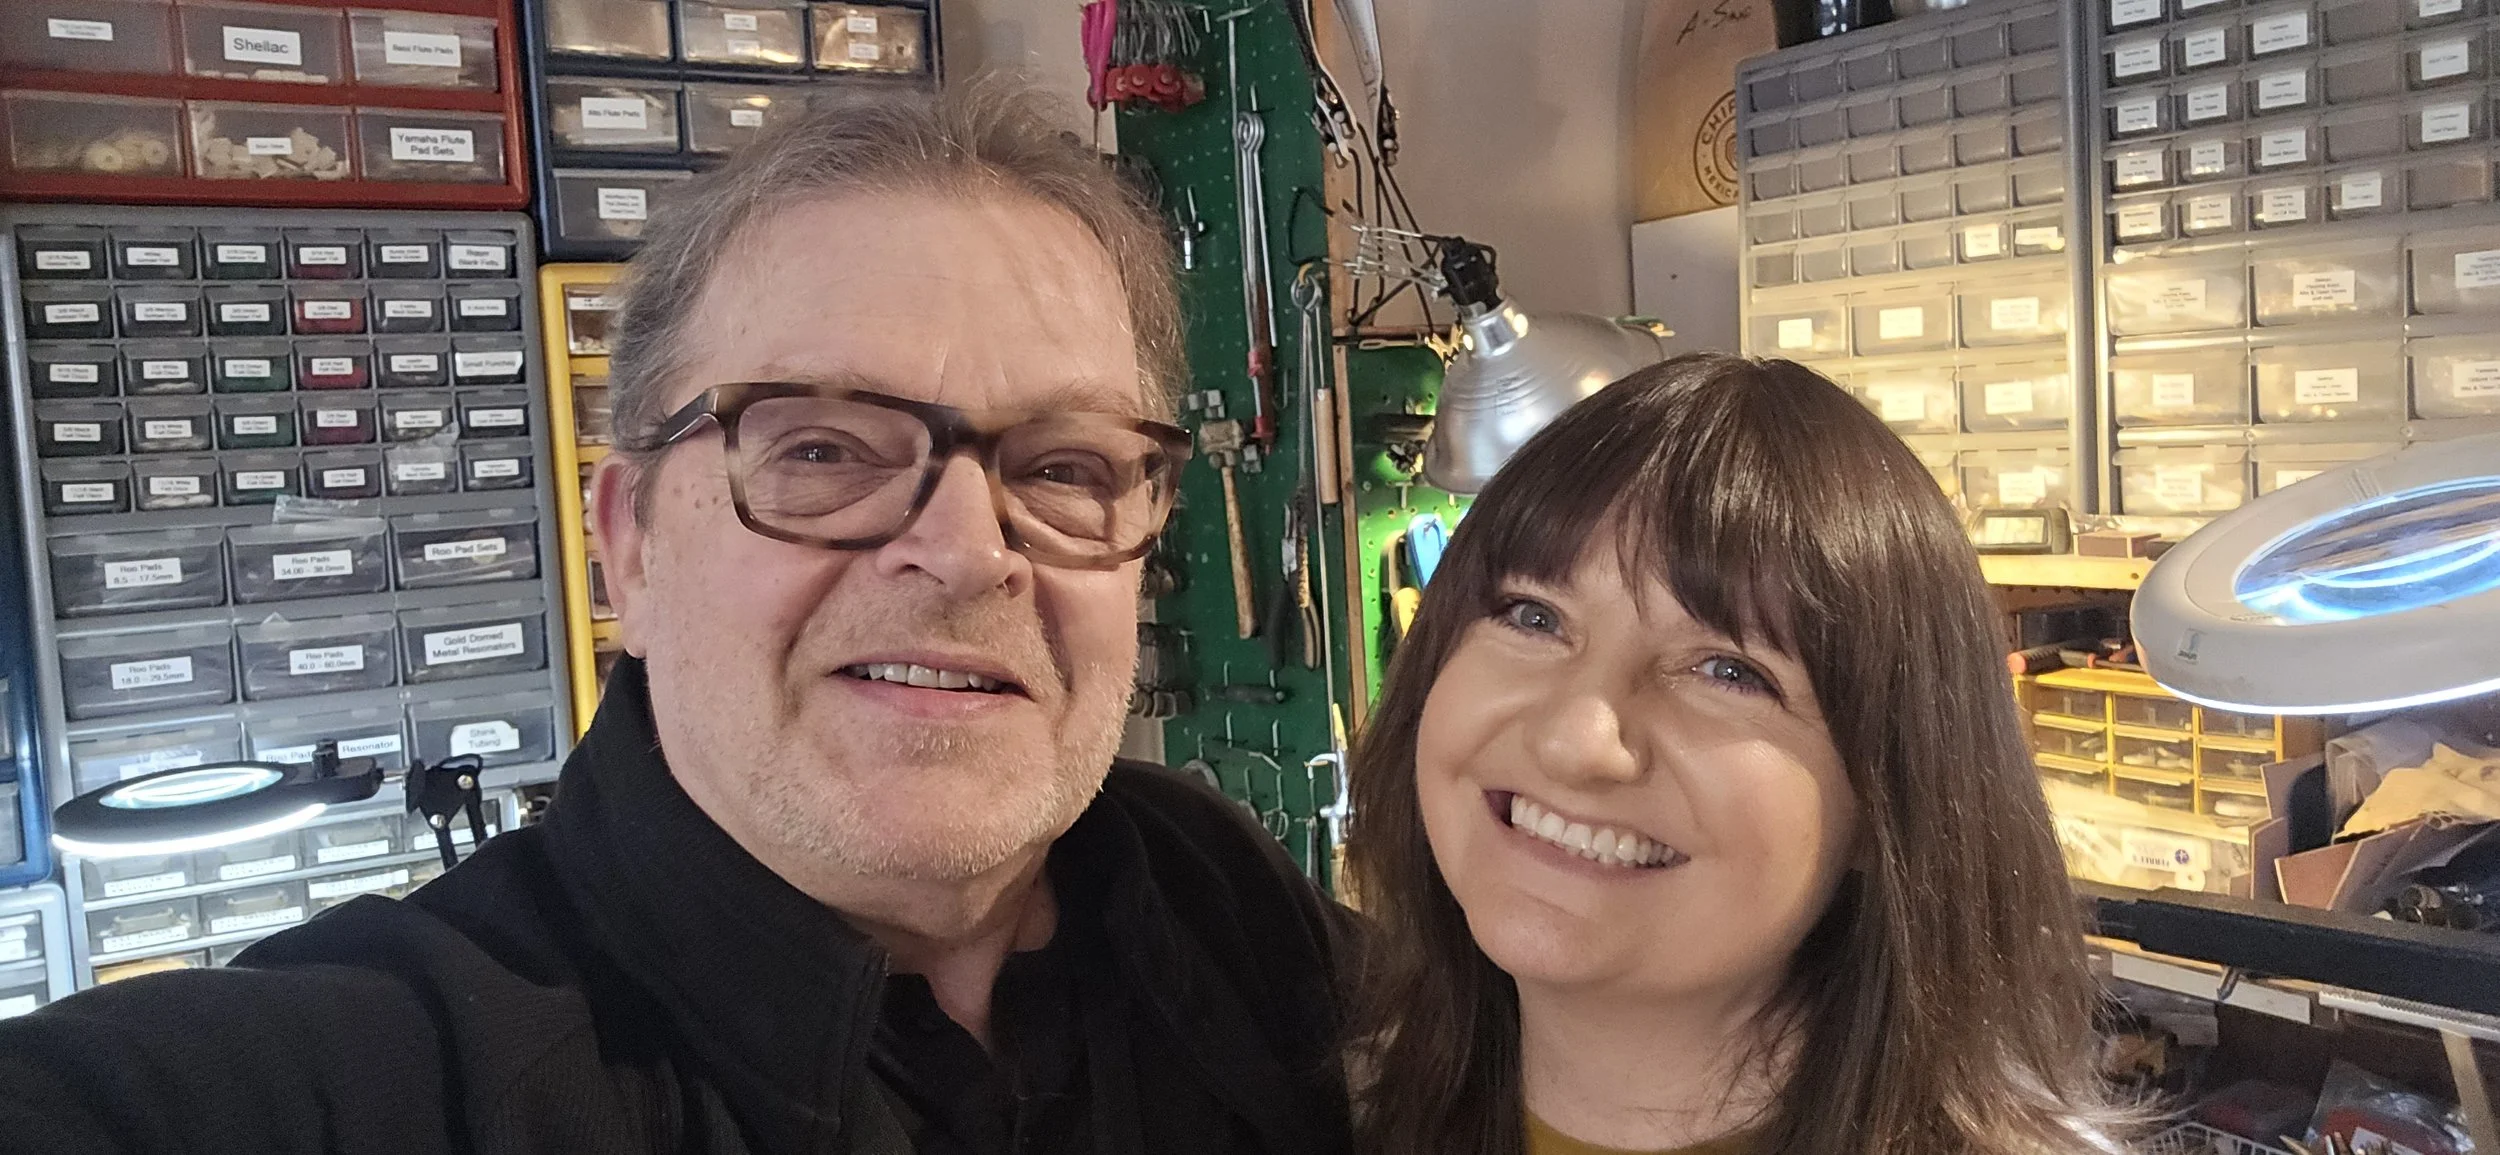
This is Cari Shipp, a great flutist in this area and a great teacher. I do repair on her flute, and she sends me many of her students. I certainly repair their flutes and occasionally sell them better flutes as they improve their playing skills. It is always good to stay in touch with local teachers.


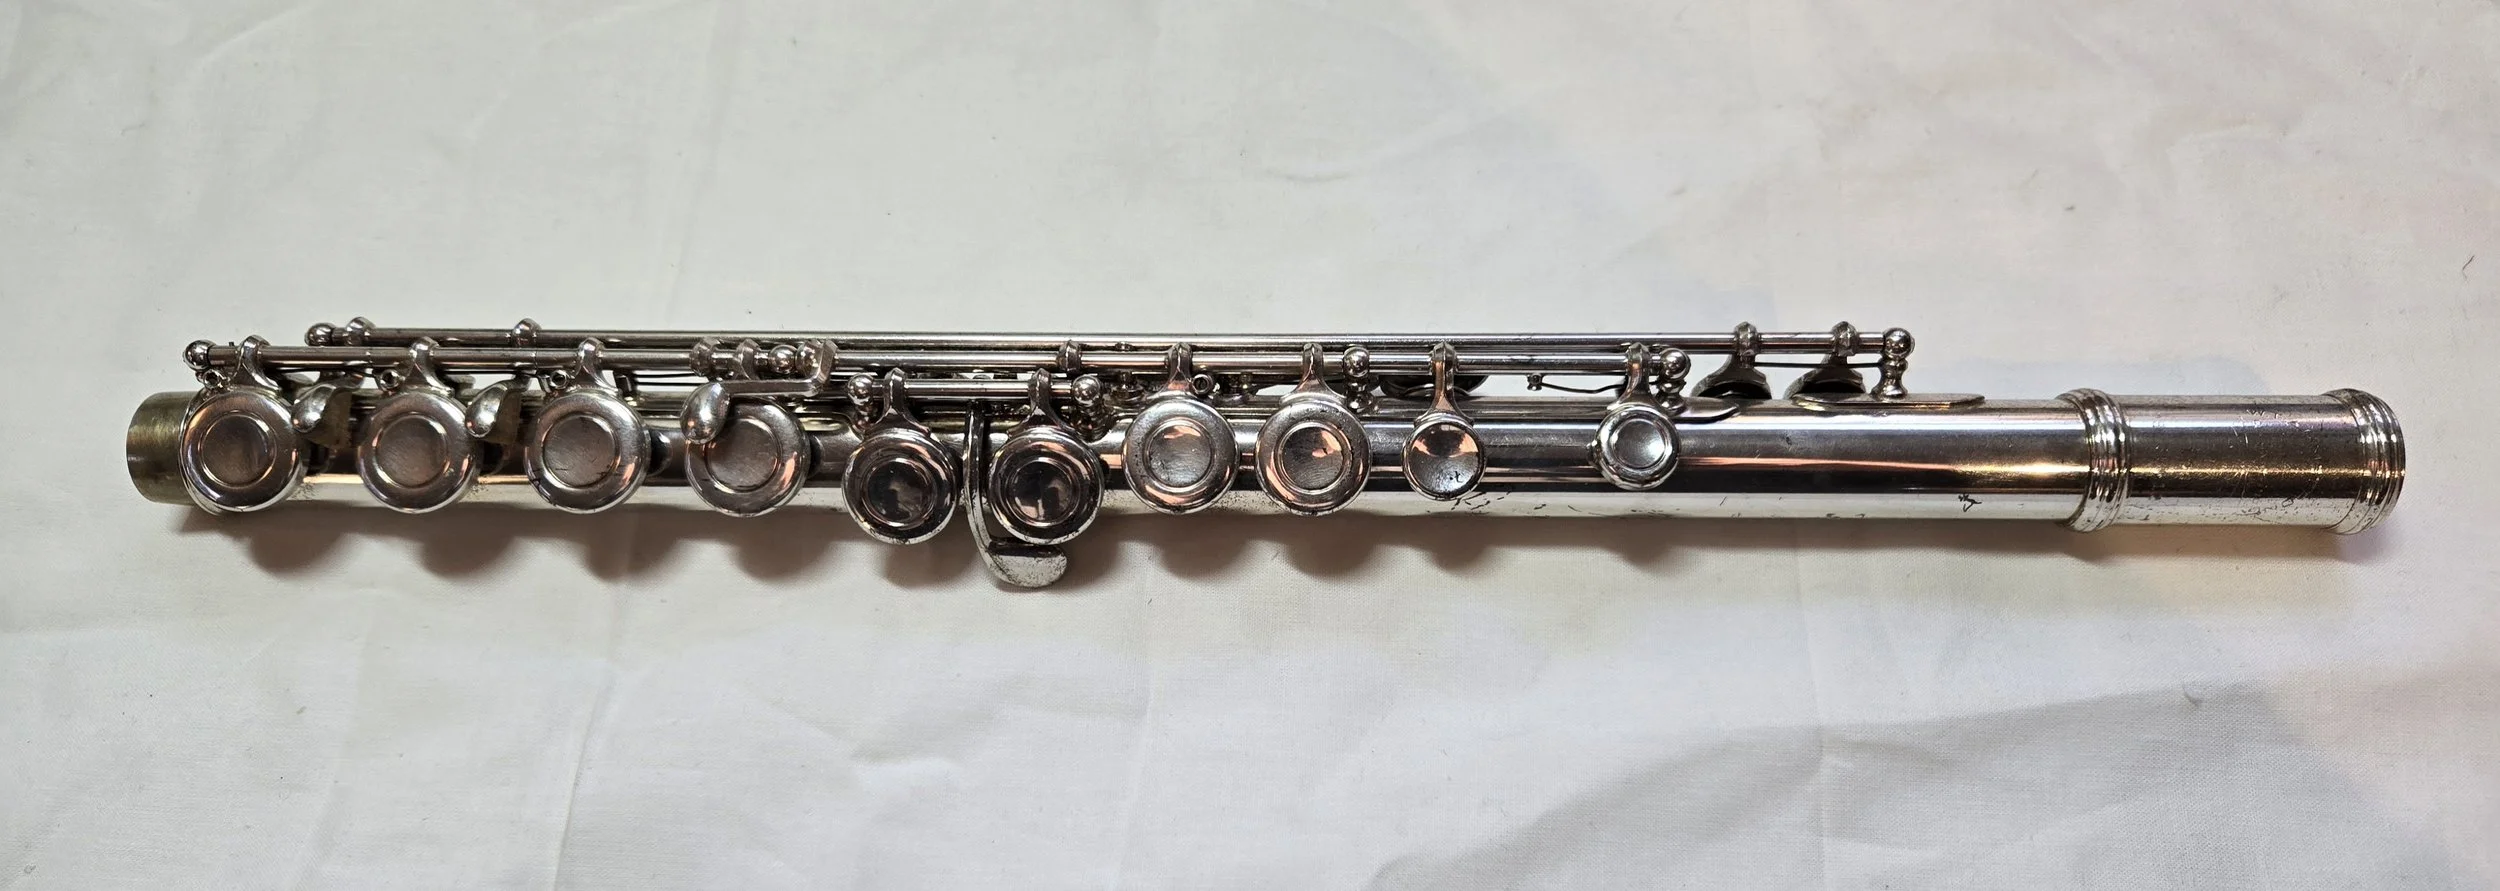
Flute Lamp for a Christmas Present
I make lamps out of old wind instruments from time to time. My daughter Megan asked for a flute lamp for Christmas so, I thought I’d show you a bit of the transformation from an old tired, unrepairable instrument into a flute lamp. Normally a flute has 3 parts, the head joint, the main body and the foot joint. In this case, I’m just using the main body to make a lamp because it makes a lamp of a nice height. This is an old Armstrong flute that is silver plated. First, I sprayed it with a primer to prepare the instrument for the paint. Sorry, I didn’t take a photo of that but the whole flute just is a flat gray. Not very exciting so you’re not missing anything.
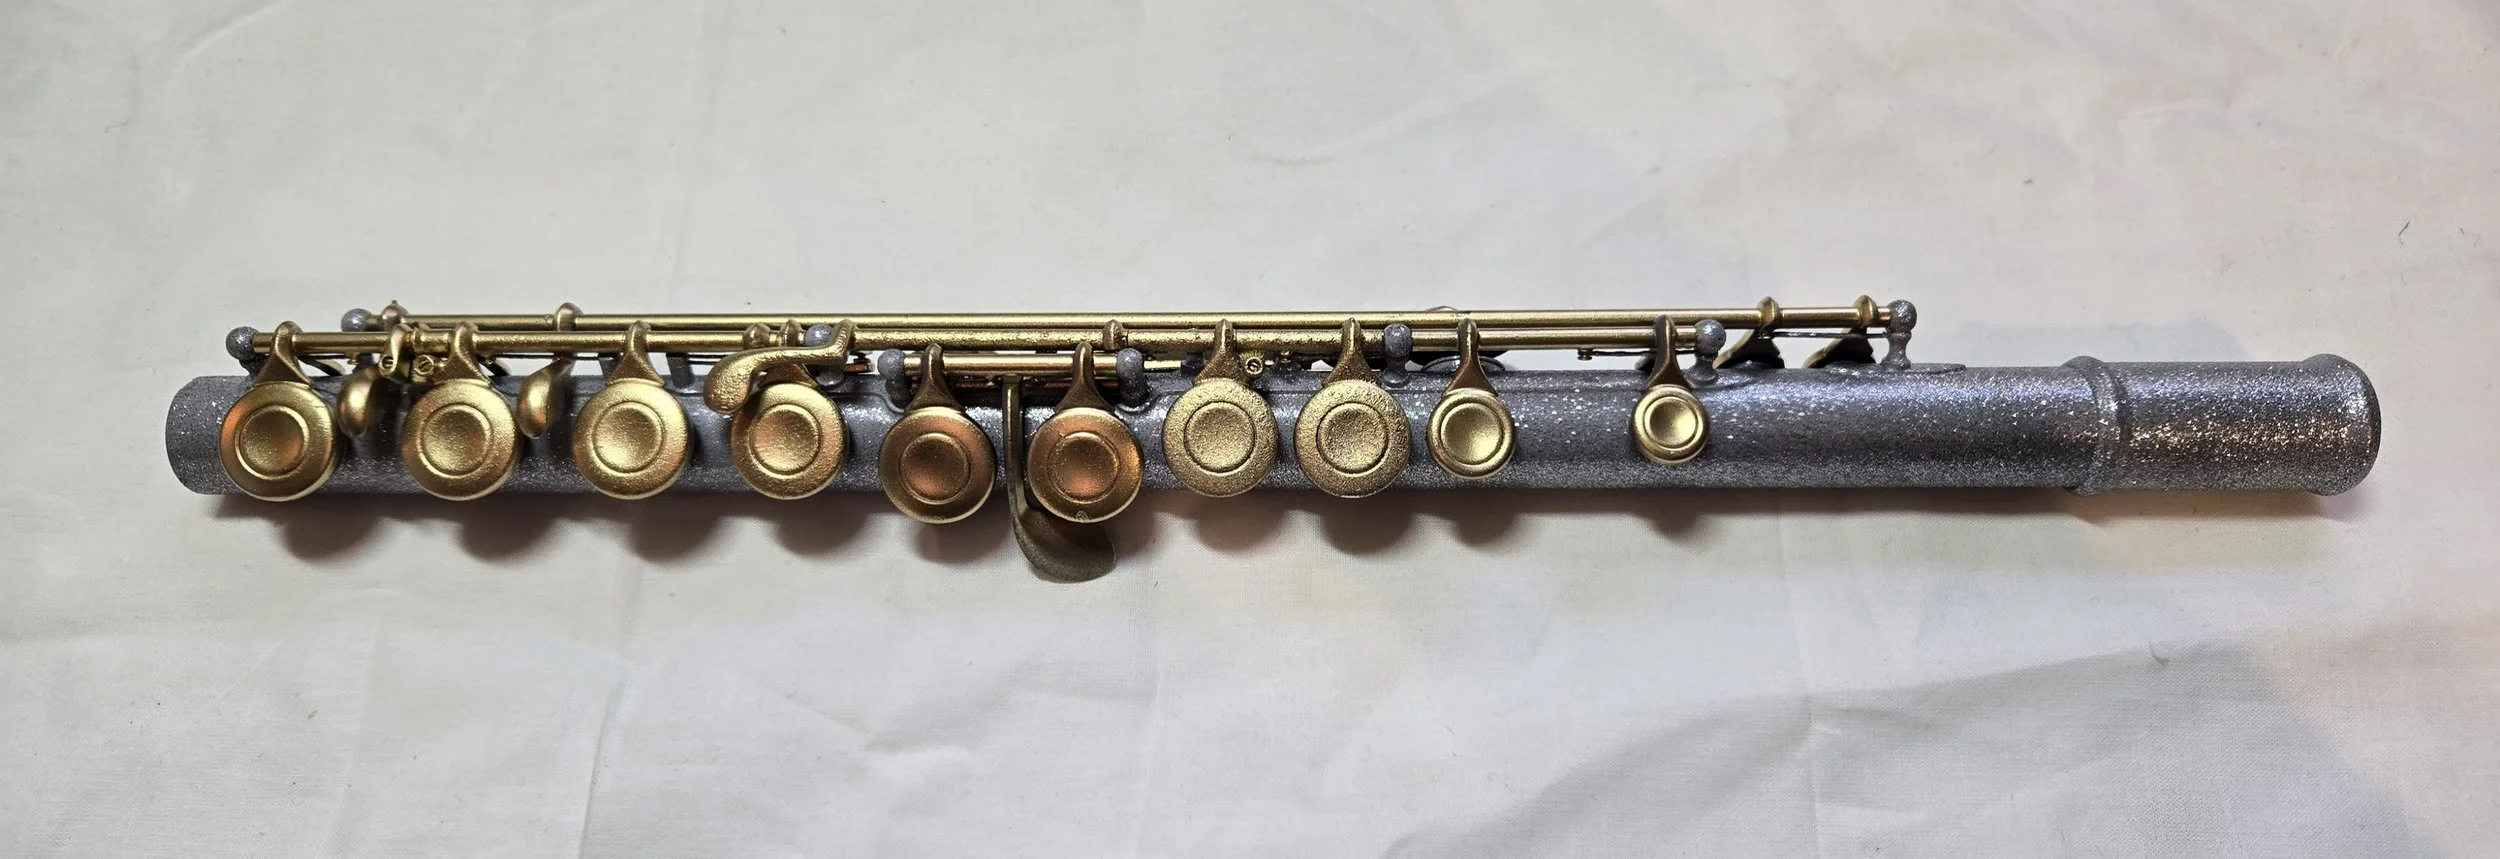
Of course, I have to decide what colors I want to use so, I decided to use sparkly silver and gold because of the Christmas season. Of course, I disassembled the instrument, then spray painted the body silver and the keys gold. After the paint was dry then I reassembled the flute. I was pleasantly surprised to see how it came out.
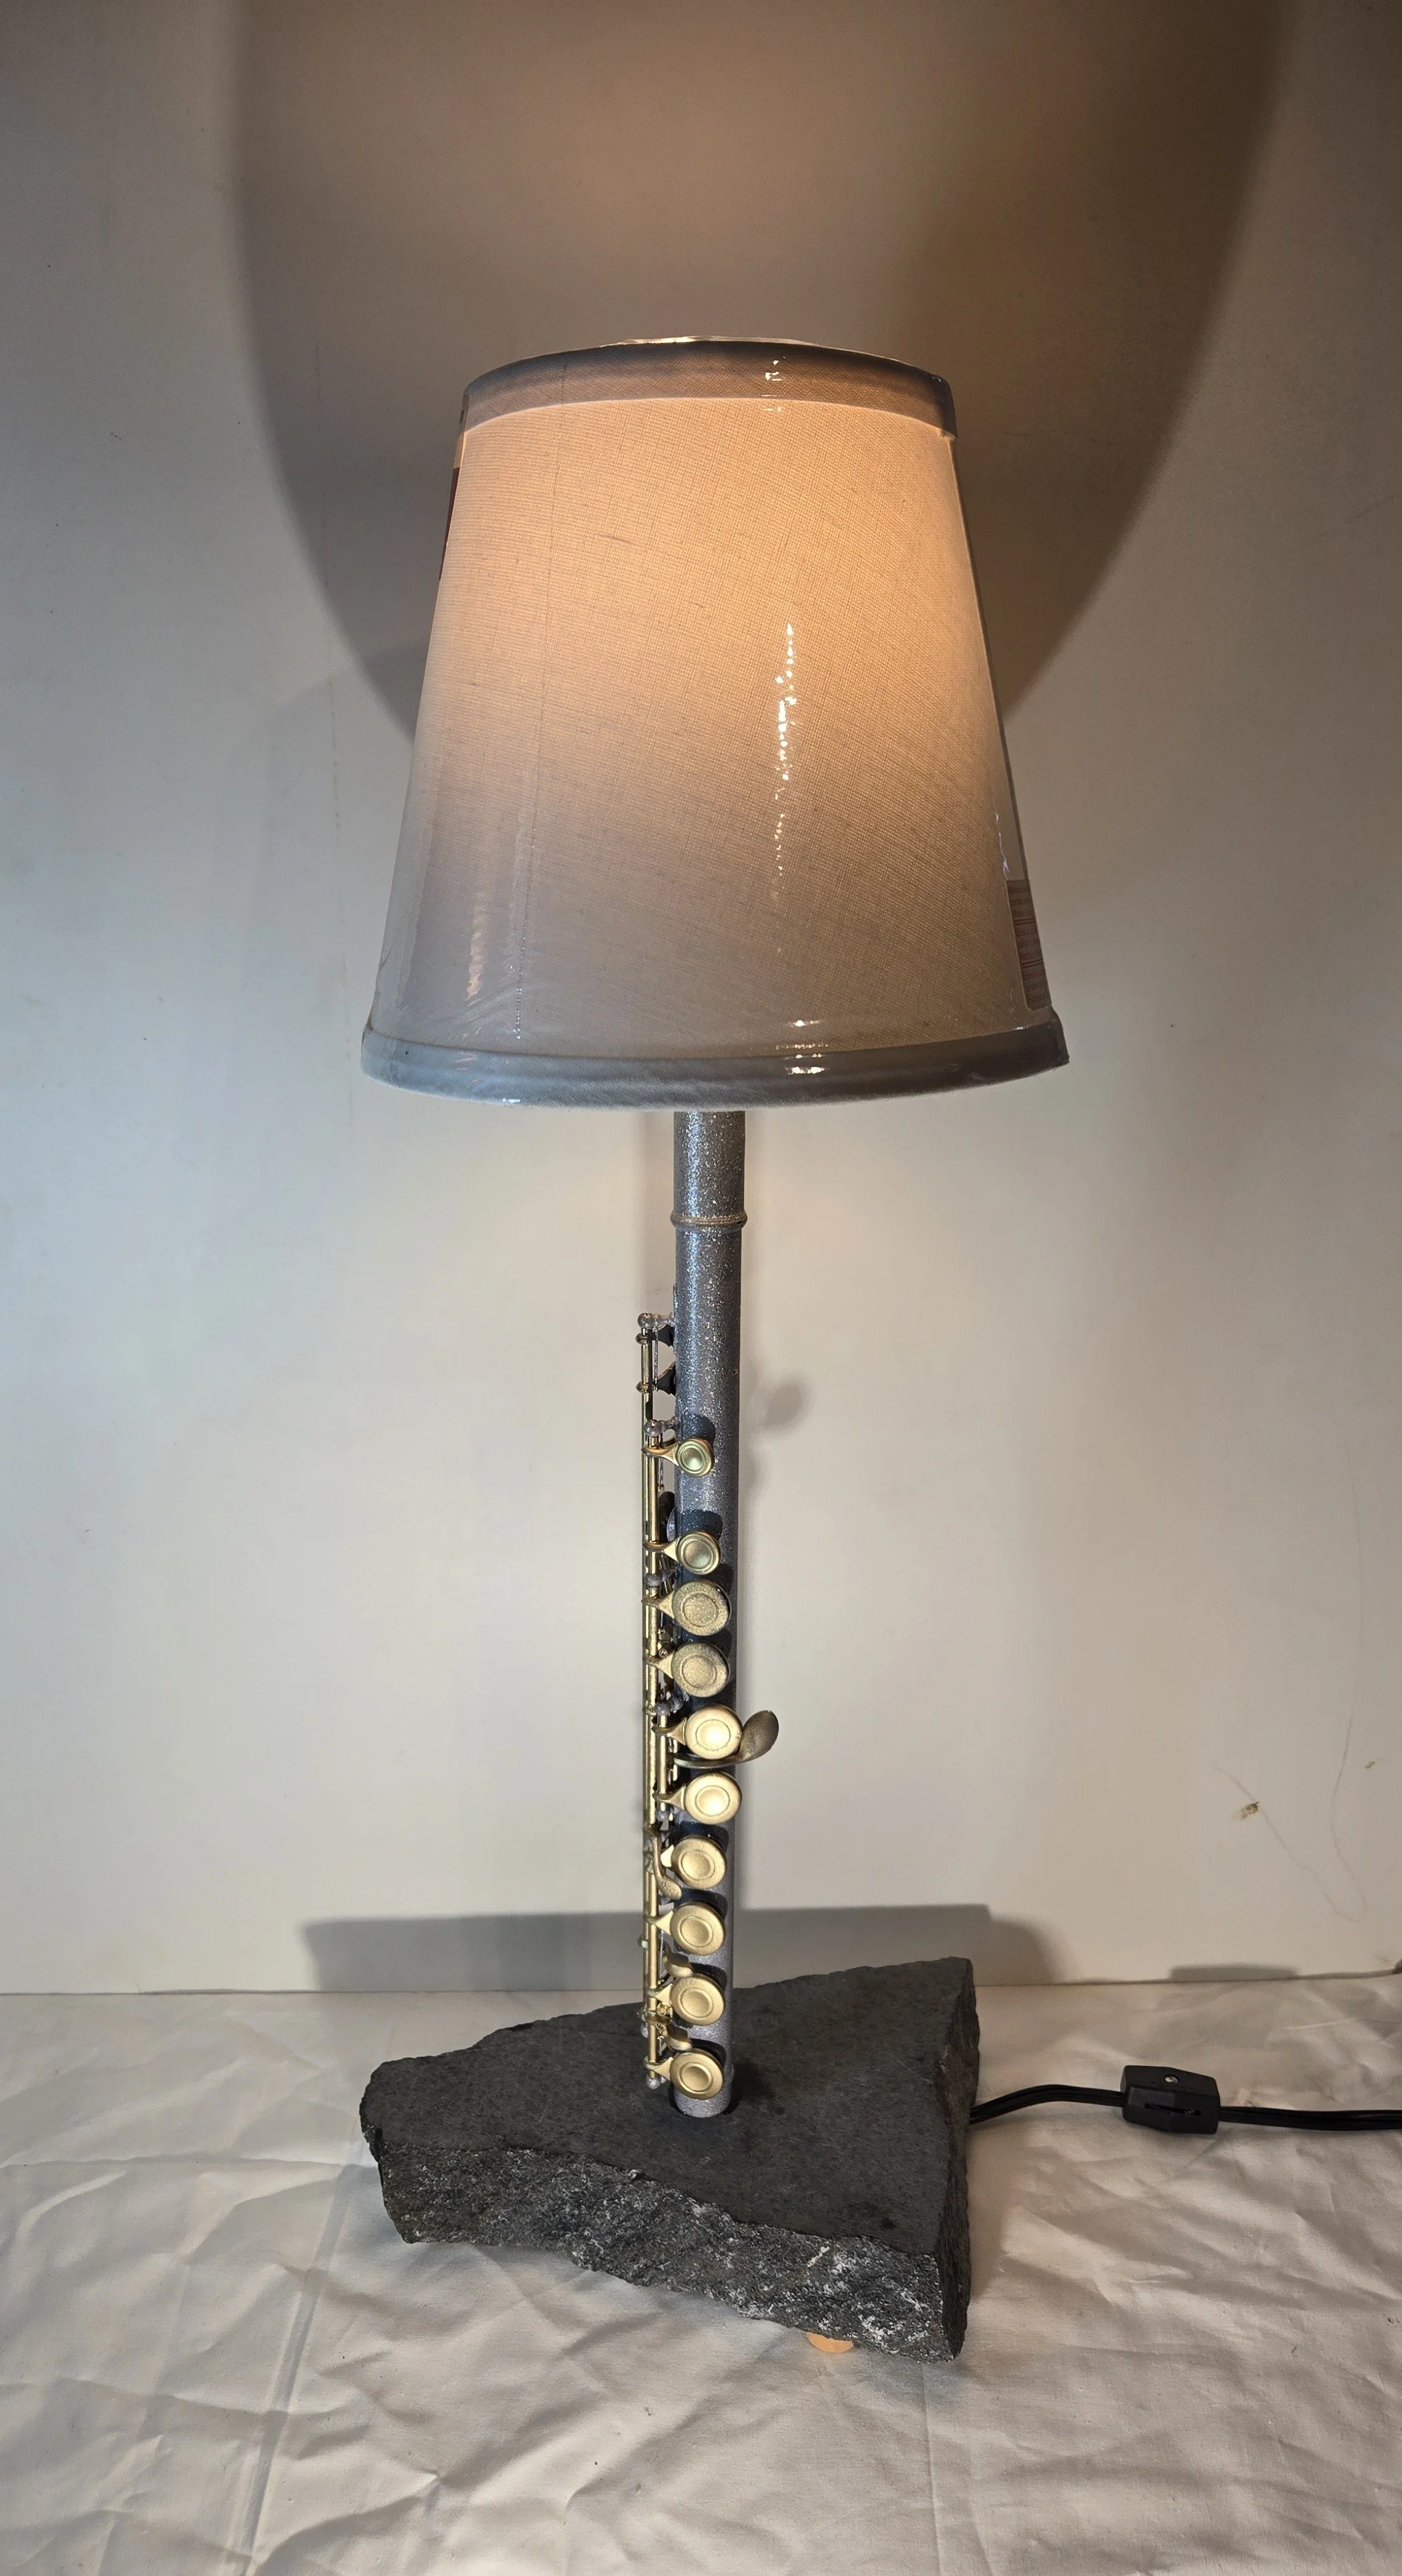
So, I mounted the flute onto a piece of soapstone. Plus, I had to drill a hole in the soapstone and secure a threaded brass tube to it to hold the flute securely. Next, I ran an electric cable, with a switch on it, through the brass tube and connected it to a light bulb socket at the top of the flute. The light socket is also screwed to the top end of the brass tube. I also glued 4 small wooden feet to the bottom of the soapstone, so the soapstone doesn’t scratch whatever furniture it’s sitting on. And finally, I put a small, white lamp shade on it which clips to the light bulb. This whole process took about 3 days of on and off work.
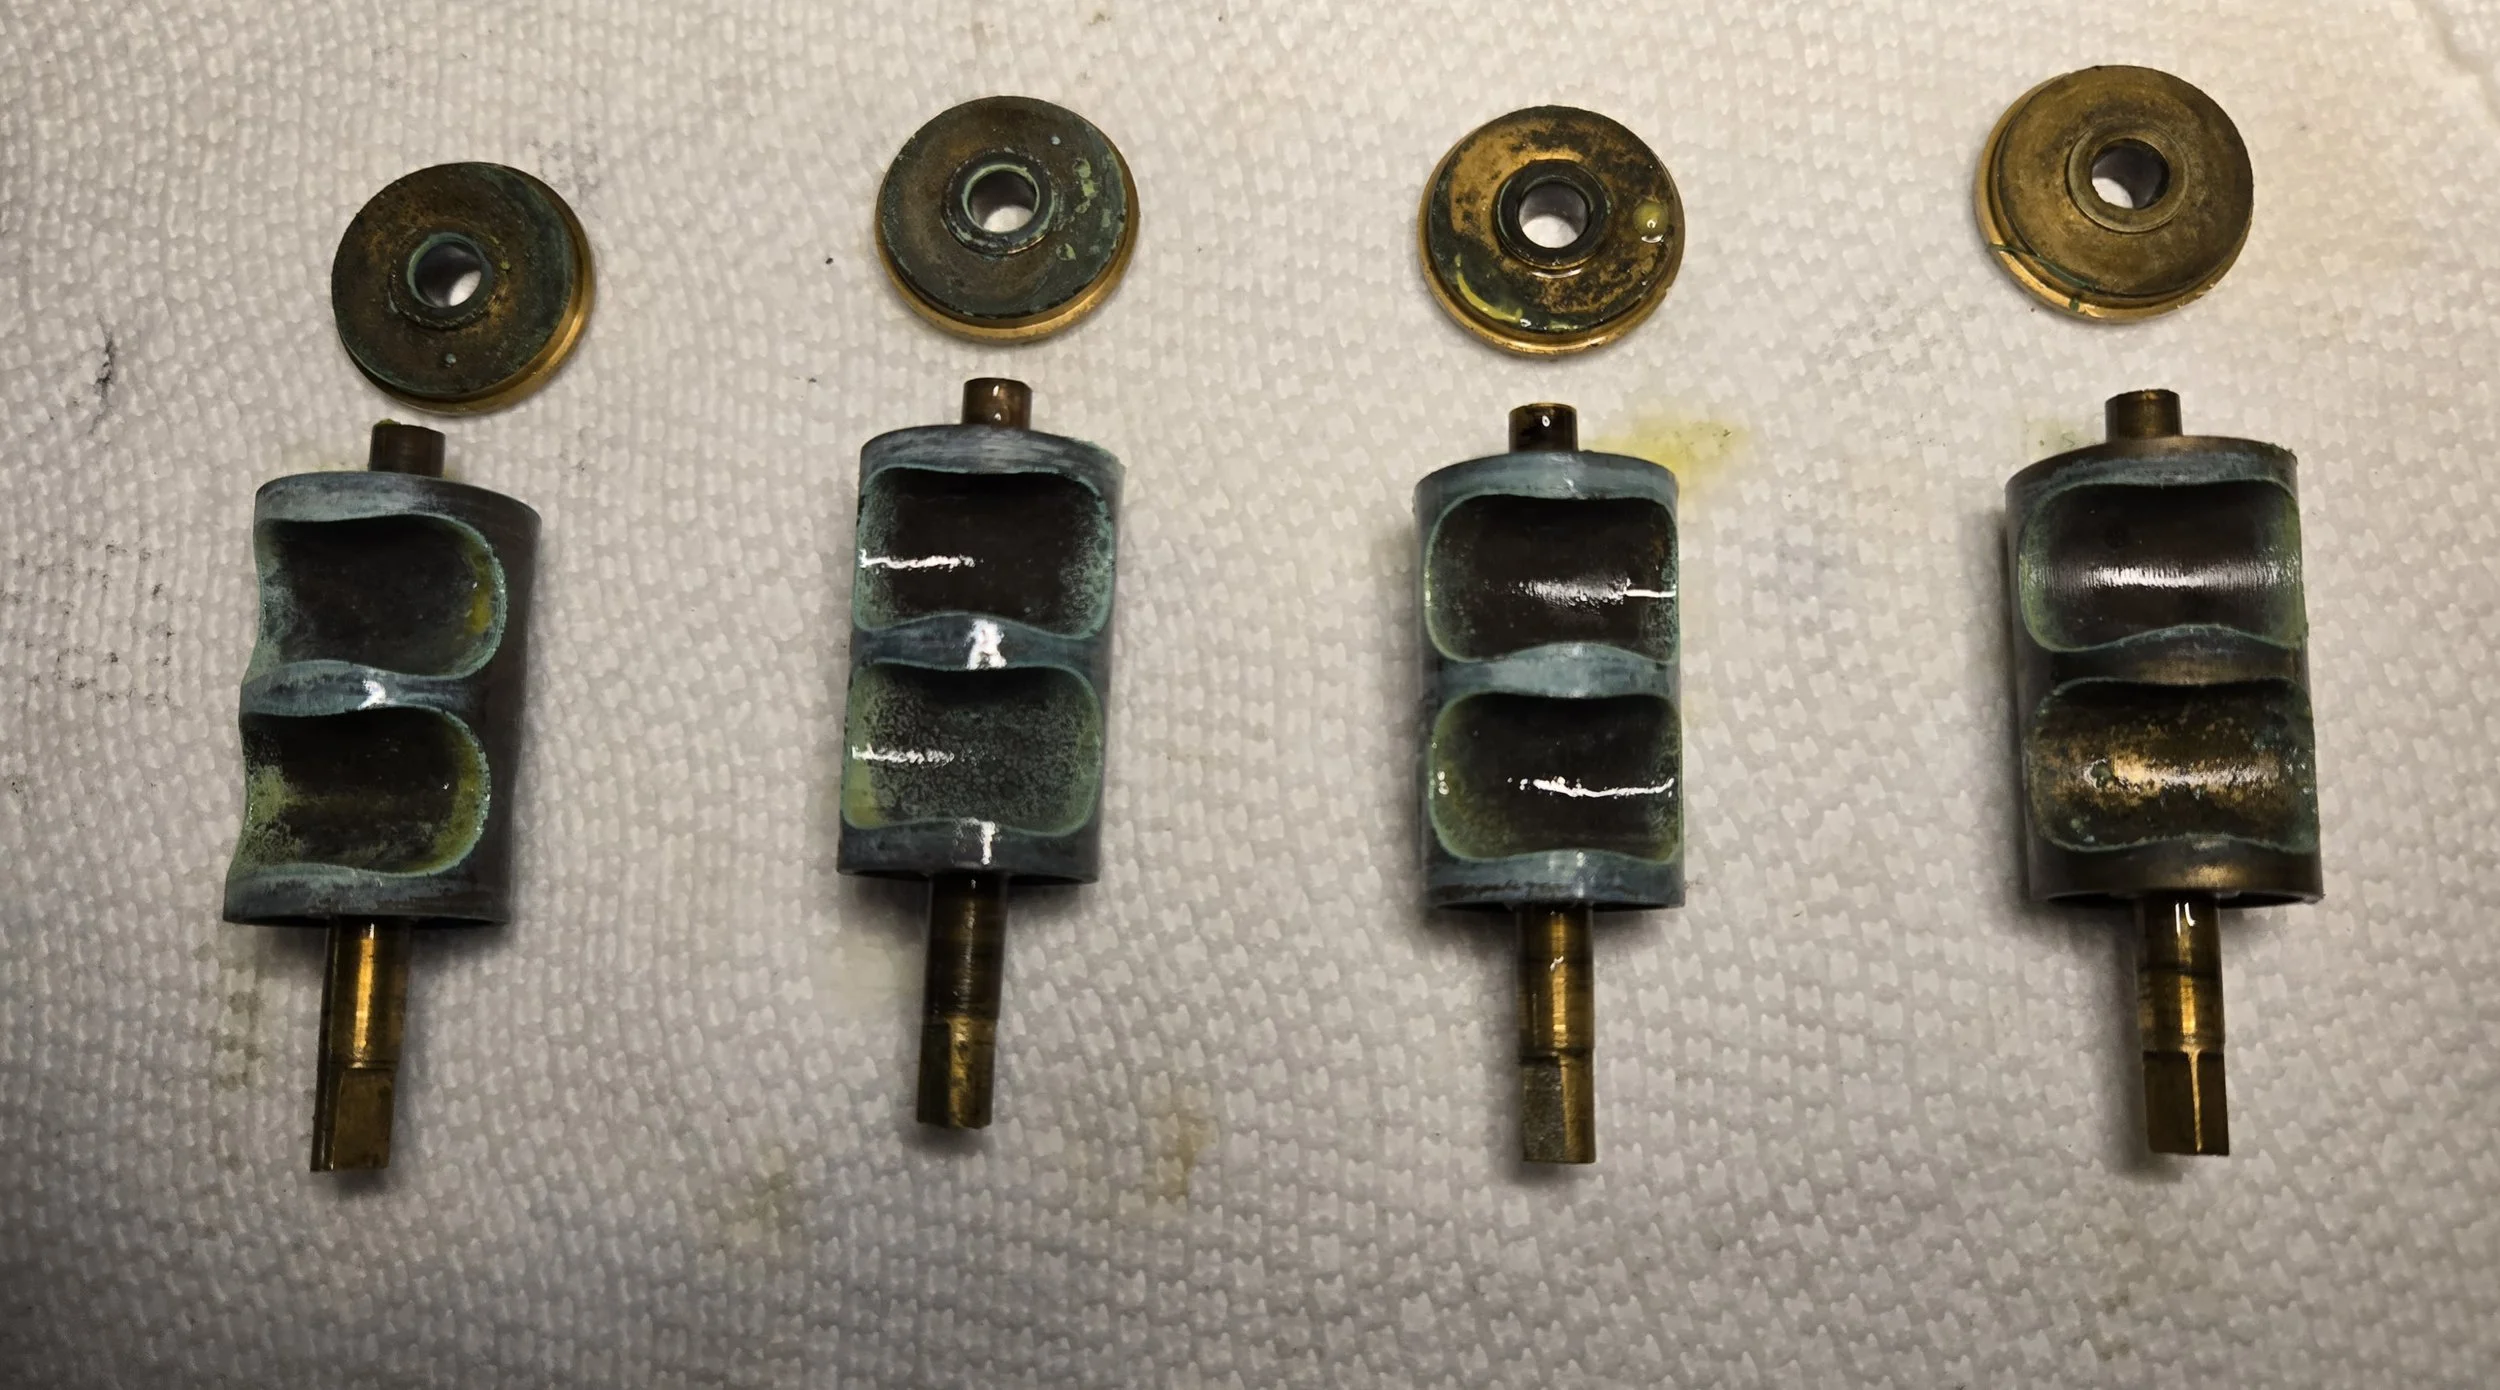
Dirty, Dirty French Horn Rotors
Obviously, photo #1 is a set of French horn rotors that are gut wrenchingly dirty! I just disassembled the horn to clean it and, of course, this is what I found. In photo #2 you will see the rotors after I have cleaned them. Tremendously better, don’t you think?

Not all Tubas are the same size!!!
Tubas come in several different sizes and different pitches/keys. The most common sizes are 3/4, 4/4, 5/4 and 6/4. They can also be pitched in Bb, C, Eb & F. These instruments are all made of brass.
The tuba on the right is a Bach 3/4 size tuba that you would see in a lot of middle and high school band rooms. I would consider this a student model or maybe an intermediate model instrument. This big brass creature is 37” tall with a 16” bell diameter and it weighs 15.5 lbs. This is not terribly heavy, but it is awkward.
The tuba on the left is a Cerveny 5/4 size tuba. This is a much nicer tuba and would be played by professional players in symphonic bands and orchestras. This behemoth is 40” tall with a 19.75” bell diameter and it weighs in at 20 lbs. It is surprisingly more unstable than the Bach tuba. Both of these instruments are used in a stationary setting. In other words, you’re playing in a band room, a concert hall, an auditorium or at home. Neither of these instruments are used in a marching band because they are so cumbersome.
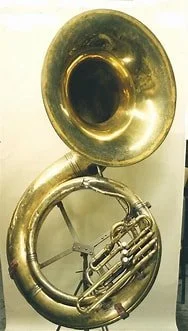
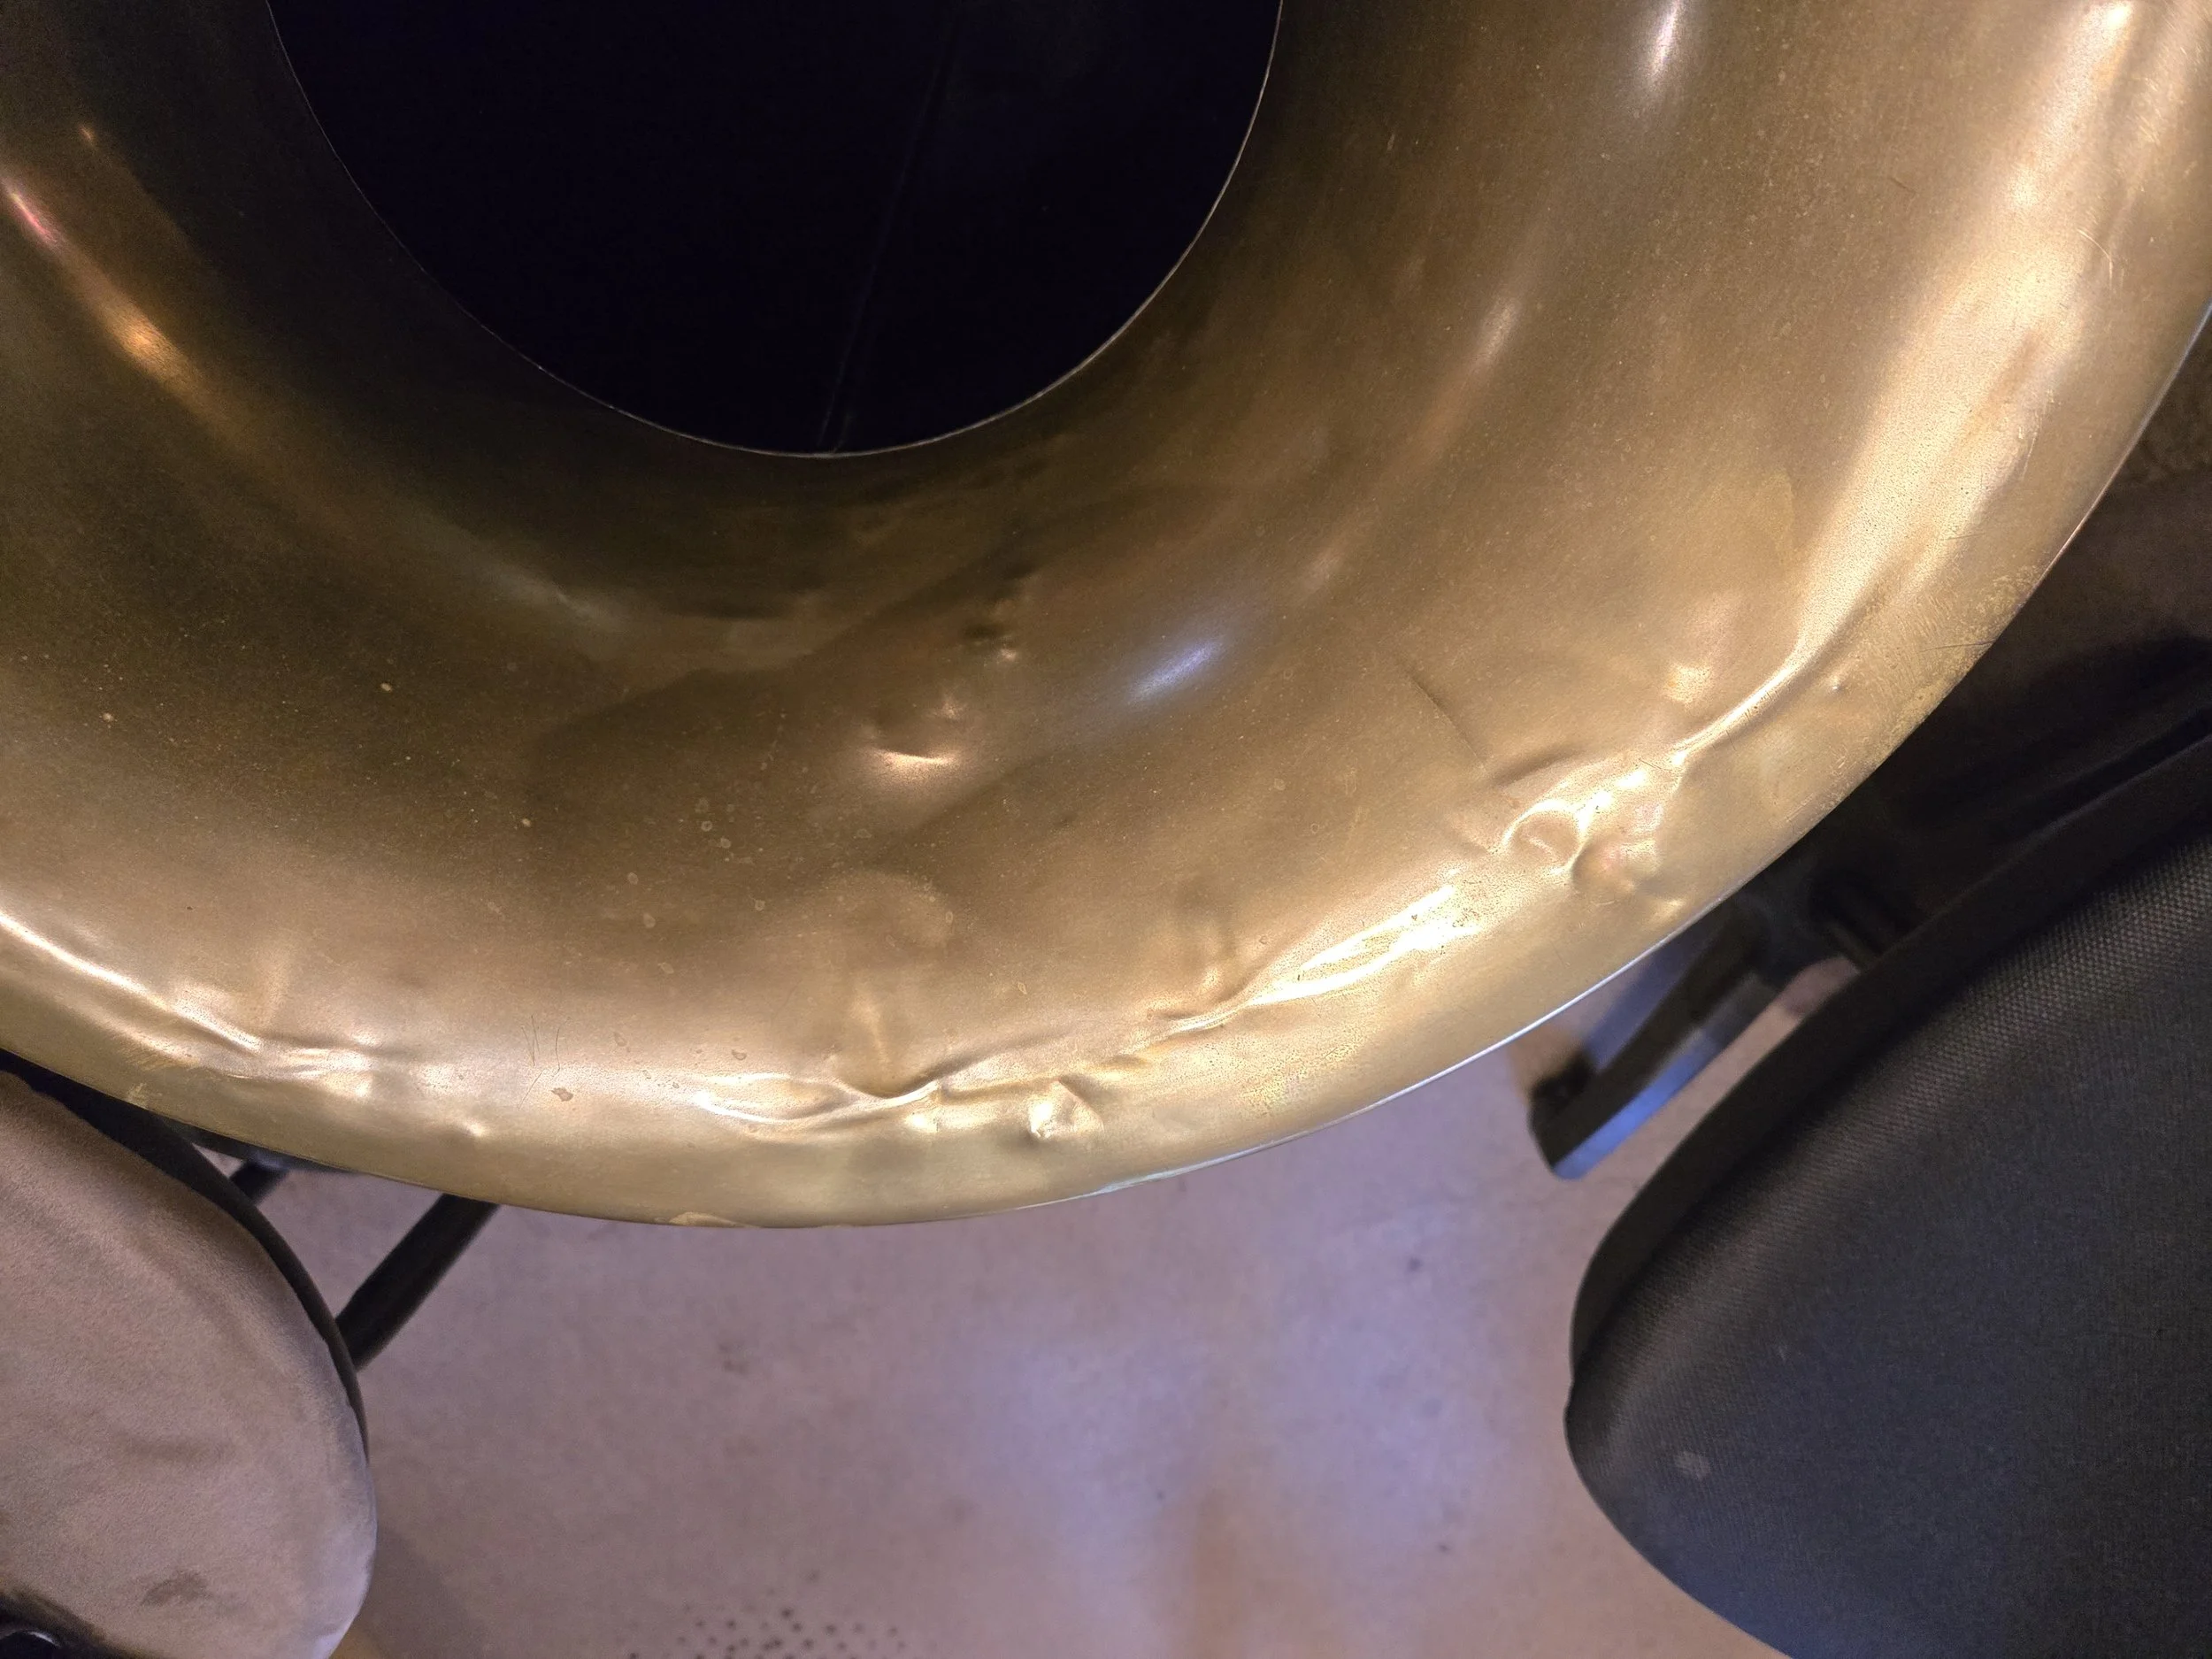
The second photo is a sousaphone which was made by J.W. Pepper, in 1895, at the request of John Philip Sousa. Of course, John Philip Sousa was a director of marching bands during that time. It was designed to rest on your shoulder so you could easily march and play. These “big boys” weigh in between 28 to 35 lbs. depending on the thickness of the metal. A sousaphone is not a tuba, or I guess you could say that it is a type of marching tuba. Sorry, this is just a pet peeve of mine. I hear many people call a sousaphone a tuba. It’s kind of like calling a pickup truck and tractor and trailer.
Bear in mind, I am a musical instrument repair geek.

De-denting the bell of a Conn 8D French Horn
The photos on the Left are of the damaged bell and the photos on the Right are of the repaired bell. For some reason, lately there has been a rash of badly damaged trumpet bells, Victrola bells, trombone bells and now a French horn bell. This is obviously not a new instrument however, brand new, this model of horn costs over $6000.00! So, it’s certainly cost effective to have it repaired. French horn bells are prone to getting dented simply by virtue of their size and the thinness of the metal. This particular instrument is made of nickel-silver which is also referred to as German-silver.


Double Reed Instrument of the Week
This is a Renard Model 330 Oboe which is made by Fox. This would be considered an intermediate model instrument. It is a full conservatory fingering system oboe with the exception of the split ring Eb-E trill key. Also, it has nickel silver keys and a plastic resin body. Brand new this oboe sells for over $4700.00. But I’m selling this one for $2000.00 which is a steal and it’s in pristine condition! If you scroll above to “Woodwind Instruments for Sale” and then to “Double Reeds” I have more info about this outstanding instrument.

Victrola Bell Revisited
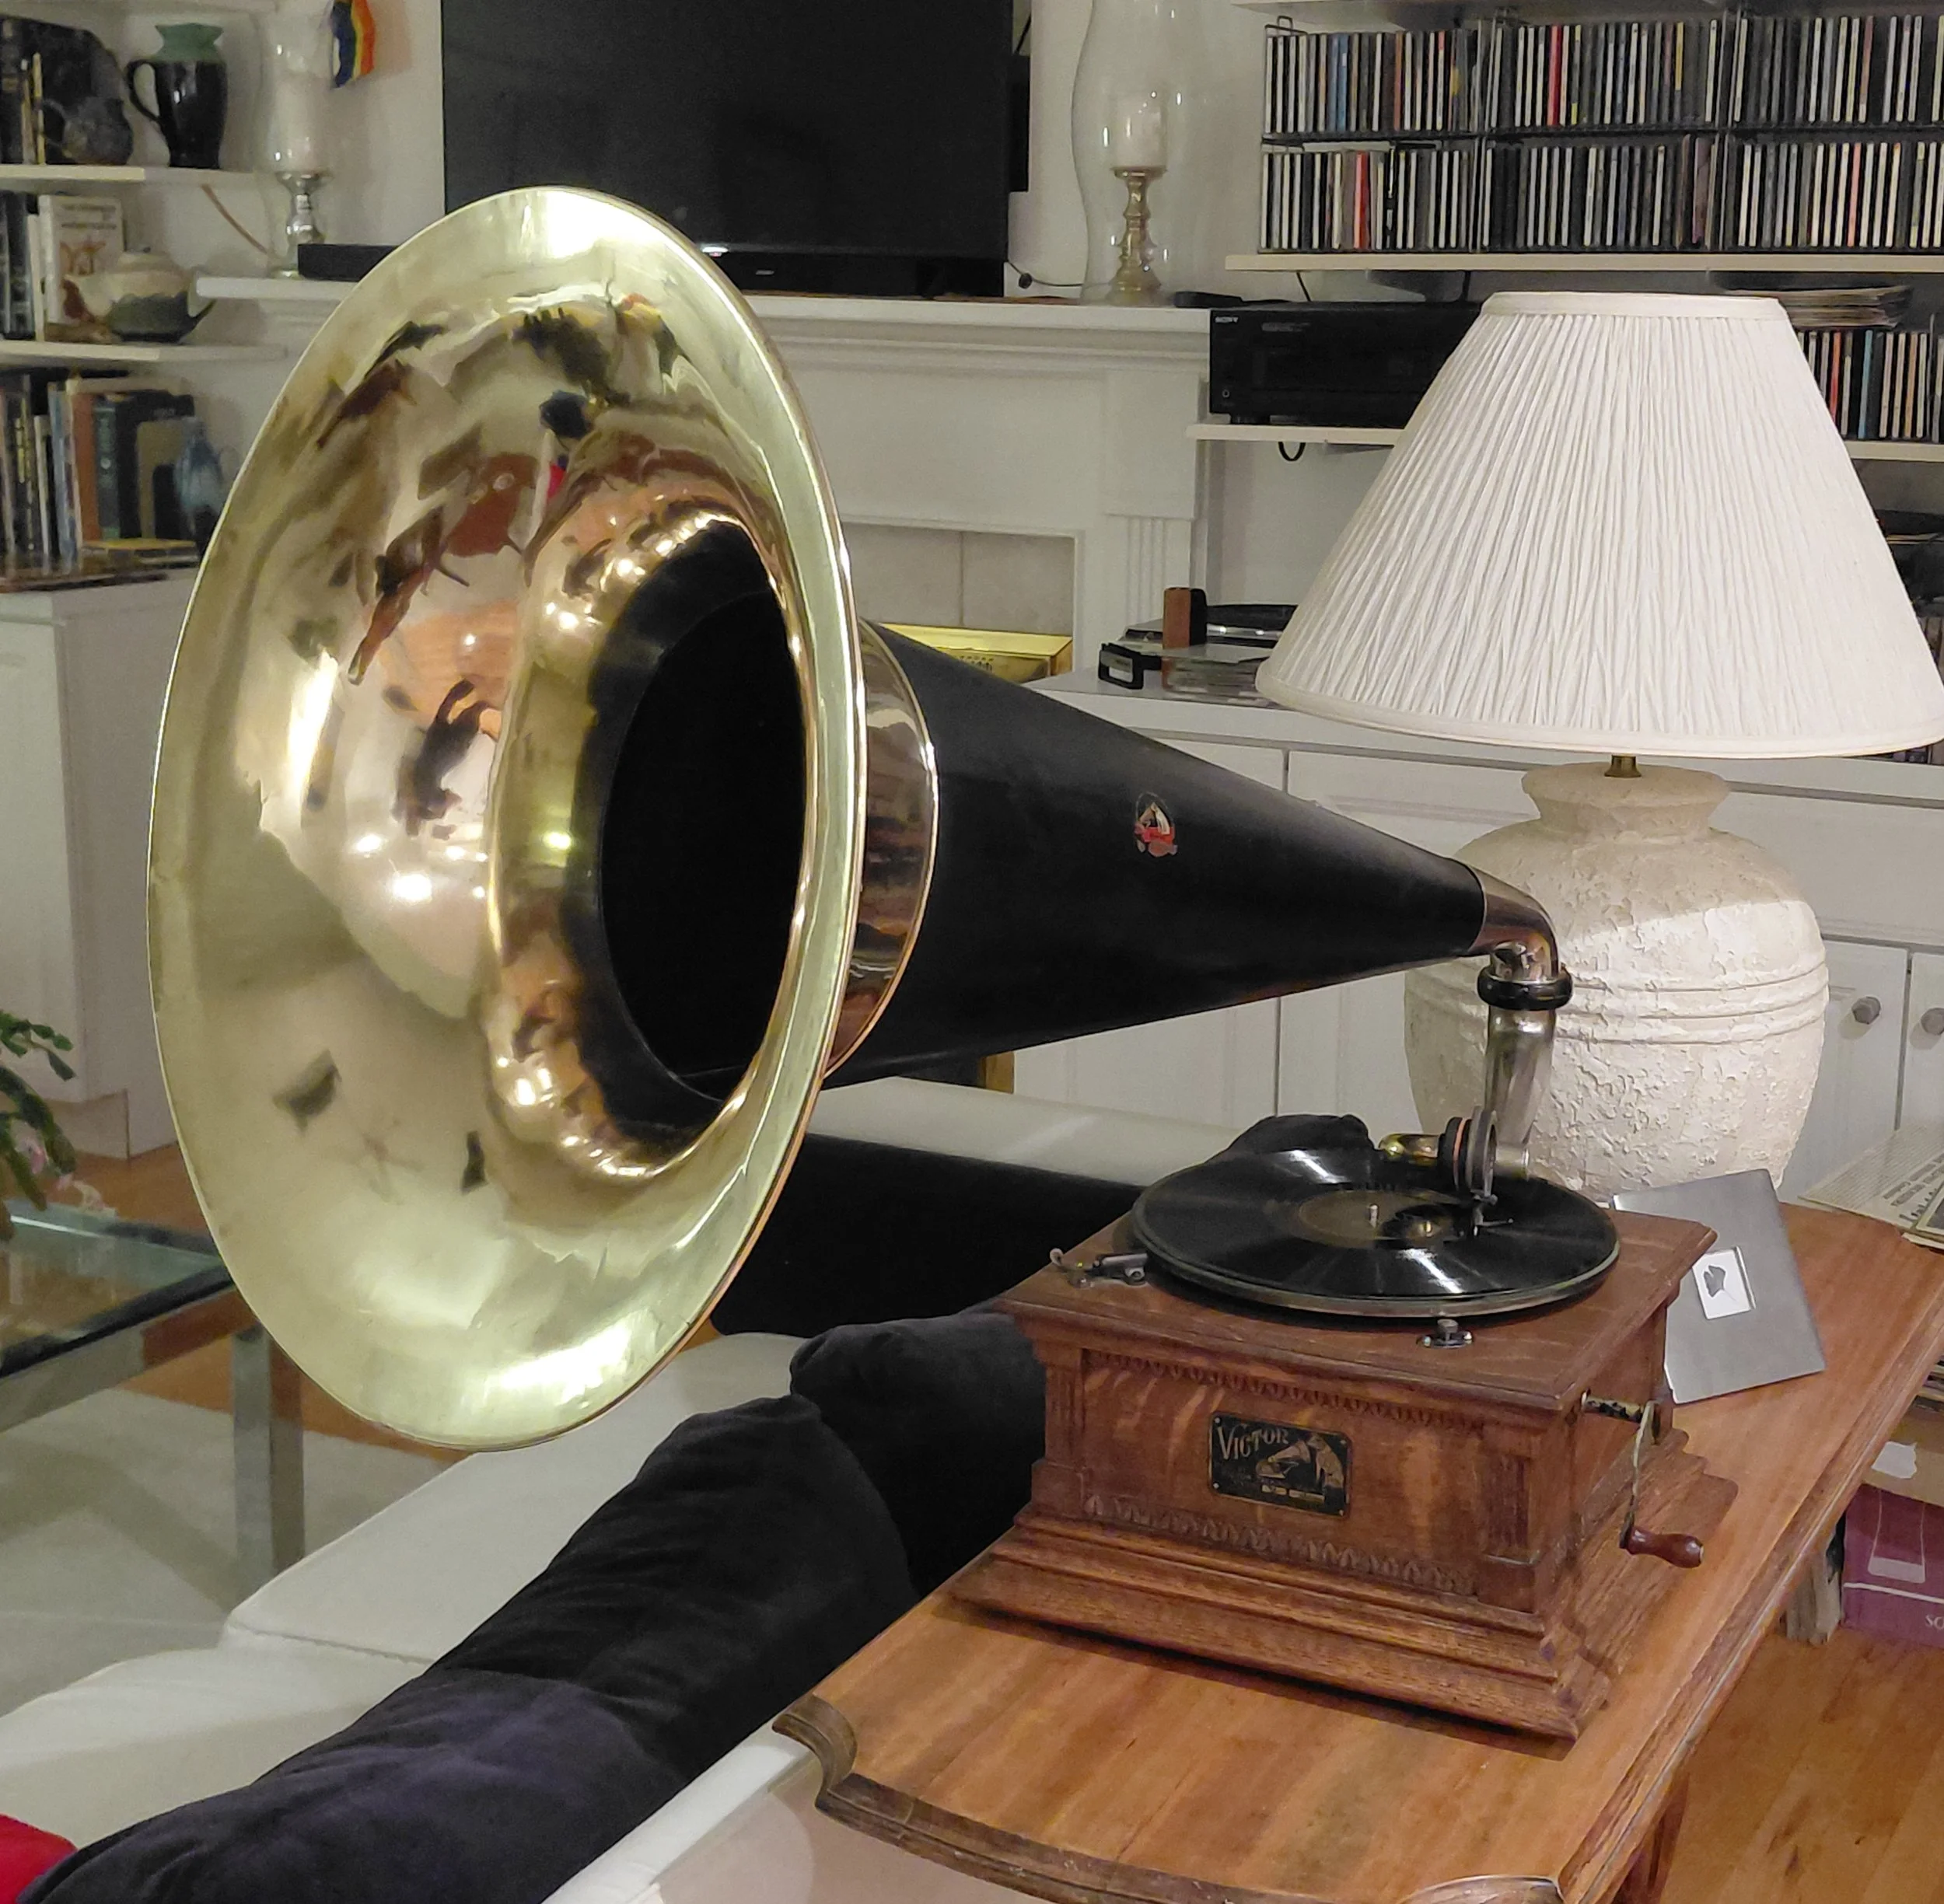
I rarely hear back from my customers after I’ve repaired something for them. However, a week or so ago I made a post about repairing a 1904 Victrola bell. This morning, I receiver an email with 4 photos of this bell from the owner.
Below is the first photo showing the bell as it was originally attached to the Victrola box. Obviously, it is bent and dented all over.

Below is the second photo from another angle that shows the creases and dents a bit more clearly.

In this third photo you can see the bell after I de-dented and de-creased it.

And here, in the fourth and final photo, the customer has buffed or polished the bell and re-installed it onto the Victrola box. I think that it looks amazingly good.
Brass Instrument of the Week
This is a Yamaha YTR-2330 which is a student model trumpet. I don’t think that it was used very much because it looks clean as a whistle. Like always, I have included a beginner model 7C mouthpiece. That’s exactly the mouthpiece that you want for a beginning student. I just checked the current price, and it is selling for $1600.00 to $1700.00 depending on where you buy it. Obviously $800.00 is a great price for this horn. I also have several other trumpets for sale on my website, elswickband.net

From Aluminum Foil to Trumpet Bell!!!
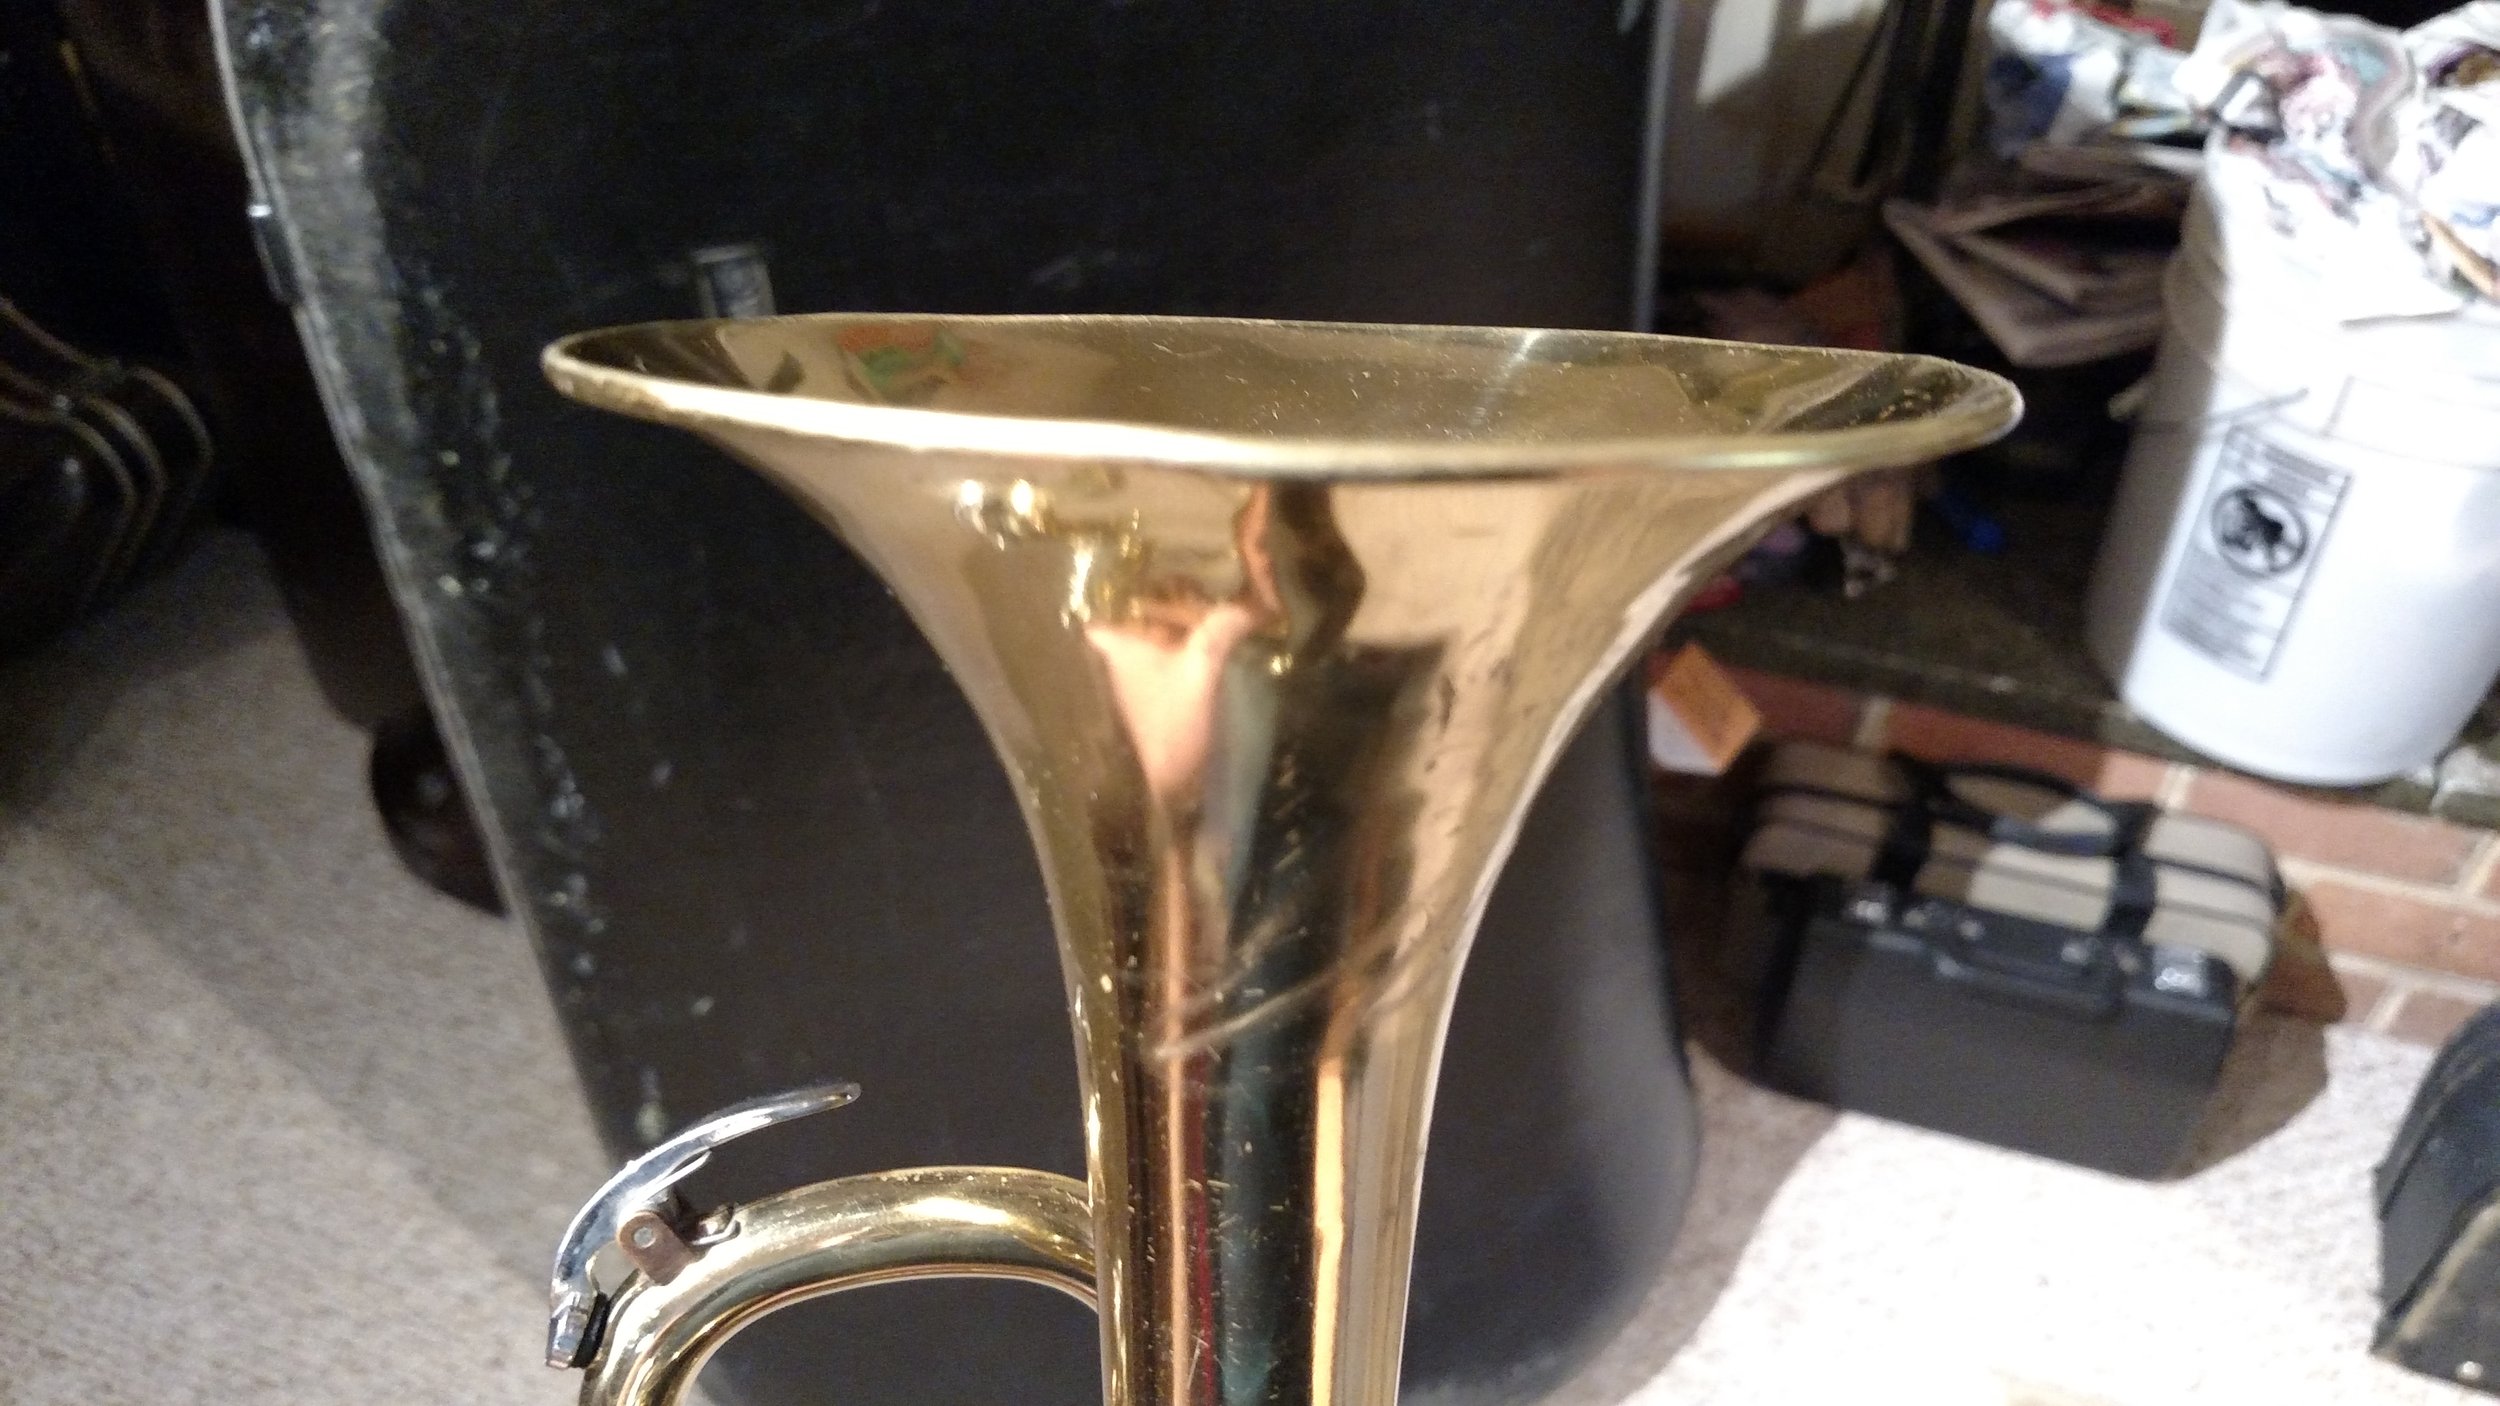
Here are a few photos of a trumpet bell that I repaired. As always, Before photos are on the left and After photos are on the right. As you can see, there are some very severe creases and bends in the metal. As I started raising the dents, I fully expected to see several spots in the metal tear. Fortunately, the brass did not tear, rip or crack.


Woodwind Instrument of the Week
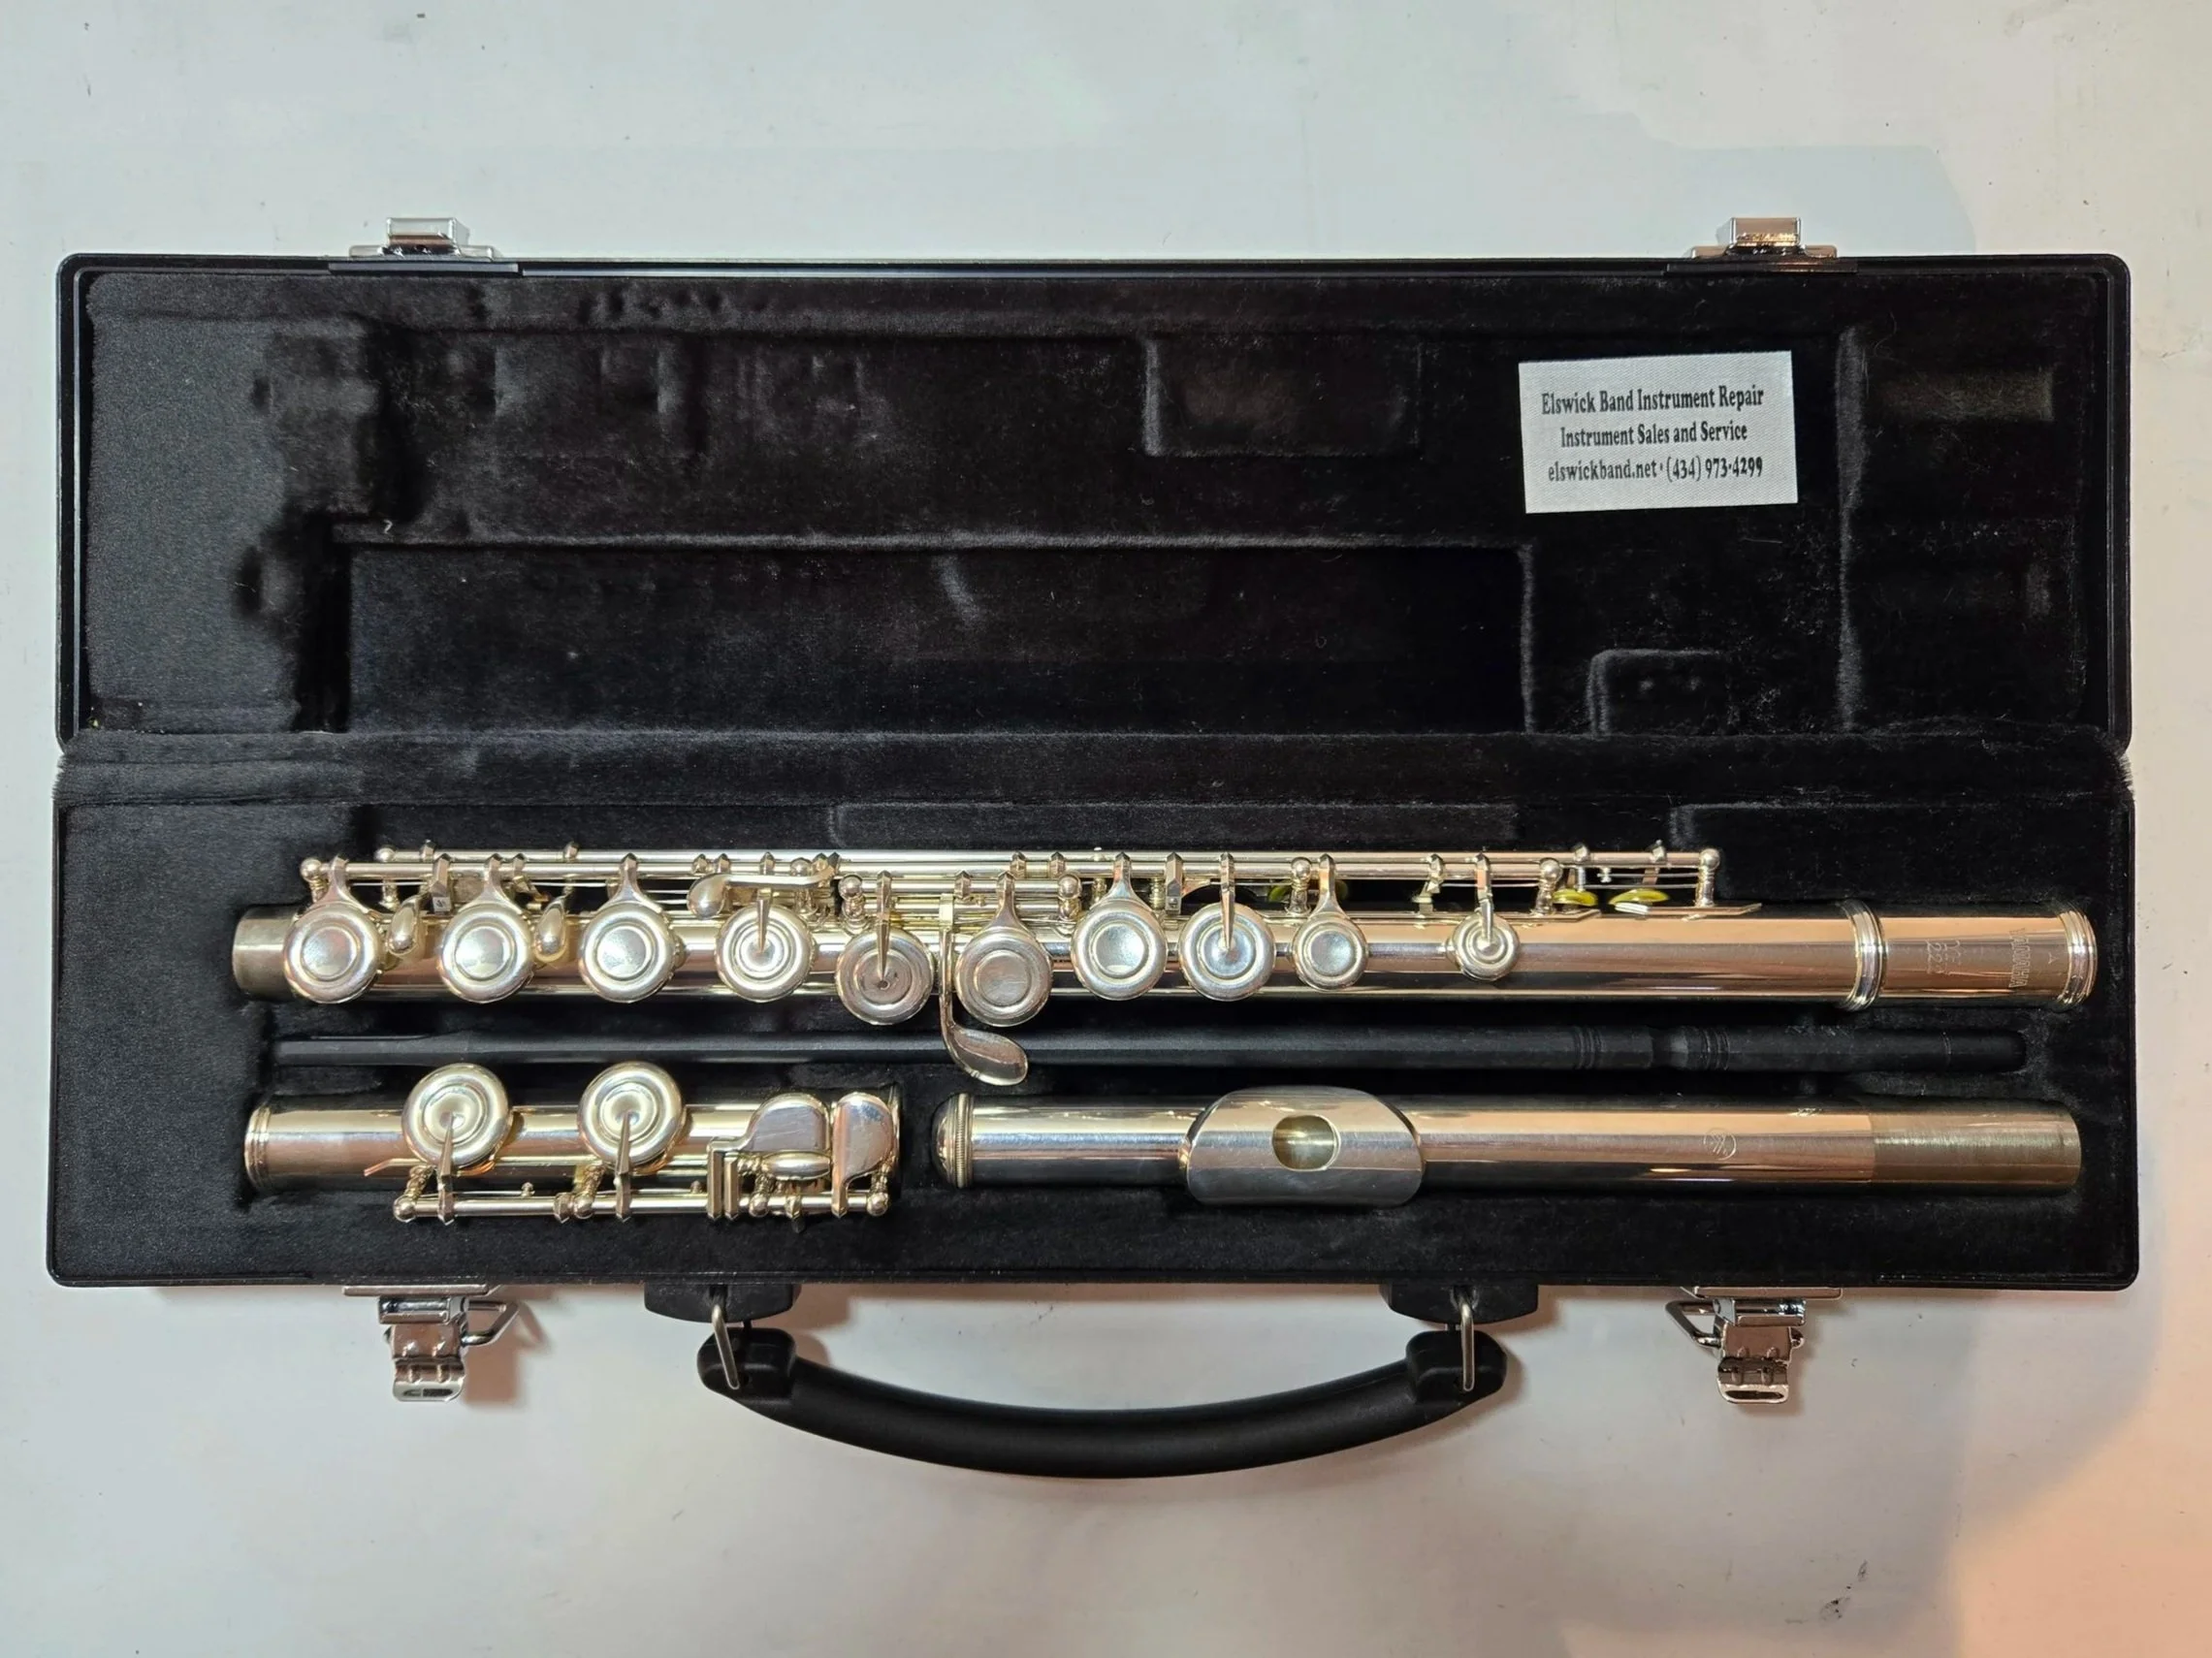
The previous three weeks I have posted professional model instruments so, this week I’m putting up a student model flute. This is a Yamaha YFL-222 flute which is the current model that Yamaha is selling right now. Of course, I have cleaned it, regulated and adjusted it so it plays just like a brand new flute. It’s a great instrument for any beginner of any age. These flutes sell for $1290.00 new, I just Googled the current price. I’m selling this one for $600.00! Come check it out.
1904 Victrola Bell
Normally I just work on wind instruments but once in a blue moon a unique item comes through my door, and this is definitely one of the most unique items that I have seen in quite a while. This is the bell from a 1904 Victor Talking Machine, more commonly known as a Victrola. A gentleman over in the “Valley” is in the process of restoring this machine and he wants to get it as close to original condition as possible. Consequently, he wants all the dents, creases, pings and dings removed.
The photo layout is simple: Photos on the Left are before the repair. The photos on the Right are after the repair except for the last one. This one is of the bell with a yard stick sticking out the top of the bell. I just wanted to give you a reference point. The height of the bell is almost 28” and the bell rim is 21” in diameter. Another reference point, a normal tenor trombone bell is 8” in diameter and a Bach tuba bell is about 16” in diameter. Not all are the same size. My point is, this thing is pretty dang big! Enjoy!


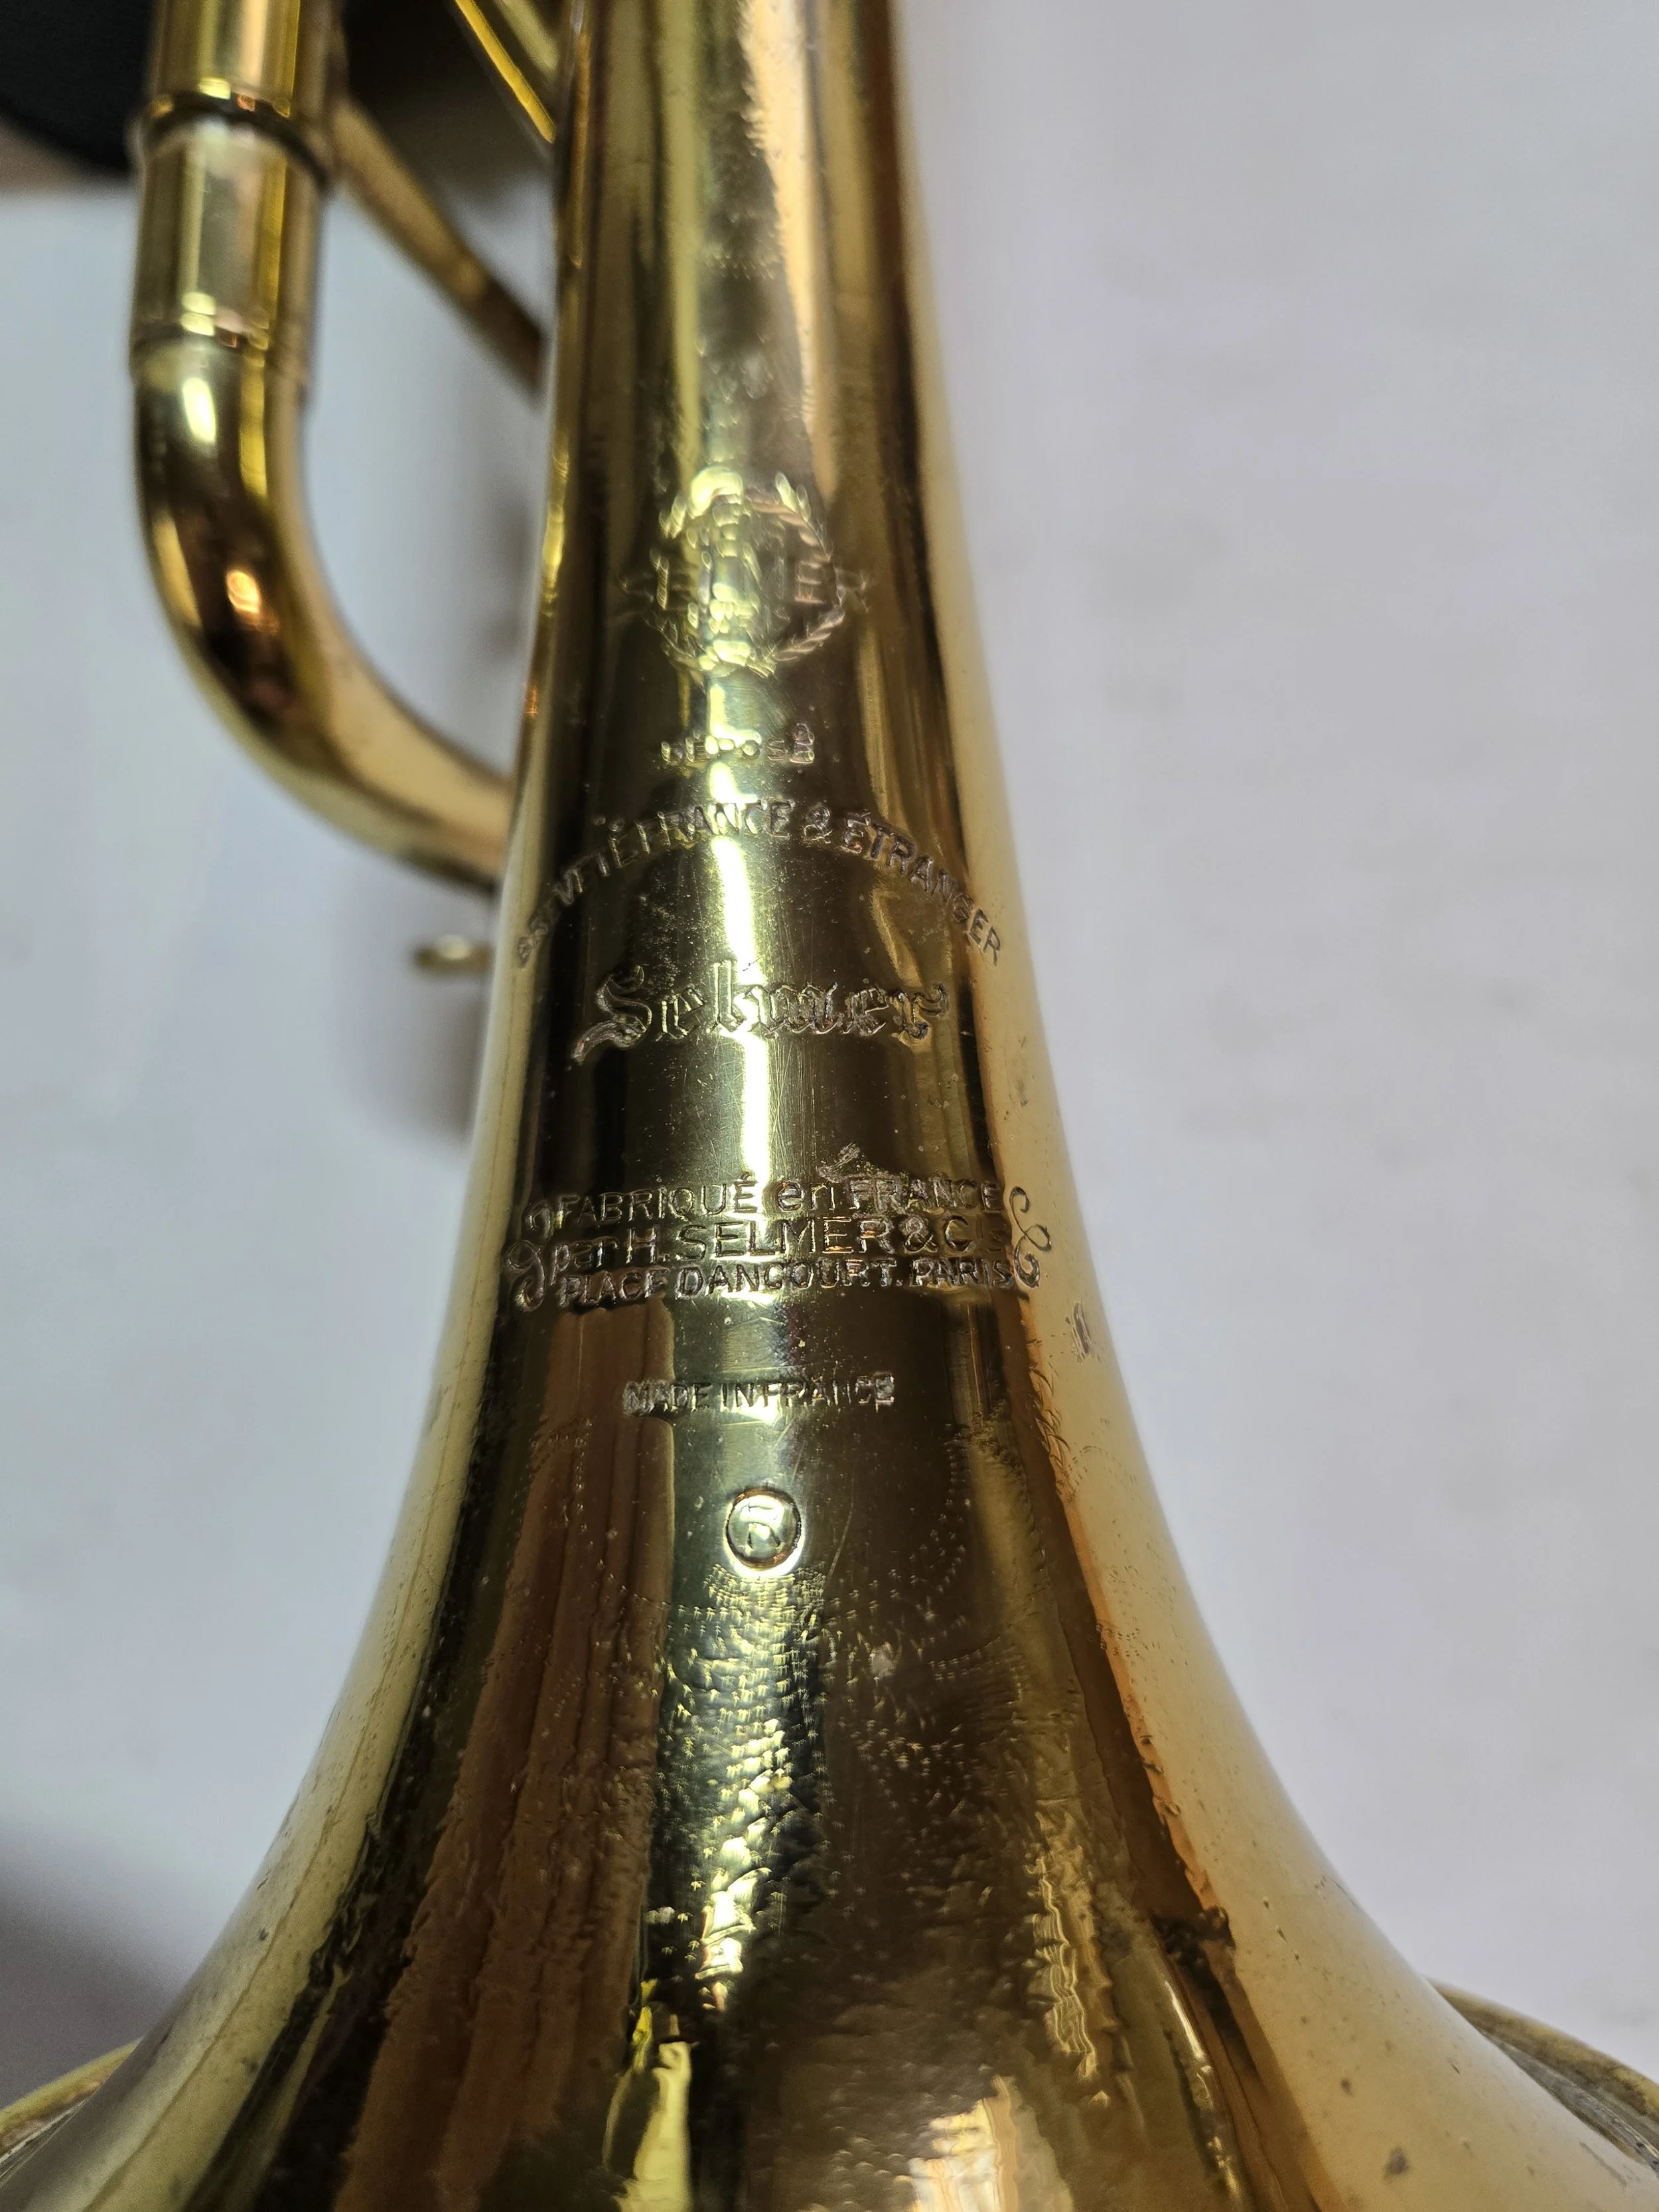
1958 Selmer “K-Modified” Trumpet
This trumpet came into the shop a couple of weeks ago. After sitting for a very long time, the customer wanted it brought back to life and restored to playing condition. Bear in mind, this is a 67 year old instrument. All 4 slides were badly stuck, the valves were moving like they had molasses on them and the right hand finger hook had been knocked off its normal position on the lead pipe. In the second photo I re-soldered the the finger hook, then buffed the area and re-lacquered it. The third photo is one of the valves which is very grubby. The whitish-green stuff is crude that is caked in the valve port, probably for decades. The fourth photo is after I cleaned it. Photo five is showing the valves from a different angle and the bottom caps with more of the whitish-green stuff. Also, notice that the bottom of the third valve has been caved in. More than likely this is from someone trying to get the stuck valve out of the valve casing with something like a drum stick. I see this a lot! Photo six is obviously the valves and bottom caps after I cleaned them. And of course, the final photo is the trumpet after its cleaning and completely reassembled. I also had to do some structural work on the trumpets case. I think the customer will be pleased with the outcome of this repair.


Woodwind Instrument of the Week!!!
This week I’m featuring a very nice professional model clarinet which is a Buffet “RC” clarinet. This is basically the upgraded or new version of the original R-13. The R-13 was created in 1955 by Robert Carree. Now you see where the “RC” comes from. The RC was introduced in 1975. The original R-13’s have a polycylindrical bore and the RC’s have a conical bore. The difference in sound is fairly subjective but the R-13 has a brighter more direct sound while the RC has a warmer, richer and maybe sweeter sound. Check out elswickband.com to see additional info about this outstanding instrument.

I Recently Acquired a Unique Saxophone!
This 1971 Selmer Mark VI alto sax with a low “A” key and a high #F#” key has been in here several times for repair. However, the customer decided to get rid of it and I bought it. After buying it I did a bit of research on just how many of this particular type of alto sax were made. I found my answer on the Selmer website:
The first low A altos are actually a very small number built in the 1920s. This is called the Ladario model. However, the first Mark VI low A altos were built right at the very beginning of the Mark VI in the 55,000 serial range. There were just a couple built. A couple more were built at 62,000 and a couple more were built at 92,000. These are to be considered prototypes or test models. The actual production of the Mark VI alto starts at 106,000 and continues up to 238,000.
Roughly half of them, actually 51% of all the Mark VI low altos featured the high F# key. The instruments shipped not to the US were almost exclusively with the high F sharp key, about 87% of them, but the instruments shipped to the US, about two thirds did not include the high F sharp key.
After the Mark VI range, there was one known Mark VII built and also one known Super Action 80 built.
So let's get to the key number. The low A altos I first searched in the Paris archives - as I mentioned earlier this year I was in Paris and went through other archives at the factory, gained additional information. I've also found a couple low A altos that were not in the archives at all, but I have photos of them. So the total number of low A altos that I have found is 859. So the myth of 200 low A altos being built is purely that, just a myth.
Now where were they shipped? Roughly 600 of them were shipped to the US. So that means about 200 American low A altos have the F sharp key, and 400 don't. About 100 were shipped to Selmer London, for distribution through all the Commonwealth countries. Most of them, I presume, would have remained in the UK, but some would have made their way to Australia and other countries. The rest of the world, including Europe and, well, everywhere else in the world, about 170 were made.
There are some rarities amongst the group. If you're looking for a rare version of the rare low A alto, there were 41 made with lacquered body silver plated keys. There were about 90 made silver plated overall. There were only nine made with the full set of trill keys. So that's a really rare. But the rarest is a Mark VI low A and high F#, black lacquer alto. Only one was built.
So there you have it : 859, plus two that were built after Mark VI, plus three that we know of that were built before Mark VI, for a total number of Selmer Paris low A altos of 864.

Brass horn of the week
Here is a very nice intermediate model trombone. By intermediate I mean, not a beginning or student model instrument and not a professional model. For example, if you’ve been playing a student model trombone for a few years and you want something a bit better, then this is your horn. This is a Yamaha YSL-548GO also known as an Allegro model, which adds features like an “F” attachment, above and beyond your basic tenor trombone. Plus, the material that this instrument is made of is gold brass which means that it’s a better sounding trombone. This is what you want for concert band, symphonic band or marching band settings. Brand new this instrument sells from $2300.00 to over $2700.00 and I’m selling this one for $1600.00 which is a great deal for an instrument of this caliber. For more info about this trombone, at the top of the page just click on “Brass Instruments for Sale” then click on “Trombones”.

Horn of the week
I case you don’t look past my Home Page, I’ll show you some of the new instruments that I have recently acquired. This week I am featuring a Yamaha YAS-62III alto sax that I just finished doing a complete repad on. Of course, this is one of Yamaha’s professional series saxes. As always, I cleaned it, repadded it and put it into a hard shell travel case that is shaped like an alto sax. After I repad each and every horn that I sell I always play them. I like the sound of this sax and the way it projects. For any additional info about this saxophone just scroll to the top of this page and click on Woodwind Instruments for Sale>Saxophones and then scroll down the page until you see this particular sax. If this horn doesn’t tickle your fancy there are several other alto and tenor saxes of varying prices on the page. I’m sure you can find something that you might like. If you don’t see something that you like just call me at the shop, 434-973-4299 and ask if I have anything in the process of being repaired. I constantly am keeping my eye out for other instruments to purchase.

I work on recorders too!!!
I don’t have recorders in my shop for repair very often but occasionally I do see them. The two smaller instruments are soprano recorders, the next biggest one is an alto recorder and the largest one is a tenor recorder. These are here to have the tenon corks replaced, also known as the joint corks.
In the first photo you are seeing all four instruments assembled, as they would be if you were going to play them.
In the second photo you are seeing them disassembled so you can see the tenon corks.
As time goes by the tenon corks get compressed and won’t securely hold the adjacent pieces together. So, periodically they need to be replaced. This is a simple repair but certainly a necessary one.


A note left by a previous repairman!!!
Yesterday I was disassembling a 1990 Selmer “Super Action 80 series II” alto sax which is a professional model instrument. I’m doing a complete repad on it. After removing all the keys from the body of the horn I start removing the pads from the keys and all the old shellac. The pads are held into the keys by shellac. In one of the keys I discovered this little note shellacked into place under the pad. It says Desert Winds Music Inc., Swedge - Repad, 4/25/94, Michael J. Krill. Apparently he was the last repairman to do a complete repad on this sax. Out of all the thousands of instruments that I have repaired over my 53 years of repairing I’ve never put my name under a pad like this. Should I start?

Pad Bugs
In the process of doing a complete repad on this student model Bundy clarinet I discovered that virtually all of the 17 pads on the instrument are infested with Pad Bugs. Pad Bugs are like moths or carpet beetles that munch on your clothes in your dresser drawers or closets. They like to eat the felt center of the pads. This normally happens when you’re not using the instrument for a long period of time. For example, when you put the instrument in a closet, under your bed on in a basement for years. Once this happens there’s no quick fix meaning, the instrument will need all the pads changed and you will need to replaced the case. If you repad the instrument and put it back into the same case, the new pads will get eaten before long.
In the first photo these are some of the keys, and pads of course, from the upper joint of the clarinet. I placed a brand new pad among the hideously eaten ones so you can see the difference. The new pad, obviously nice and round while the others have jagged edges. If the pads have jagged edges then they don’t completely cover the tone holes on the instrument meaning, they leak and the instrument doesn’t play correctly or at all.

These are 5 of the 6 pads from the lower joint of the clarinet. These are obviously equally compromised. One pad escaped the wrath of the Pad Bugs.

1953 Selmer “Super Balanced Action” Tenor Sax
Here is a classic instrument that recently came into my shop. A 1953 Selmer “SBA” Tenor saxophone that needs a complete repad. Today I will start disassembling it, removing all the old pads and old shellac from the pad cups. Next, I will clean each and every part. After that, the repadding process will begin. This is a multi-day event so, I will add photos as I go.
I have seen saxophones like this sell for prices ranging from $5500.00 to over $17,000.00 depending on the physical condition of the instrument and, of course, how well it plays. When I finish with the repair, I will let you know just how well it actually plays.

As I started to disassemble the sax, I discovered a badly stuck rod. This is the rod that holds the right-hand F#, F, E & D keys in place. The rod is 7.5 inches long and is obviously badly rusted. It was rusted to the 4 keys and the 5 posts so, it was a real pain to extract it. Unfortunately, the photo is blurry because my camera couldn’t focus on something so thin and narrow.

An “Eb” Clarinet, “C” Clarinet and a “Bb” Clarinet
A “C” Clarinet is certainly an oddity and you’ve probably never seen one. I know I hadn’t, and I see weird instruments all the time. It’s a very handy instrument if you need a flute or an oboe part played and neither of those instruments or players are available. Or if you have to read piano music and your clarinet player can’t transpose up a whole step at sight. If you want to hear the “C” clarinet in action, go to: rclarinetproducts.com/lyrique-570-c-clarinet
Tom Ridenour is performing a Mozart quartet for oboe on strings transcribed for “C” Clarinet
and he’s actually playing a Ridenour Lyrique 570 C Clarinet, just like the one in the photos.
The first photo is of the “C” clarinet.
In the second photo the instruments are in this order:
1) The Eb metal clarinet, that I just happen to own, is slightly less than 17”. (Made of metal, specifically brass that is nickel plated)
2) The total length of the C clarinet, minus the mouthpiece, is slightly less than 20.5”. (Made of hard rubber)
3) And of course, the standard Bb clarinet is a staggering 23.5”! (Made of plastic)
I made this post to show you the “C” Clarinet be I feel like I need to talk about the other clarinets also. Metal clarinets came about in the days before viable plastics existed in the clarinet world. Most all clarinets used to be made of grenadilla wood and that was great as long as you performed inside. As soon as you take these instruments outside, for example, military bands, high school marching bands, etc., they have a tendency to crack because of temperature and humidity variations and now the instrument is ruined. So, metal clarinets seemed to work well in these situations. When better plastics, less brittle plastics, came about then the plastic clarinet became the “go to” instrument for outside performances. These days all student model clarinets are made of plastic. Intermediate and professional clarinets are made of grenadilla wood, and the metal clarinet has gone away. Actually, last fall I played an outside gig at a local winery, and it was cold the last hour of the performance. During the last set, the clarinet player put away his $3500.00 Buffet R-13 wooden clarinet and whipped out a metal Bb clarinet. I haven’t seen that for quite some time.


One Selmer saxophone is not like the other!!!
Here are two Selmer Mark VI alto saxophones. The upper photo is a normal alto with a regular bell section. The bell section is the part with the engraving on it and with the largest keys. The largest and last key on the horn is called the low Bb key. The lower photo has an extended bell section with an additional key on it. Of course, it has a low Bb key but after that it has a low A key! This is very common on baritone saxophones but is rarely seen on altos. In my 53 years of repairing wind instruments, I have only seen 3 of these types of alto saxes and they have all been Selmer Mark VI’s. These are considered to be professional model saxes. As a matter of fact, this is the same brand of saxophones that I play, and I think they are the best saxophones made.


En Puerto Rico
I am back after 12 days in Puerto Rico and the island of Vieques. During the past 4 years I have been diligently studying Spanish in the hope of becoming fluent someday. So, instead of just reading books, studying Duo Lingo and writing a diary each day in Spanish, I decided to throw myself into the deep end of the Spanish pool. Real live conversations with real native speakers. Photo #1 - My friends Victor & Sonia Cruz picked me up at the airport and allowed me to stay in their home for the first two days. This was a good way to start. Photo #2 - I found out that I had a college buddy and fellow musician on the island of Vieques so, day 3 & 4 I flew there and spent some time with him and his girlfriend Linda. After that I came back to PR and I got a hotel in Condado which is a suburb of San Juan. Photo #3 - The first day there I found a smokin’ 8-piece salsa band playing at the Marriott hotel on Condado beach. They let me sit-in for a song which was very cool or Chévere, in local speak. Photo #4 - The next few days I did a little beach time, which is rare for me, and I drove around the island speaking with anybody that would talk to me. Their dialect is definitely unique. Photo #5 - Of course, I sampled as much local cuisine as I could. This plate of food is criolla with mofongo which is very traditional. Photo #6 - This is me with Carli Muñoz, a tremendous Puerto Rican piano player, and we are standing in his restaurant called Carli’s which is in Old San Juan. I was fortunate to get to play with him on two different nights while I was there. Carli has played with everyone from the Beach Boys, for 11 years, Wilson Pickett, George Benson and more. This was a spontaneous trip that was better than I could have imagined and I will definitely go back.


Eb Tuba Planter
On my front porch I happen to have a unique instrument that serves multiple purposes. This is an Eb tuba which is not commonly seen unless you are in an orchestra that has a specific part written for an Eb tuba or in an ensemble like a funky brass band. Or maybe you’re busking on a sidewalk somewhere. Most tubas you see are called Bb tubas or BBb tubas (double B flat Tubas). This particular Eb tuba has long since past its prime so, I mounted it on a piece of soapstone and Vanessa uses it for a planter or something interesting during the holidays. For example, at Christmas Vanessa puts decorations in it. Recently, the 2 brass rods on either side of the tuba, that I installed, rusted through and the tuba fell off the soapstone base. So, this morning I hauled the creature into my shop and repaired. I mean, it’s what I do! Now it will live again as a planter, holder of Christmas decorations or who knows what.


Dedication to a Young Musician
Back in November of 2020 I received a call from a woman about wanting to commemorate her son who had died some years before. Actually, he was still in high school when me died. Since he had been a sax player, she wanted to do something with his horn. She didn’t have any idea what she wanted to do but she wanted something done so she could have a constant remembrance of him. After talking with her for a bit, I mentioned putting the sax into a Shadow Box, but she wasn’t familiar with a Shadow Box, so I described it to her, and she liked the idea. After I received the instrument from her, I took to Pete Katz who besides being a great sound engineer, he is also a builder of road cases for musical electronics and musical instruments for touring bands. So, Pete came up with the design of the box and made it. Since this was during the start of the pandemic, my wife, Vanessa and I delivered the Shadow Box to the woman in Waynesboro. She loved the finished product. Now, here we are, 4 and a half years later, the woman’s other son brought the box back to me because it had been dropped, and the wood came apart plus the glass was broken. I didn’t think I would ever see this box again but here it is. Pete resecured the separated pieces of wood and I took it to get the glass replaced. All is well and soon it will be back into the owner’s possession.

Sears Silvertone Trombone
Here is a horn from a bygone era. When Sears existed, they seemed to sell everything, and they also sold musical instruments. The trombones & trumpets were made by the H.N. White Company who also made instruments for the King instrument company. They were made in Elkhart, IN., as you can see on the bell. Elkhart is still a hotbed of musical instrument manufacturing. How interesting that this horn has survived and, after I repaired it, it will still be making music. Of course, I cleaned it from stem to stern, de-dented and aligned the hand slide and raised a few dents. Below you will see a couple of bell dents that I raised. The first two photos are from one side of the bell and the other two photos are from the opposite side of the bell. The fact that the dents were next to a brace which made the dent removal a bit more challenging. I periodically get calls from people asking if I can remove the dents from their flute, sax, trumpet, trombone, French horn, euphonium or tuba and of course the answer is “YES”.


Eb Contra Alto Clarinet
You don’t get to see these instruments very often unless you’re in a high school band, college band or a symphonic group. In photo #2 you’ll see the clarinet completely assembled in all its glory and it measures 55” in length. There are a whole family of clarinets, for example: Eb sopranino, Bb soprano (the most commonly seen clarinet), Eb Alto, Bb bass, Eb contra alto (shown below) and the Bb contra bass clarinet. I just finished doing a complete overhaul on this contra alto meaning it was disassembled and cleaned then I replaced all the pads and all the corks, which are numerous. Enjoy!!!


The Cost of Band Instrument Repair
I try to keep a wide variety of pads in stock for all woodwind instruments. Below is the latest order of “just” sax pads that I received. There are only six different sizes in this photo. For saxophones I have pads ranging from 7mm - 70mm, in half millimeter sizes, and in four different thicknesses, thin, medium-thin, medium and thick. This is necessary to accommodate the pads needed for sopranino, soprano, alto, tenor and baritone and bass saxes. Plus, to accommodate for all the different brands of saxes like Armstrong, Berkeley, Borgani, Buescher, Buffet, Bundy, Bundy II, Cannonball, Conn, Couf, Jupiter, Leblanc, Keilwerth, Mauriat, Noblet, Selmer Paris, Selmer USA, Signet, Trevor James, Vito, Yamaha and Yanagisawa, just to name a few. All saxes do not use the same size of pads or the same thickness of pads. So, back to the photo. In not too many years past this collection of pads would have cost me $400.00 to $500.00. As prices have sky-rocketed on all things, you are now looking at $1000.00 worth of pads!!! They all came to me yesterday in a 7” x 7” x 6.5” box. I don’t usually get too many complaints about what I charge for instrument repair but in case you wonder way things cost what they cost; this is part of the reason.


Look Who was in the shop today!!!
This a photo of me and saxophonist Walt Weiskopf, of course in my shop. He is rarely here to get his sax worked on because he is always touring, composing and teaching. He tours all over with his own quartet and he is also the sax player for Steely Dan! A tremendous player and a great guy. To find out where he’s playing next and to simply learn more about him just check out waltweiskopf.com.

All the old pads from a saxophone and a couple of new pads
I am in the process of repadding a Yamaha YTS-23 tenor saxophone which is a student model instrument. On the upper part of the photo there are the 24 old pads that I just removed from the instrument. Below those 24 funky, mold ridden and older looking pads are 2 brand new sax pads. I thought it would be interesting to see the difference between the “old” and the “new”. I’ll be finishing the repad soon with 24 new super supple pads installed on this horn. When completed the instrument should play as good as it did when it was new. You might think that some of the older pads don’t look that bad, but I can assure you that they were all leaking badly. If the pads on your instrument haven’t been changed or at least looked at by a repair person in a year or two, I guarantee that you have leaks in your horn. You’ve just gotten used to the leaks. Call my shop at 434-973-4299 and let me take a look at your instrument. If you don’t have any leaks, then I’ll see you next year.

Actually, I just finished the complete repadding of this sax so, here it is. I know you can’t see the pads, but they are all brand new and the sax has been completely cleaned, regulated and adjusted. Also, just to give you a reference point of the value of an instrument like this, the new version of this tenor sax, the YTS-26, sells for anywhere from $3200.00 to over $3400.00 brand new!

Local Student Receives a Professional Clarinet
Recently I had a customer, let’s call him Joe, bring in an older professional model clarinet, a Selmer “Series 10”. After checking the serial number, I discovered that this clarinet was made in 1972. During this time the “Series 10” was the Top of the Line if you wanted a pro-model clarinet. Buffet clarinets were certainly around, and Yamaha had not yet gained any prominence in the professional clarinet world. So, this customer asked what it needed to be put into excellent playing condition. After looking over the instrument it was quite apparent that it needed a complete overhaul which means, disassemble the instrument, clean each and every part, buff the keys, replace all 17 of the pads and replace all of the corks, which are numerous. This is a fairly costly and time-consuming job however when the procedure is completed, the clarinet will play as good as it did when it was brand new. Then Joe tells me to go ahead and do everything that is needed and once the work is done, find a deserving student and give it to them! Wow! This rarely ever happens. My search started by contacting a local clarinet teacher and a local band director. They both came up with the same name, Emma Shirilla. She is a junior at AHS and is planning to go to JMU and major in music once she graduates high school. Congradulations Emma!

A Badly Damaged Alto Sax
Well, here we have an alto saxophone that was severely damaged by, I assume, a fall. Here are the “Before” photos. The first photo on the left is how the instrument came to me. Obviously, the key which, happens to be the “low C” key, is not opening properly. The key guard above the key is also obviously bent and the tone hole below the key is bent. The tone hole is supposed to be flat so the key can cover it. Also, to the left of the tone hole you can see the key guard mount is bent into the body of the horn. The photo on the right is the exact same photo but I have put my leak light inside the horn. This is to illustrate how big the gap is between the key and the tone hole. Normally, when the key is closed you shouldn’t be able to see any light. Way too much light is visible here!

Now, here is the “After”. The photo to the left is showing that the “low C” key is now opening the way it should so the key can vent properly meaning, the low C note will sound the way it’s supposed to sound. Notice that the key guard above the key has been straightened and the tone hole below the key is perfectly flat, the way it should be. The photo to the right is showing the key in the closed position. You can’t see any light and that’s the way it should be.


Same scenario here in the “Before” photos. In the left photo the “low Eb” key guard is wickedly bent to the left. Also, the “low Eb” key is gapped open, and it should be closed. There are two reasons for that, the tone hole is warped and one of the posts holding the key is bent. In the photo on the right, again, my leak light shows just how badly the key is bent and how severely the key is leaking. Just to be clear, this type of damage makes this instrument unplayable and there is no quick fix.
“After” - It’s quite apparent that the key guard is noticeably straighter in the left photo. And in the right photo, the key and tone hole are perfectly flat so that no light is showing between the key and the tone hole. Very nice!


“Before” on the left photo. Here is an overhead view of the “low C” tone hole from the very first photo, in this post. I have removed the key, and you can see just how warped out of shape the “low C” tone hole really is. Plus, there is a clearer view of the dent under the key guard mount next to the tone hole.
“After” on the right photo. Here I have rounded and leveled the tone hole & raised the dent under the key guard mount and straightened the mount.

There was definitely a plethora of other things wrong with the sax from the fall that it took but I chose to address just these blatantly obvious problems.
Some of the Instruments that I have repaired.
Besides repairing band instruments for individual players here in Charlottesville, Richmond, Harrisonburg, Staunton, Waynesboro & Lexington….. basically, central Virginia, I also repair the instruments for the UVA Marching Band. This photo is of the Pep Band at the UVA Women’s Basketball game that Vanessa and I attended a few days ago. This band consists of about 65 members of the normally 250-ish member marching band. Now, these students are NOT playing their own instruments. If you play in the UVA Marching Band, you play an instrument owned by the university. Why? Well, there are 2 reasons. First, they want the instruments to all look the same. Except for the clarinets and piccolos, all the instruments are silver plated. It’s a cool look! Second, each group of instruments are the same brand meaning, the saxes are all Yamaha model 62’s which are professional model horns. The trumpets are all Bach model 37’s, also pro-model horns. The trombones are all Conn 88H’s, again, pro-model horns. Get the idea. I believe the belief is if they are all the same brand of instruments then they will sound the same. In other words, the instruments are not just a collecting of different brands that might or might not sound similar.
I have been doing their repair work for several years and look forward to continue doing it for several years to come.

A Flute Assembled and then Disassembled!!!
This is an intermediate model flute that is in the shop for a complete overhaul meaning, I will disassemble it, clean all the parts then replace all 17 pads and a plethora of key corks which are on every key plus the tuning cork which is in the head joint.
Obviously, the flute has 3 main body parts: the head joint which is the part with no keys and the hole where you blow into it, the main body which is the longest part with the majority of keys and the foot joint which is the shortest piece with just 4 keys.
Here is the flute completely disassembled. The body of this flute, the head joint, main body & foot joint are solid silver. The keys are German silver that are silver plated. Student model flutes are usually made of all German silver that is silver plated. In years past they were made of brass that was silver plated, or nickel-plated. I haven’t seen a nickel-plated flute in a long time.
These are the 3 parts of the flute, the body of the flute, that the keys are attached to. Without the keys they look pretty simple. The little things that look like needles or pins are the springs that hold the keys open or closed, depending on the function of the particular key.
Here are all the keys. This collection of keys or fingering system has developed over many years. The flute fingering system is called the Boehm system which was invented by Theobald Boehm in the mid-19th century. Boehm was an inventor and flute player himself. The very first flutes were simply a tube of bamboo or bone with holes drilled into them. As time went on a key was added here and then another key there until we have today’s flute. Even some of today’s flutes might have less keys that the one pictured, for example a student model flute for a beginning student. Conversely, a professional model flute might have an extra key or two than the one pictured here.


Straightening a Key Guard on an Alto Saxophone
There were a great number of things wrong with this sax but I’m only going to address the damage to the bell & bow key guard. That is the metal piece that covers the 4 largest keys on the bottom (bow) and bell sections of the instrument.
Here is a close-up of the area that I’m talking about. It’s supposed to be straight not bent out of shape.
In this photo I have straightened the key guard back to the way it is supposed to be.
Now, let’s look at it from a different angle. I have removed the key guard from the instrument, and you can see just how unlevel it really is. Not only does the key guard protect the larger keys from getting knocked out of alignment or bent, but it also controls the height that the keys open up. This affects the proper pitch of specific notes. If the keys are too open, then the notes could be too sharp (high) and if the keys are too closed then the notes could be too flat (low).
Now you can see the key guard straightened and reinstalled onto the saxophone. Now, I’m on to repair the other problems on the instrument.


A Wessex Contrabass Trombone
Over my 52 years of repairing band instruments, I have only seen a couple of these massive contrabass horns. Go to my “Michael Elswick FB page” to hear how it sounds. This customer was in town from Austin, TX for the holidays and had some problems with the hand slide so he came my way. The photos below will show the comparison of a regular trombone to a contrabass trombone.
This is a standard tenor trombone, actually a King 3B which is 46” in length.
And here is the contrabass trombone which is 61” in length. You can clearly see how much further the bell extends past the edge of the table than the tenor trombone and how much further the hand slide extends.
Notice the difference in the width & length of the of the hand slides. The tenor trombone hand slide is 32” long and the contrabass hand slide is 40” long.
The tenor trombone bell is 8” in diameter while the contrabass bell is almost 11”! This is one of the perks of this job, getting to see rarely seen instruments from time to time.


Christmas Clarinets
Here are 2 clarinet lamps that I just made for a customer. He brought me two older clarinets that I disassembled and cleaned. Then I mounted each of them on a piece of soapstone, installed the wiring and added a lamp shade and a bulb. You might notice that one lamp is slightly taller than the other. Well, the lamp on the right is a standard Bb (B flat) clarinet just like most students play in school bands. However, the clarinet on the left is pitched in the key of A, consequently it is slightly longer. These clarinets are more often seen in orchestral and operatic groups. Ho, Ho, Ho!

Before and After photos of an Olds trombone
Here we have an Olds trombone from circa 1969 - 1970 that has obviously not lived a good life. The owner is very sentimentally attached this instrument, and he definitely wants it fixed. So, here in the first photo you can see that the main body of the horn is pretty dang bent. I have seen worse, but not by much.
After more than an hour of bending and de-denting, I finally got it back into useable condition. In the process of straightening the bell some of the tubing came un-soldered so, I resoldered it. Plus, I raised and smoothed a plethora of dents that don’t show up in this photo.
This is a shot of the main tuning slide that is on the far right of the previous photo. Obviously, it is dented. When tubing is dented it can affect overall pitch of the instrument.
Here you can see that I raised and smoothed out the dents. Not that it looks dramatically better but, at least it will hopefully play a bit better in tune.
On to one of the other big problems with this horn. The water key a.k.a. spit valve is damaged beyond repair. Bad, Bad, Bad!
So, I replaced the whole assembly meaning, the w/k mount, which had to be soldered to the slide, the w/k itself, the screw to hold the w/k to the mount, the w/k spring and the w/k cork. Plus, I replaced the slide end bumper which is the little black thing at the very end of the slide.
I didn’t even address all the issues with the inside of the hand slide. The cleaning, the de-denting, the alignment of both inner and outer slides, yada, yada, yada! That took tons of time. Anyway, I think the customer will be happy.


Rejuvenating a silver plated Getzen Eterna II “700” Trumpet
This Getzen trumpet is an intermediate or maybe even an upper intermediate model instrument. It has not been taken care of for, apparently, quite a while. For example, 2 braces were missing, and 3 more braces were unsoldered or partially unsoldered. Also, the lead pipe was out of alignment with the rest of the horn. There were a few dents scattered throughout the body, so I smoothed them out. Plus, the slides and pistons moved slowly or not at all.
Here you can see the trumpet completely disassembled. And you can see how tarnished and dark the trumpet and all of its parts are. Of course, this is before I have cleaned it.
Now you see the trumpet completely cleaned, inside and out, and reassembled, ready to play. It looks dramatically better, and everything works the way it should. Plus, I replaced the finger ring and retaining screw on the 3rd slide. I like bringing instruments back to life.


Installing an Adjustable Finger Hook
I usually do Before & After photos but, I forgot to get the Before photo. This is an older Conn 8D French horn. The client wanted the original, stationary left-hand finger hook replaced with an adjustable finger hook. The original finger hook, sitting on the table, was soldered to the small silver plate underneath the new finger hook. So, I unsoldered it, cleaned off any excess solder and soldered on the mount to the new adjustable finger hook. That’s the piece with the 2 hex screws on it. Then you just slide in the new finger hook and tighten the hex screws. The hex key is also laying on the table. This is not a difficult repair, but it can become messy if you’re not careful.

Trombone Re-soldering Job
This is a Ventus VTB-10 Tenor Trombone with an “F” attachment. This is a brass instrument that has been lacquered. The round thing in the photo that is attached to the horn is a rotor and it is part of the “F” attachment. However, the trigger that activates “F” attachment has come unsoldered, disconnected, from the rest of the bell section. My job, should I choose to accept it, is to reattach the trigger section. Actually, the trigger section has another job. It is also the receiver for the hand slide section of the horn.
Here is the aforementioned trigger. I don’t know how it came to be unattached from the bell section, but I will reattach it using “soft solder”. This is how most all horns are put together, using soft solder. Soft solder is pretty strong and doesn’t require too much heat in the soldering process. Too much heat can burn the lacquer, which I try to avoid, if possible.
Here we have the finished product. The trigger/hand slide receiver assembly has been reattached to the bell section, as it is supposed to be.
Below you will see the photo with 3 blue dots. The single dot, to the left, is where the trigger assembly was resoldered to the bell section. The other 2 dots are showing a brace that was only partially soldered so, I leveled and resoldered it also. Some of the lacquer was compromised during the soldering process so, I buffed off the burnt lacquer and relacquered the area. The photo to the right is just a view from another angle. It came out pretty good and I was happy with the finished product.


Cleaning a Flute for a New Student
This is a Gemeinhardt “2SP” flute, which is a student model instrument, that recently came into the shop to be rejuvenated for a student. This photo shows the flute completely disassembled meaning, all the keys have been removed. This is the best way to show you the tarnish and grime, all the dark spots, on the body of the instrument.
This photo is of the flute after I cleaned all the main body parts. It looks much nicer, don’t you think? No more tarnish or dark spots.
Here, I have also cleaned the keys and reassembled the instrument. Plus, I added the other head joint to the photo. This flute comes with a straight head joint, which is standard for all flutes, and a curved head joint. The curved head joint is for younger, smaller students so you’re not having to reach out so far when holding the instrument. This makes it a bit easier on young arms.


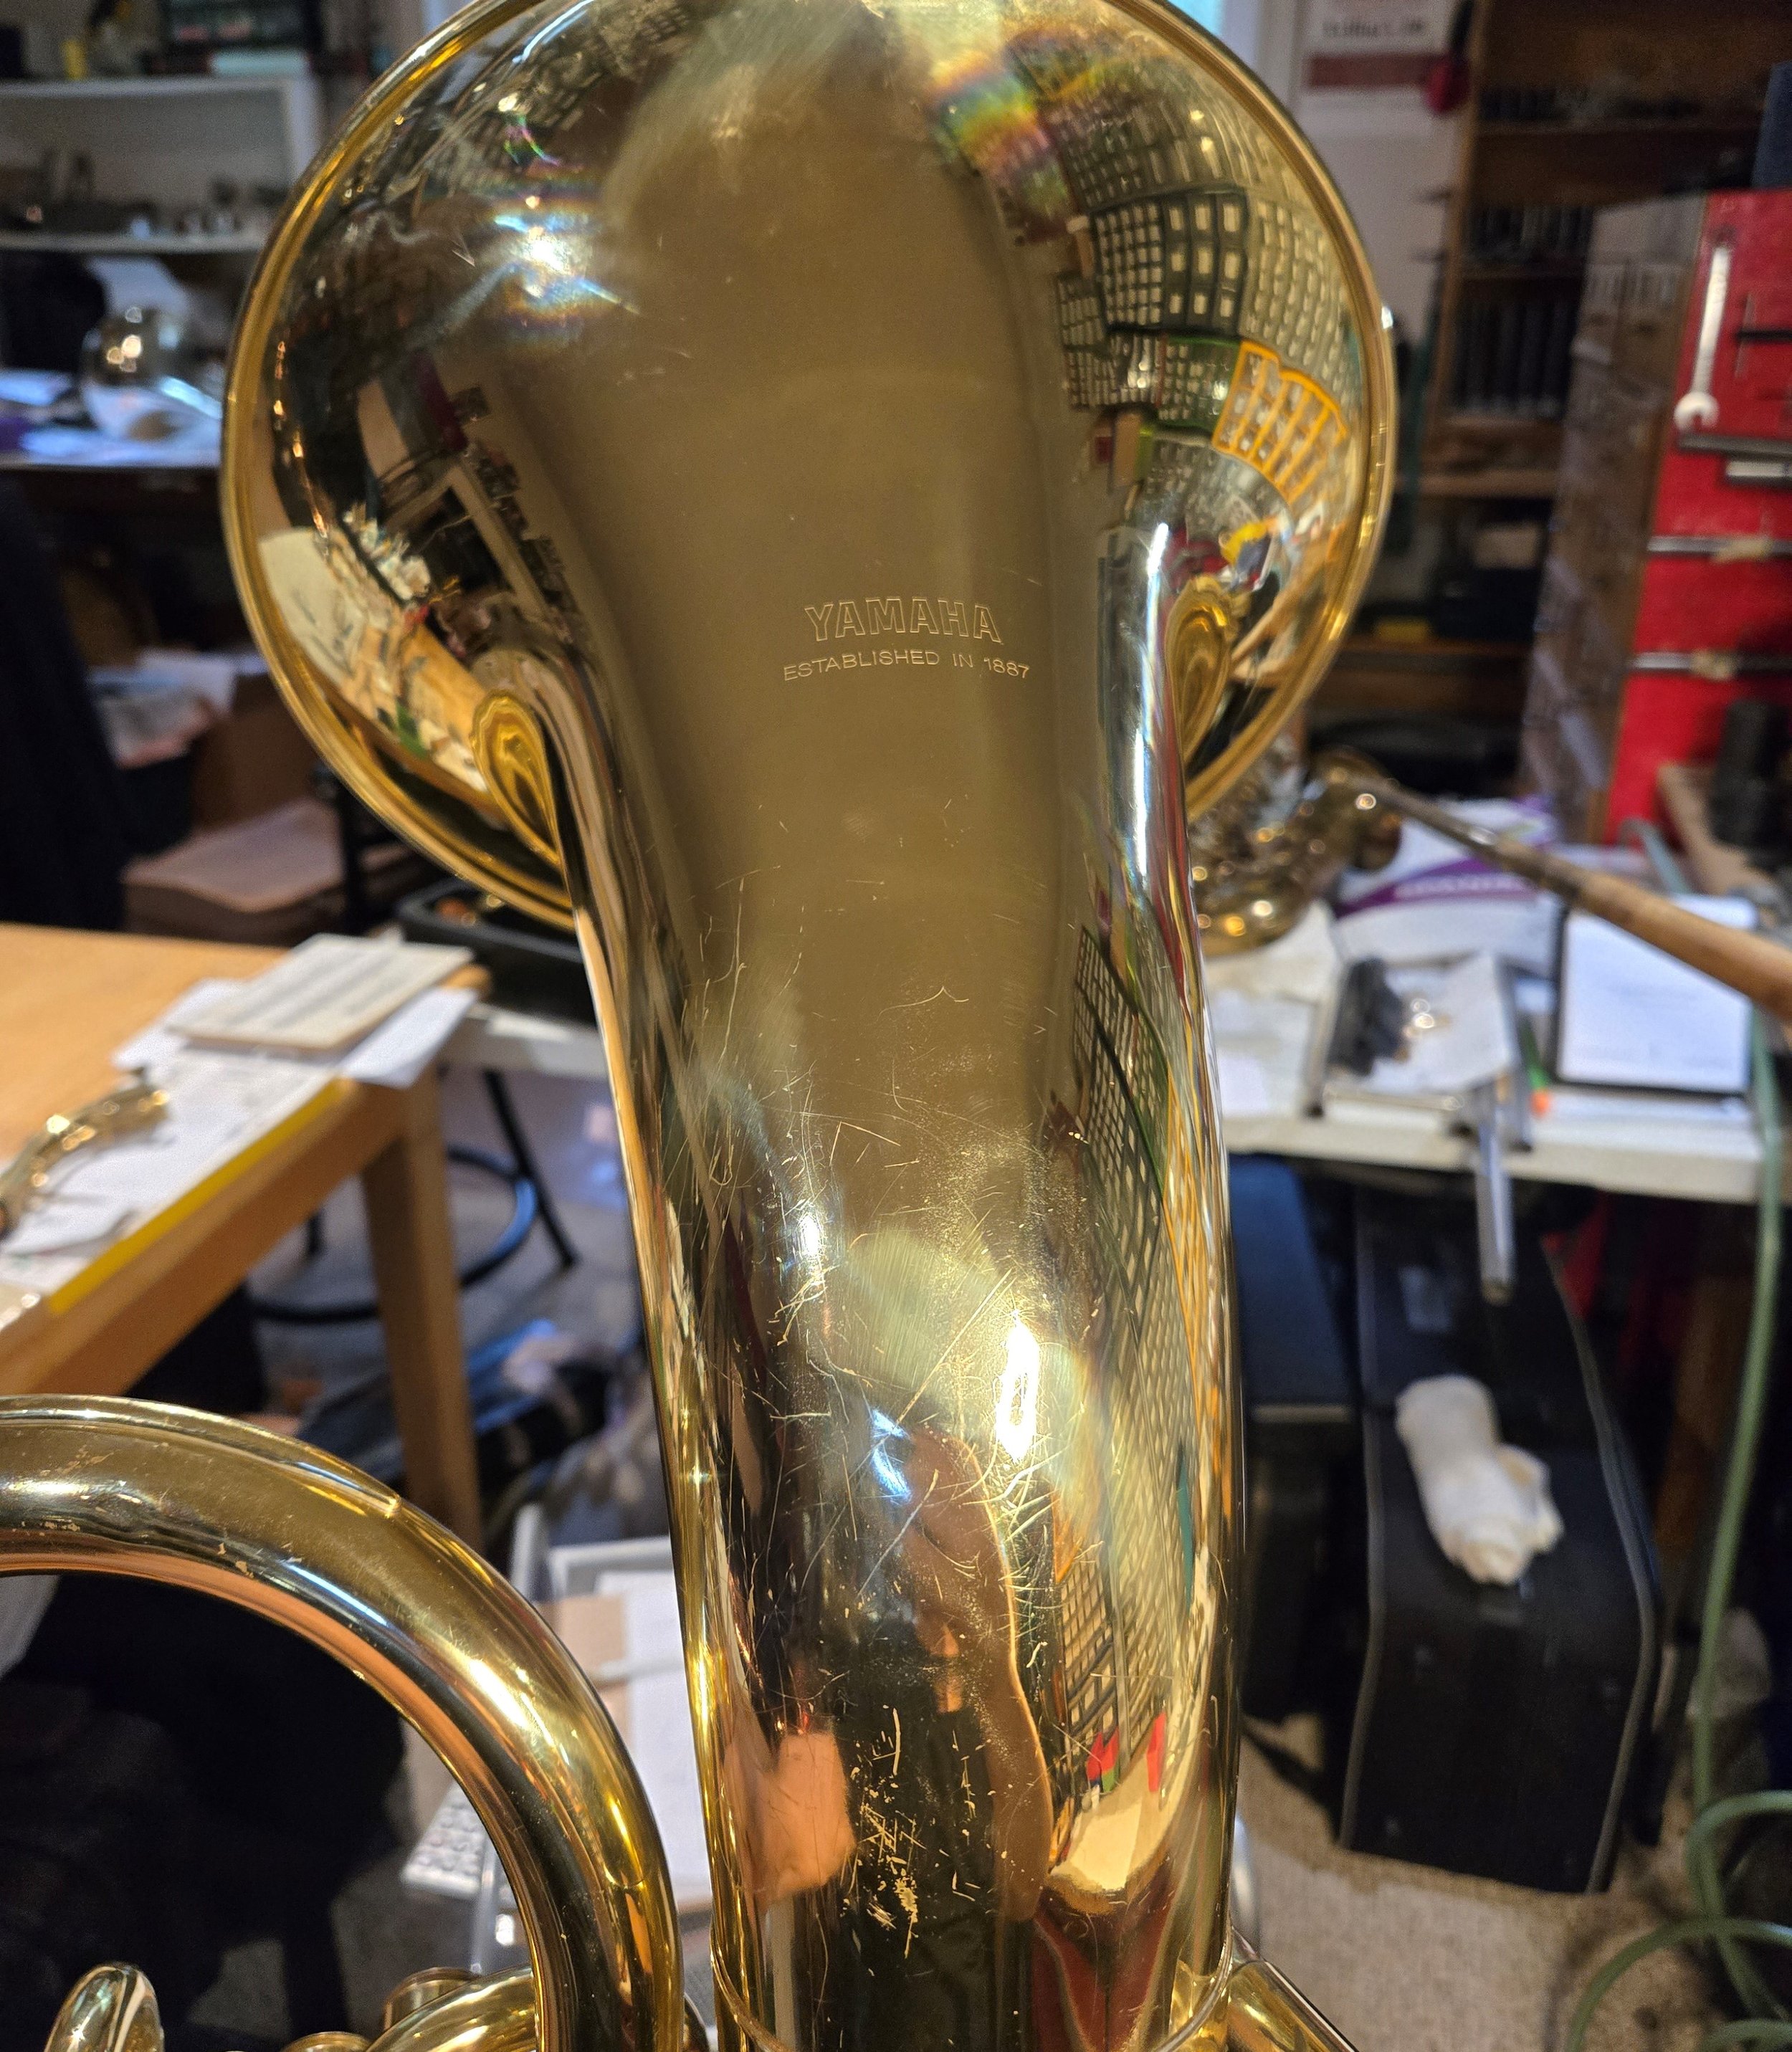
Yamaha YEP-211 Baritone Horn
For a little clarification, this baritone horn is a “brass” instrument. It’s like a small tuba. Sometimes people confuse it with a baritone saxophone which is a “woodwind” instrument. Now, with that out of the way…… this instrument has apparently been sitting in the instrument storage room of a band room for several years. All the valves and slides were stuck, and it had numerous dents and bent tubing. It was in need of a lot of repair.
#1 - Obviously, the left photo is of some pretty grubby slides. They were a pain to extract from the horn so I could clean them. The right photo is of the slides dramatically cleaner.
#2 - The left photo is of the bell section of the horn that has been dented pretty severely. And, of course, the right photo is the bell section after I de-dented it. It took a bit of time to de-dent it because the metal, which is brass, is fairly thick.
#3 - These 3 pistons, valves, should move freely, but they do not. I used a procedure called “lapping” to refit the pistons to the casing that they are in. Lapping involves using a compound that is kind of like liquid sandpaper to remove dirt and dents. Now they work like new.
#4 - And finally, in the first photo the mouthpiece receiver and lead pipe are seriously bent. This is where the mouthpiece attaches so you can blow into the horn. There are a couple of problems here if this isn’t fixed, first, your head and neck get put into a funny angle while you’re playing the horn, which is not good. Second, the tubing is crimped which hinders the proper flow of air going into the instrument. This can affect the sound of the instrument and tuning of the horn. Also, not good. In the second photo, I have straightened the mouthpiece receiver to its original position and partially straightened the lead pipe to address the air flow issue. This will work for now however, at some point the lead pipe should be replaced.


1951 Conn 6M Alto Sax
Removing Bends and Dents…. and some re-soldering!
This group of “Before & After” photos will show some of the “prep work” that needs to be done to this sax before I even begin to think about leaks. new pads, adjustment, etc.
#1 - Left photo is one of the low C# posts and there is a dent under the post. This throws off the key that is attached to it and doesn’t allow the key & pad the cover the low C# tone hole properly, meaning it leaks. This is bad.
Right photo is after I raised the dent under the post. Now the low C# key & pad will work properly. This is good.
#2 - Left photo is showing a key guard mount. Obviously, there is a dent under the mount.
Right photo is of the undented area. Dang, it looks pretty good.
#3 - Here we get into some more extensive damage. Actually, there are 3 major things going on here. First, the key guard is bent and second, the guard mount that is soldered to the body of the sax has been dented in. Third, the tone hole has been dented and warped. Look at the next set of photos and you’ll see what I mean. It not as apparent in this photo.
#4 - I was able to re-round, straighten & level the low Eb/D# tone hole without removing the key guard. Plus, the green stuff is gone. In the process of straightening and de-denting the key guard, the guard mound that had the dent under it came unsoldered, and I had to re-solder it. I thought that might happen.
#5 - And I found one more dent hiding on the backside of the horn. Of course, the Left photo is of the dent. This dent was directly under the “F” key which is the right hand, forefinger key and it affects the height of “F” key. This is important because it affects the pitch of that note and all the notes below it. Of course, the Right photo is after I raised the dent. Again, looks pretty good!


Do you have dirty pistons or clean pistons?
These are 3 trumpet pistons (valves). The first photo is of the pistons when I just pulled them out of a trumpet. They are pretty dang grubby. Potential lifeforms are growing in the port holes of the pistons. You can detect these lifeforms by their lovely shade of green. The second photo is of a set of clean pistons. The lifeforms have been eradicated.
If one little speck of the green crud breaks loose and moves around between the piston and the casing, then this could foul the piston, so it sporadically moves or doesn’t move at all. Dirt is the enemy in brass world.
While we’re in the world of “Lifeforms in Trumpets” I decided to add 3 more recent photos of another trumpet that is getting ready to be cleaned.


Just a nice photo!
Not that this photo is anything musical or referencing anything musical, but I just liked it. It’s a photo that my wife, Vanessa, took. I believe that this is a tiger swallowtail butterfly or in Spanish, mariposa cola de golondrina tigre. Sorry, I’m learning Spanish so when I see or hear a new term or phrase, I try to learn it in Spanish.

A Recent Gig!!!
I recently performed at a wedding reception that was the most incredibly opulent display of wealth that I have ever seen in the past 56 years of playing music, and I have played at some “over the top” venues.
The first 3 photos are the venue where we played. It was built in 3 days before and specifically for the wedding reception. It was designed to accommodate 300 people for a sit-down dinner. The next 3 photos are of the elaborate table settings and the stage where we performed in the center of the room. I was performing with a jazz quartet.
The next 3 photos are of the room behind where we were performing. It had a dance floor and a stage for a band that was flown in from Paris, and I don’t mean Paris, Kentucky! The last of those 3 photos is the bar in that same room that took up the whole wall.
The first of the last 3 photos are, of the food prep area. This is where they “plated” the food before it was delivered to the tables. There was over 100 caters, wait staff & bartenders at this event, all from northern Virginia, D.C. & Maryland, none from the local area. Oh, there was also a couple of make-up artists to touch up the guest’s make-up if needed. The last 2 photos were of the transport that shuttled us from the venue to our vehicles. A bar and 2 TV’s were built into the van but no damn alcohol! We were not permitted to drive directly to the place where we performed. Well, that was my weekend.


An Eb Tuba (An E flat tuba)
The far-left photo is yes, an Eb tuba. This Besson Eb tuba, Besson is the brand name, is 30” tall. Most tubas you see are Bb tubas or sometimes referred to as BBb Tubas, “double B flat tubas” which are much bigger. They can range in sizes from 40” up to 45” and I’m sure there are even bigger tubas. The second tuba photo is also an Eb tuba that lives on my front porch and serves as a planter and a Christmas ornament holder during the holidays. It’s useful, playable lifetime has long since passed so now it has become a topic of conservation. Tubas weigh between 20 - 30lbs, again, depending on the size and thickness of the brass.
Many times, people confuse a tuba with a sousaphone. The photos below the tubas are all sousaphones. The 1st photo is obviously a BBb Fallopian Tuba (sousaphone) which is made of brass. My wife snagged a photo of this at The Women’s March in Washington, D.C. a few years ago. Notice that the sousaphone is sitting on the woman’s shoulder. Unfortunately, the little play on words perpetuates the incorrect belief that a sousaphone is a tuba. Anyway, tubas are not so good for marching. The 2nd photo is also a standard brass sousaphone without any covering over the bell section. And the 3rd photo is a white, fiberglass tuba. Fiberglass sousaphones are lighter than brass sousaphones and since they sit on your shoulder, they are much easier to carry over long distances, like a parade that goes on forever and ever. Sousaphones are around 13’ to 18’ in length, depending on the diameter and thickness of the tubing and brass ones can weight up to 50 lbs.


Contrabass Flute!!!
Unless you’re in a flute ensemble of some sort you will rarely see a contrabass flute. This one was in the shop from Richmond, VA. for a little soldering work. Of course, I couldn’t help but take a few photos before it got picked up.
From the 1st photo it’s kind of hard to tell exactly how big it really is. I mean, in its case it doesn’t really look that big, does it?
This particular instrument is made by the company DiZhao in Tianjin, China. From my research, Mr. DiZhao teaches everyone, himself, how to make these flutes. The line of copy that I read actually said, “The workers are all superbly trained by directly by Mr. Zhao”.
I believe that this particular contrabass flute costs $10,000.00. Wow! Such a deal, I think I’ll take two!
In photo #2, I measured this “bad boy” from top to bottom and it is 6 feet. If you straightened the flute out it would measure as a staggering 8.91 feet. Just as a reference point, a regular flute that you see every day is 26 inches long. The contrabass is 107 inches long. That’s slightly longer than 4 regular flutes.
In photo #3, I have the contrabass standing next to a flute lamp that I made for my daughter. This flute lamp is made from 3 regular flutes.
I thought you might like to see this unusual instrument.


Trombone slide with a “CRACK” in the crook
This is the hand slide from a Bach model 36 trombone which are nice horns. The instrument was in here for a dent to be removed further up the slide. I did that and then discovered this pretty serious dent in the crook of the hand slide, 1st & 2nd photos. The crook is the very bottom of the hand slide. At this point I checked the compression of the slide meaning; how airtight the slide is. It was not airtight which means there is a hole in the tubing somewhere. So, I raised the dent and discovered a crack in the metal, 3rd photo. From here I cleaned the area around the crack, and I took a piece of brass and made a small patch. Next, I soldered the patch in place, cleaned up the area and sprayed a clear lacquer over the area to keep the brass from oxidizing.


A Yamaha YAS-23 Alto Sax Disassembled
I am in the process of repadding this sax and before I put too many of the keys back on it, I thought I would show you what a disassembled alto sax looks like. This instrument has 24 keys with pads. The pads sit in the pad cup which is the round part of the key. Pads are the leather thingies that cover the tone holes on the body of the horn. There are another 7 keys on this horn that do not hold pads and 3 more key guards, which are on the upper left of the photo. Some saxes have more keys than this but since this is a student model instrument the number of keys and mechanisms are more basic.
At this point I am only part way through the repadding process. I have disassembled the instrument, taken out all the old pads and taken off all the old key corks, which are numerous. I have leveled all 24 of the tone holes and several of the pad cups that were unlevel. Next, I washed everything and then I buffed all of the keys. Now I am ready to start the repadding and recorking process. This is the part that is the most time consuming.

Upcoming Gigs!
MUSIC THIS WEEK:
THURSDAY, 7/18 - I'll be performing with the Paulien Quartet at Stinson Vineyards from 6 - 9p. If you've never been it's in Whitehall, where Sugar Hollow road starts. Come check it out.
4744 Sugar Hollow Rd. Crozet, VA
SATURDAY, 7/20 - The Michael Elswick Gathering will be performing at Glass House Winery from 5 - 8p. We will be performing inside. Great wine, great views and an all-glass room where we perform hence, Glass House Winery.
ME - saxes
Bill Edmonds - guitar & vocals
Liz Barnes - keyboard
Tom Harbeck - bass
David Drubin - drums
5898 Free Union Rd., Free Union, VA

A Carbon Fiber Trombone
Here’s something you don’t see every day. This is a Butler carbon fiber bass trombone. Well, the bell section and the tuning slide crooks, the black parts, are made from carbon fiber. The other parts are obviously made of brass which is the goldish tubing and the rotors. The rotors are the 2 round things with the metal linkages attached to them. It was brought here with a minor issue with 1 of the rotors. By the time the customer arrived here the rotor problem had somewhat subsided. So, I did some oiling of the rotors & the linkages and everything seemed fine. Always fun to see new and exciting instruments. The only thing I have that is made from carbon fiber is one of my bicycles.

A set of rods from a clarinet
What you are looking at is most, but not all, of the rods from a Yamaha clarinet. These rods hold the keys in place on the instrument. I have these rods arranged in pairs. The upper rods are covered with rust, yes rust. The lower rods are brand new rods that I am using to replace the rusted rods. Now, it’s not as easy as unscrewing the rusted rods and replacing them with the new rods. The rusted rods were actually rusted to their keys. It took me a couple of days to free the rods from the keys. I used a procedure where I apply the Aerokroil, “The Oil That Creeps” to every part of the rusted key then I have a device like a soldering gun that I use to heat the key. This causes the rust to slowly start separating from the key. I do this over and over until I can get the rod to start turning.
One of the keys, the register key, was not as lucky as the others. The register key is on the back of the upper joint of the clarinet and is activated by your left thumb. I was unable to free the rusted rod from the key so, I took a jewelers saw and sawed the key off of the instrument! Fortunately, I had an exact replacement key and rod in stock.
On the 2 lower photos you can see where the rod is still stuck inside the key barrel. Now you understand the excitement that I get to experience each and every day here in my shop.
On top of this, the clarinet came into the shop because it had a crack in the upper joint. In the process of repairing the crack I discovered that all the keys were rusted into place. It became a Pandora’s Box scenario.


A few repairs on a bass trombone
Here are just a few things that I had to do on a recent repair of a Yamaha YBL-621 RII bass trombone. This is an older professional model instrument that is still in very good condition.
Obviously, photo #1 shows the rotors that I just pulled from the horn which were pretty grubby. Photo #2 shows the rotors after I cleaned them. Clean rotors move more freely which is what you want.
This is one of the tuning slides to one of the rotors. Each rotor has its own separate tuning slide. Photo #1, as I was cleaning this slide, I noticed that one of the inner slides was loose, meaning that it was unsoldered from the slide crook. So, in photo #2, I resoldered it.
This is another one of the tuning slides to the other rotor. Photo #1, same scenario, as I was cleaning this slide, I noticed that one of the inner slides was loose, meaning that it was unsoldered from the rest of the slide. So, in photo #2, I resoldered it. Also, bear in mind, I don’t just “resolder the inner slide” back to the main part of the slide. These inner slides have to slide into their matching outer slides that are attached to the main body of the trombone. This means that the alignment of the inner slides has to be perfect. The inner slides have to align left to right, up and down, in other words, perfectly parallel.
This is actually the first slide that I previously mentioned. Besides having an inner slide unsoldered, it also had a fairly good-sized dent, photo #1, which could potentially affect the pitch of the instrument. So, in photo #2, I raised the dent.


Music This Weekend!!!
The Michael Elswick Gathering will be performing on Saturday, 6/15 at Glass House Winery from 5 -8p.
We play a variety of blues, jazz, Latin tunes and fusion. The crew-du-jour will be:
ME - saxophones
Bill Edmonds - guitar & vocals
Eric Franzen - keyboard
David Drubin - drums
Glass House Winery - 5898 Free Union Rd., Free Union, Va. - 434-975-0094
Great venue, great wine, beautiful views

A Former Client of Mine!!!
Below, I am pictured with Micayla Rawling. While she was in middle school and high school her parents would bring her to my shop to get her piccolo repaired. During this time, I would see her on the downtown mall busking. The money that she was earning eventually was used to buy a nice flute from me. Since then, she has graduated from Interlochen Arts Academy and is now attending The Royal Danish Academy of Music in Copenhagen. Last night she was back in town and performed a wide repertoire of flute and piccolo music spanning over a 300-year period. It was an excellent performance, and I am glad that Vanessa and I were able to attend.
When I am repairing a young students instrument, I rarely know where they will end up musically. I was gratified to see her progress and mastery of the instrument. Go Micayla Go!!!

An Albert System Clarinet in the key of A
This is a Holton “A” clarinet that was made in the late 1890’s and it has a fingering system that you rarely see, it’s called the Albert system. The Albert system dates back to the early 19th century. The Albert system is still used, mainly by clarinetists who perform Belarusian, Russian, Ukrainian, Greek and Turkish folk music, Klezmer, and Dixieland styles. Often these musicians prefer the Albert system due to the ease of slurring notes provided by unkeyed tone holes. Actually, back in 2000 I was in Munich, Germany for a couple of weeks and I saw an accordion player and a clarinet player playing in the center of town. The clarinet player was wearing lederhosen, an Alpine hat with a feather in it and playing an Albert system clarinet. How quaint!

Just to compare, the photo below has the same Albert system clarinet and directly below it a standard Bb clarinet like you see every day. Notice the different key placement, the different number of rings and the ring placement.
I played the Albert system clarinet for a while and frankly, I think it’s cumbersome and awkward. Plus, it has less keys than a current day clarinet meaning fewer alternate fingerings. And what does that mean? That means that certain “difficult to play” musical passages might be almost impossible to play on the Albert system clarinet but relatively easy to play on a Bohem system clarinet. One of the things that I really like about this business is seeing instruments this old that can be brought back to life.

A Piccolo, a Flute & an Alto Flute
A customer just came in with these 3 members of the flute family and I just had to take a picture of them. I also have these 3 instruments listed on this website page under Family of Instruments, Flutes, but I think this photo gives a much better prospective. Most people normally see the middle instrument, the regular flute or the “C” flute. The piccolo is a bit less common but still periodically seen. However, the alto flute is much rarely seen unless, for example, you happen to see a flute choir.

A Disassembled Trumpet
Here we have a Bach, model 37, trumpet, circa 1975. This is a professional model instrument and very sought after by professional players. A brand new one costs around $3400.00. It’s in the shop for a bit of rejuvenation. In the process of disassembling, it I thought I would break it down into all its individual parts so you could see how many pieces there really are. For me this is an everyday thing but for you, you always see the trumpet completely assembled.
1st photo - The 3 pistons (valves) from the top down: valve stem, finger button, top cap & valve spring, valve felt & valve guide, piston (valve) and bottom cap. So, each of the 3 pistons have this number of parts. To the right of the pistons are the tuning slides. This trumpet has 5 tuning slides, but most have only 4. To the right of the slides are 2 trumpet mouthpieces.
2nd photo - All those parts have to attach to something and that’s the trumpet itself. This trumpet is a brass instrument that has been buffed to be a high luster and then lacquered. The lacquer keeps the brass from tarnishing or oxidizing or in other words, the lacquer keeps the horn shiny. Now, after 49 years the lacquer has given up in a few spots. For example, in the 3rd photo, look at the lead pipe, right in front of the 3 valve stems. The white specks are where lacquer has come off of the metal. Obviously, I did a much better lighting job in the 3rd photo.
3rd photo - This is the trumpet fully cleaned plus oiled and lubed. From a performance standpoint this instrument should play as well as it did when it was new. Besides fully cleaning the horn inside and out, I also checked the compression of the valves, making sure they are as airtight as they can be. I also check all the slides and the lead pipe for leaks. The lead pipe is the long tube with the hook on it. The trumpet mouthpiece connects to the left end of this tube.
In addition to all the cleaning and repairing, I also installed a new case handle.


Don’t leave clarinets alone in a dark basement!!!
There were only 2 clarinets here last night. Now look! There are 44 clarinets inhabiting my shop!! Actually, last week a local school brought me 44 clarinets to repair before school or, actually, band camp starts. No problem. I’ll have them done in plenty of time.

Always Check the Inside of Your Sax
This past weekend I played Friday night, Saturday night and Sunday afternoon. This morning, I decided to do a couple of repair things to my Selmer tenor sax. I happened to look inside the bell and all the way down, at the bottom of the bell, this is what I found. Apparently, I unknowingly received a tip sometime during the past 3 days

Music This Weekend
FRIDAY, 5/17/24 - I'll be performing with a 19-piece, traditional Big Band called Sentimental Journey. We will be performing at The Pub at Lake Monticello from 6 - 8:30p, and we'll be playing tunes from the 40's, 50's & 60's. This is a great group with a male & female vocalist, 5 saxes, 4 trombones, 4 trumpets, piano, guitar, bass & drums. It's like swinging back to the days of Duke Ellington, Count Basie, Harry James and Benny Goodman.... to name just a few.
The Pub is at 51 Bunker Blvd, Palmyra, Va.,
434-591-0106 - Call for reservations & there is a $10.00 cover.
SATURDAY, 5/18/24 - I'll be performing with my group, The Michael Elswick Gathering at Glass House Winery from 5 - 8p. Of course, the crew-du-jour will be:
ME - saxes
Bill Edmonds - guitar & vocals
Eric Franzen - keyboard
David Drubin - drums
Glass House Winery is at 5895 Free Union Rd., Free Union, Va.
434-975-0094

A Regular Bb Clarinet and an Extra Long Bb Clarinet
The lower clarinet in the photo is a standard, student model Yamaha. The lowest note that it will play is a low E. That’s the key to the far right in the photo. This instrument is 23.5 inches long. The upper clarinet is a professional model Buffet clarinet which has several additional keys. However, the one we’re looking at today is the key to the far right of the photo. This is a low Eb key. Consequently, the lower joint, the section where this key is attached is about an inch longer, 24.5, to accommodate this extra key. Even after repairing band instruments for 51 years, I have rarely seen one of these extra-long clarinets. I like unique instruments and this one falls under that category.

How-To Festival at The Jefferson-Madison Regional Library
Tomorrow, Saturday, May 4th I will be participating in the How-To Festival at the JMRL at 201 E.Market Street. There are three 1-hour segments…. 10am, 11am & noon. I’ll be there to discuss Woodwind + Brass Repair and my segment will be from 11 to 11:45am on the Main Floor of the library. Please come by and check it out. Don’t be late or you might miss something new and exciting.

A Saxophone in the process of being repaired!!!
This is a 1946 Martin Tenor Sax, actually, it is technically “The Martin Tenor,” as engraved on the bell. I thought I would show some of the prep-work that I have to do before getting to the repadding, recorking, regulating and adjusting. There are 4 sets of Before & After photos.
#1 is the bottom of the sax which is called “the bow” and it had some dents in it. There are several smaller dents, but the biggie is the oblong looking dent with scratches around it. This is a location on the horn that is not very accessible so, I use a tool called The Dent Eraser which is a steel ball that goes inside the horn and a large, powerful magnet on the outside of the instrument. The magnet pulls on the steel ball and normally, raises the dent pretty nicely.
#2 The left photo is on the upper part of the horn. These are the high F, D# & D tone holes that have mold on them. That’s the green stuff. Plus, the body of the horn is dusty and dirty. The right photo is after the cleaning and de-molding.
#3 This is down the back of the main body of the horn. This is a key guard mount that has dented the body. This mount is also unsoldered from the body, which is not apparent in this photo. The right photo is showing the body de-dented and the mount resoldered. The streaking of the lacquer is a byproduct of raising the dent, which causes old lacquer to separate from the brass body, plus, the discoloration is a product of soft soldering the guard mount/post back to the body. Even though I used a heat gun to solder the pieces together, much lower in heat and no open flame, as opposed to an acetylene torch, still, old lacquer just doesn’t do well during this process.
#4 We’re back to a different section of the bow, the low D# key guard. It obviously took a whack and was bent. This was hindering the key from opening properly. This key guard is soft soldered to the body of the horn in 3 spots. Luckily, I was able to straighten the guard without busting loose any of the 3 solder spots.
Now I can start reassembling the horn and repadding it.

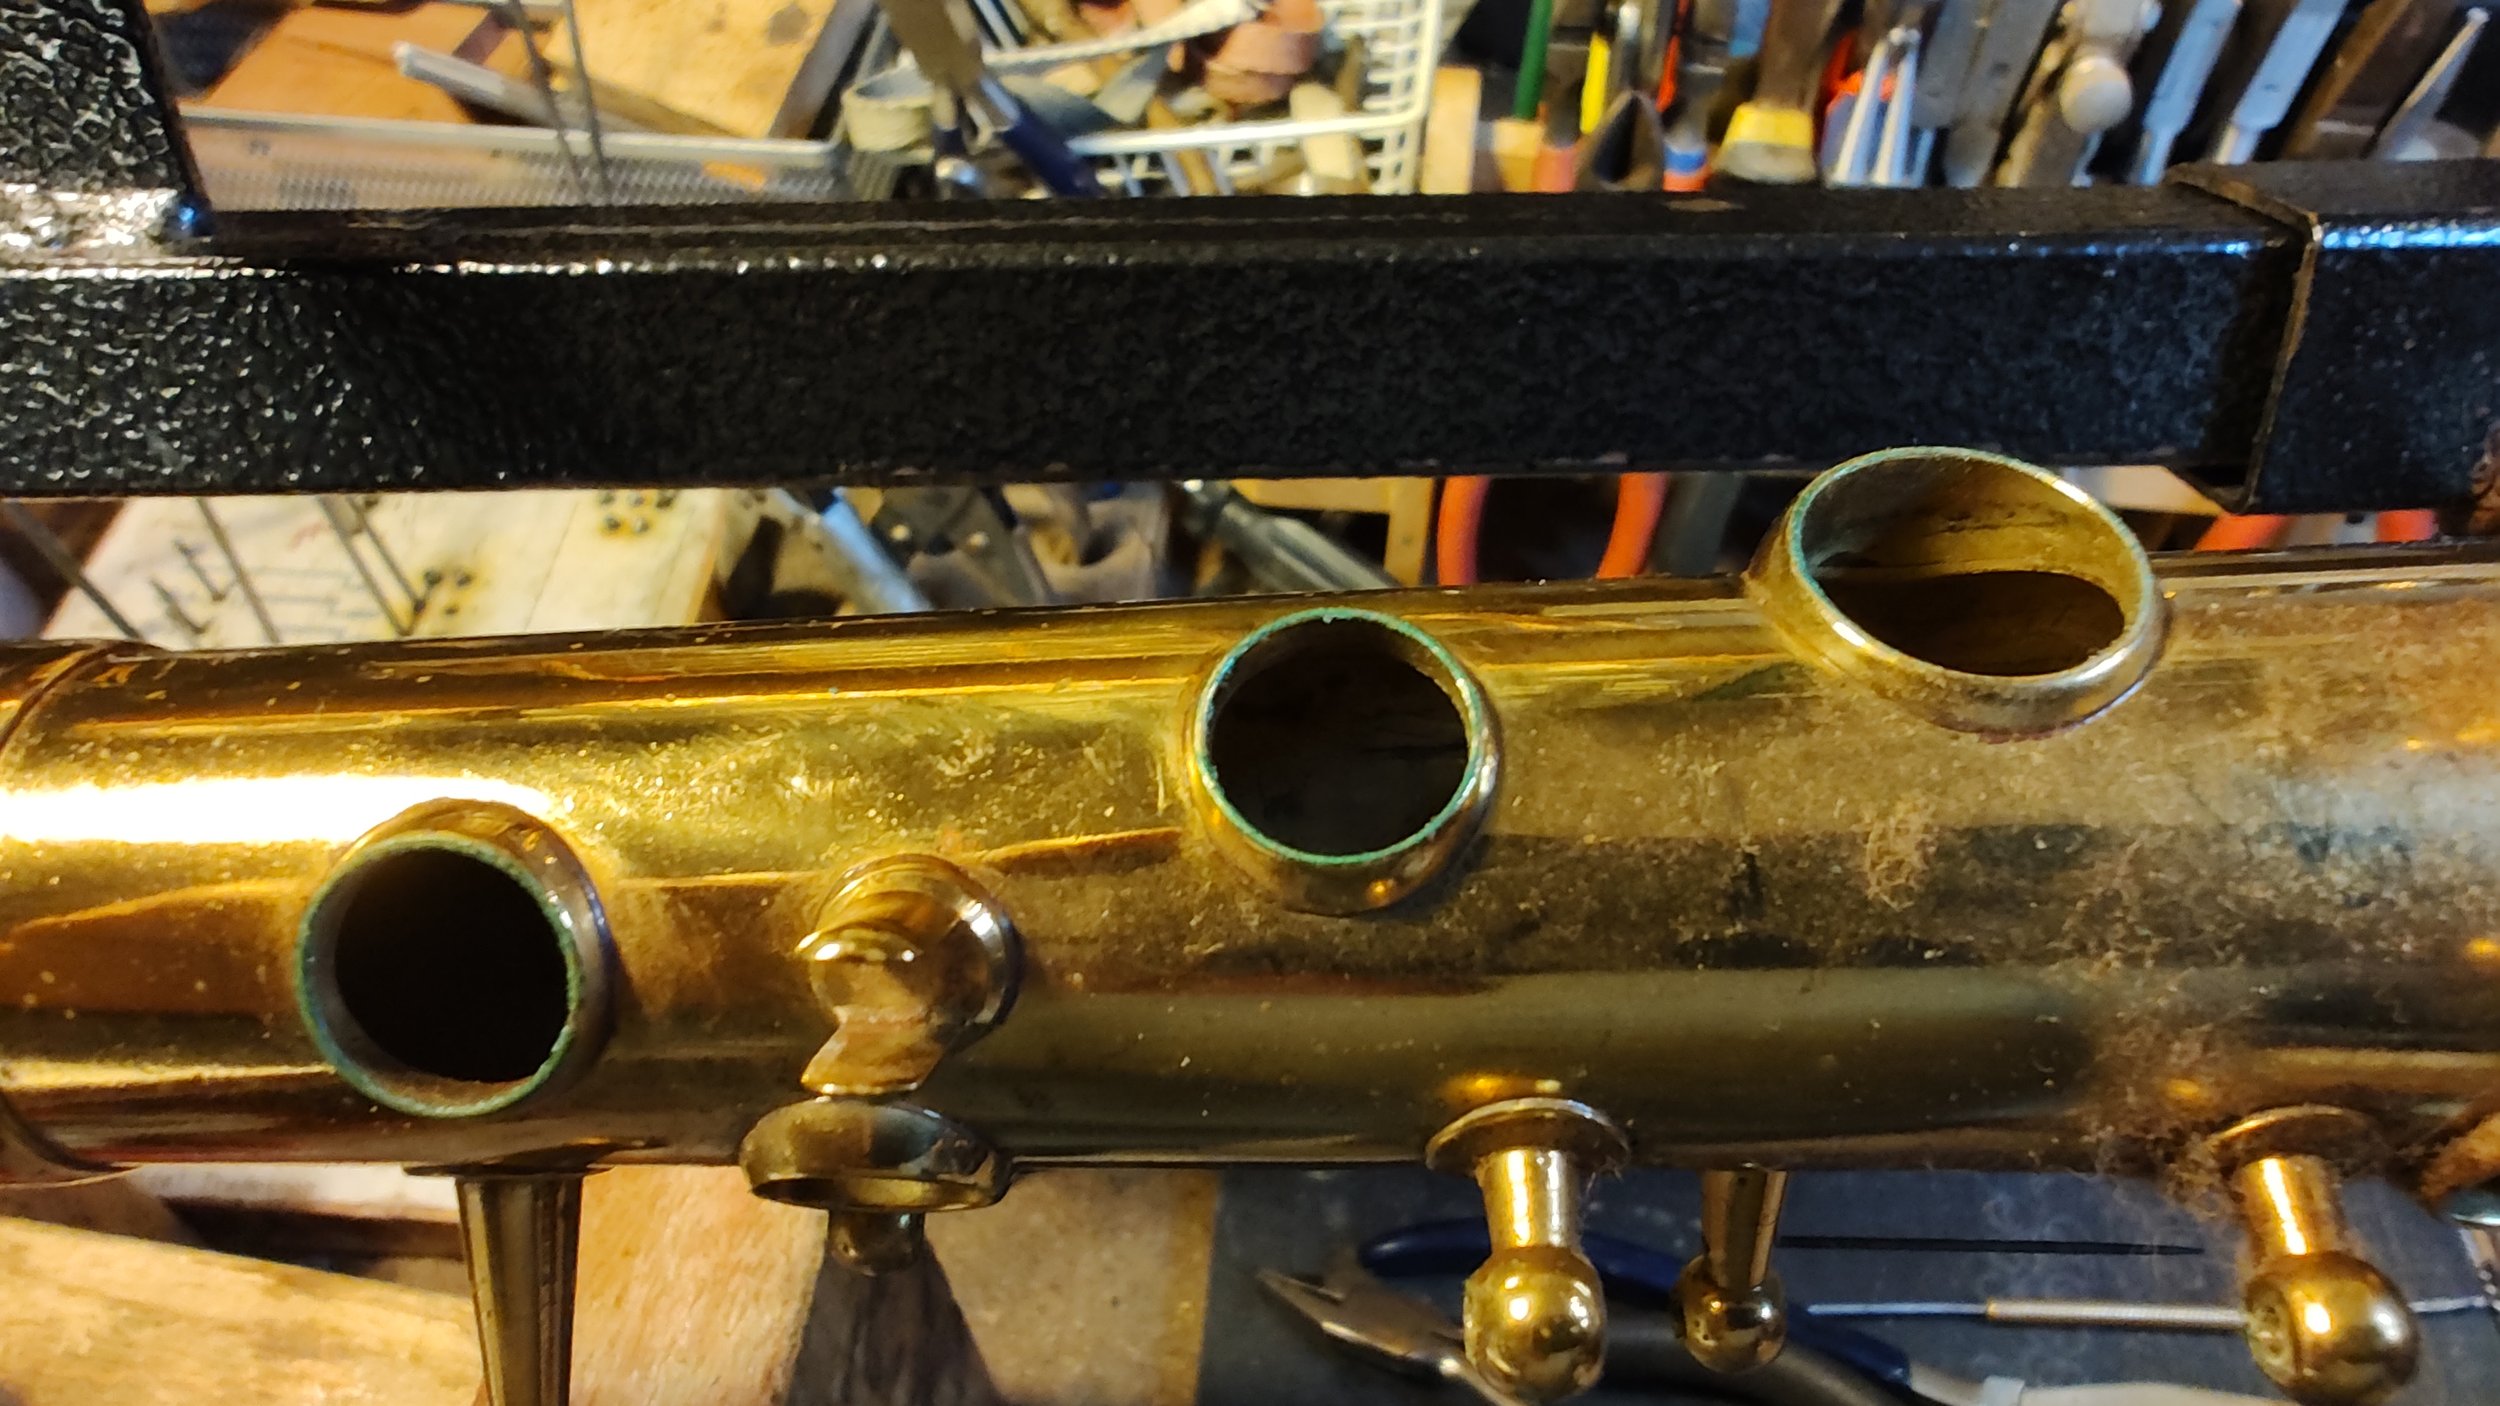


Don’t Run Over Tubas With Your Car!
Here we have a very nice Mirafone tuba from the mid-70’s that accidentally got backed over. Mirafone is the brand name. The photos are arranged in a “Before & After” format meaning, the photo on the left is “Before I repaired it” and the photo on the right is the “After I repaired it”. By the way, the metal on this instrument is very thick and was difficult to manipulate. I have some special tools that help assist me with this type of repair and also I have biceps of steel!!! I shouldn’t have to say “Don’t try this at home” but just in case, “Don’t try this at home”. I can de-dent any metal instrument meaning saxophones, trumpets, flutes, French horns, euphoniums, baritone horns, trombones, etc.


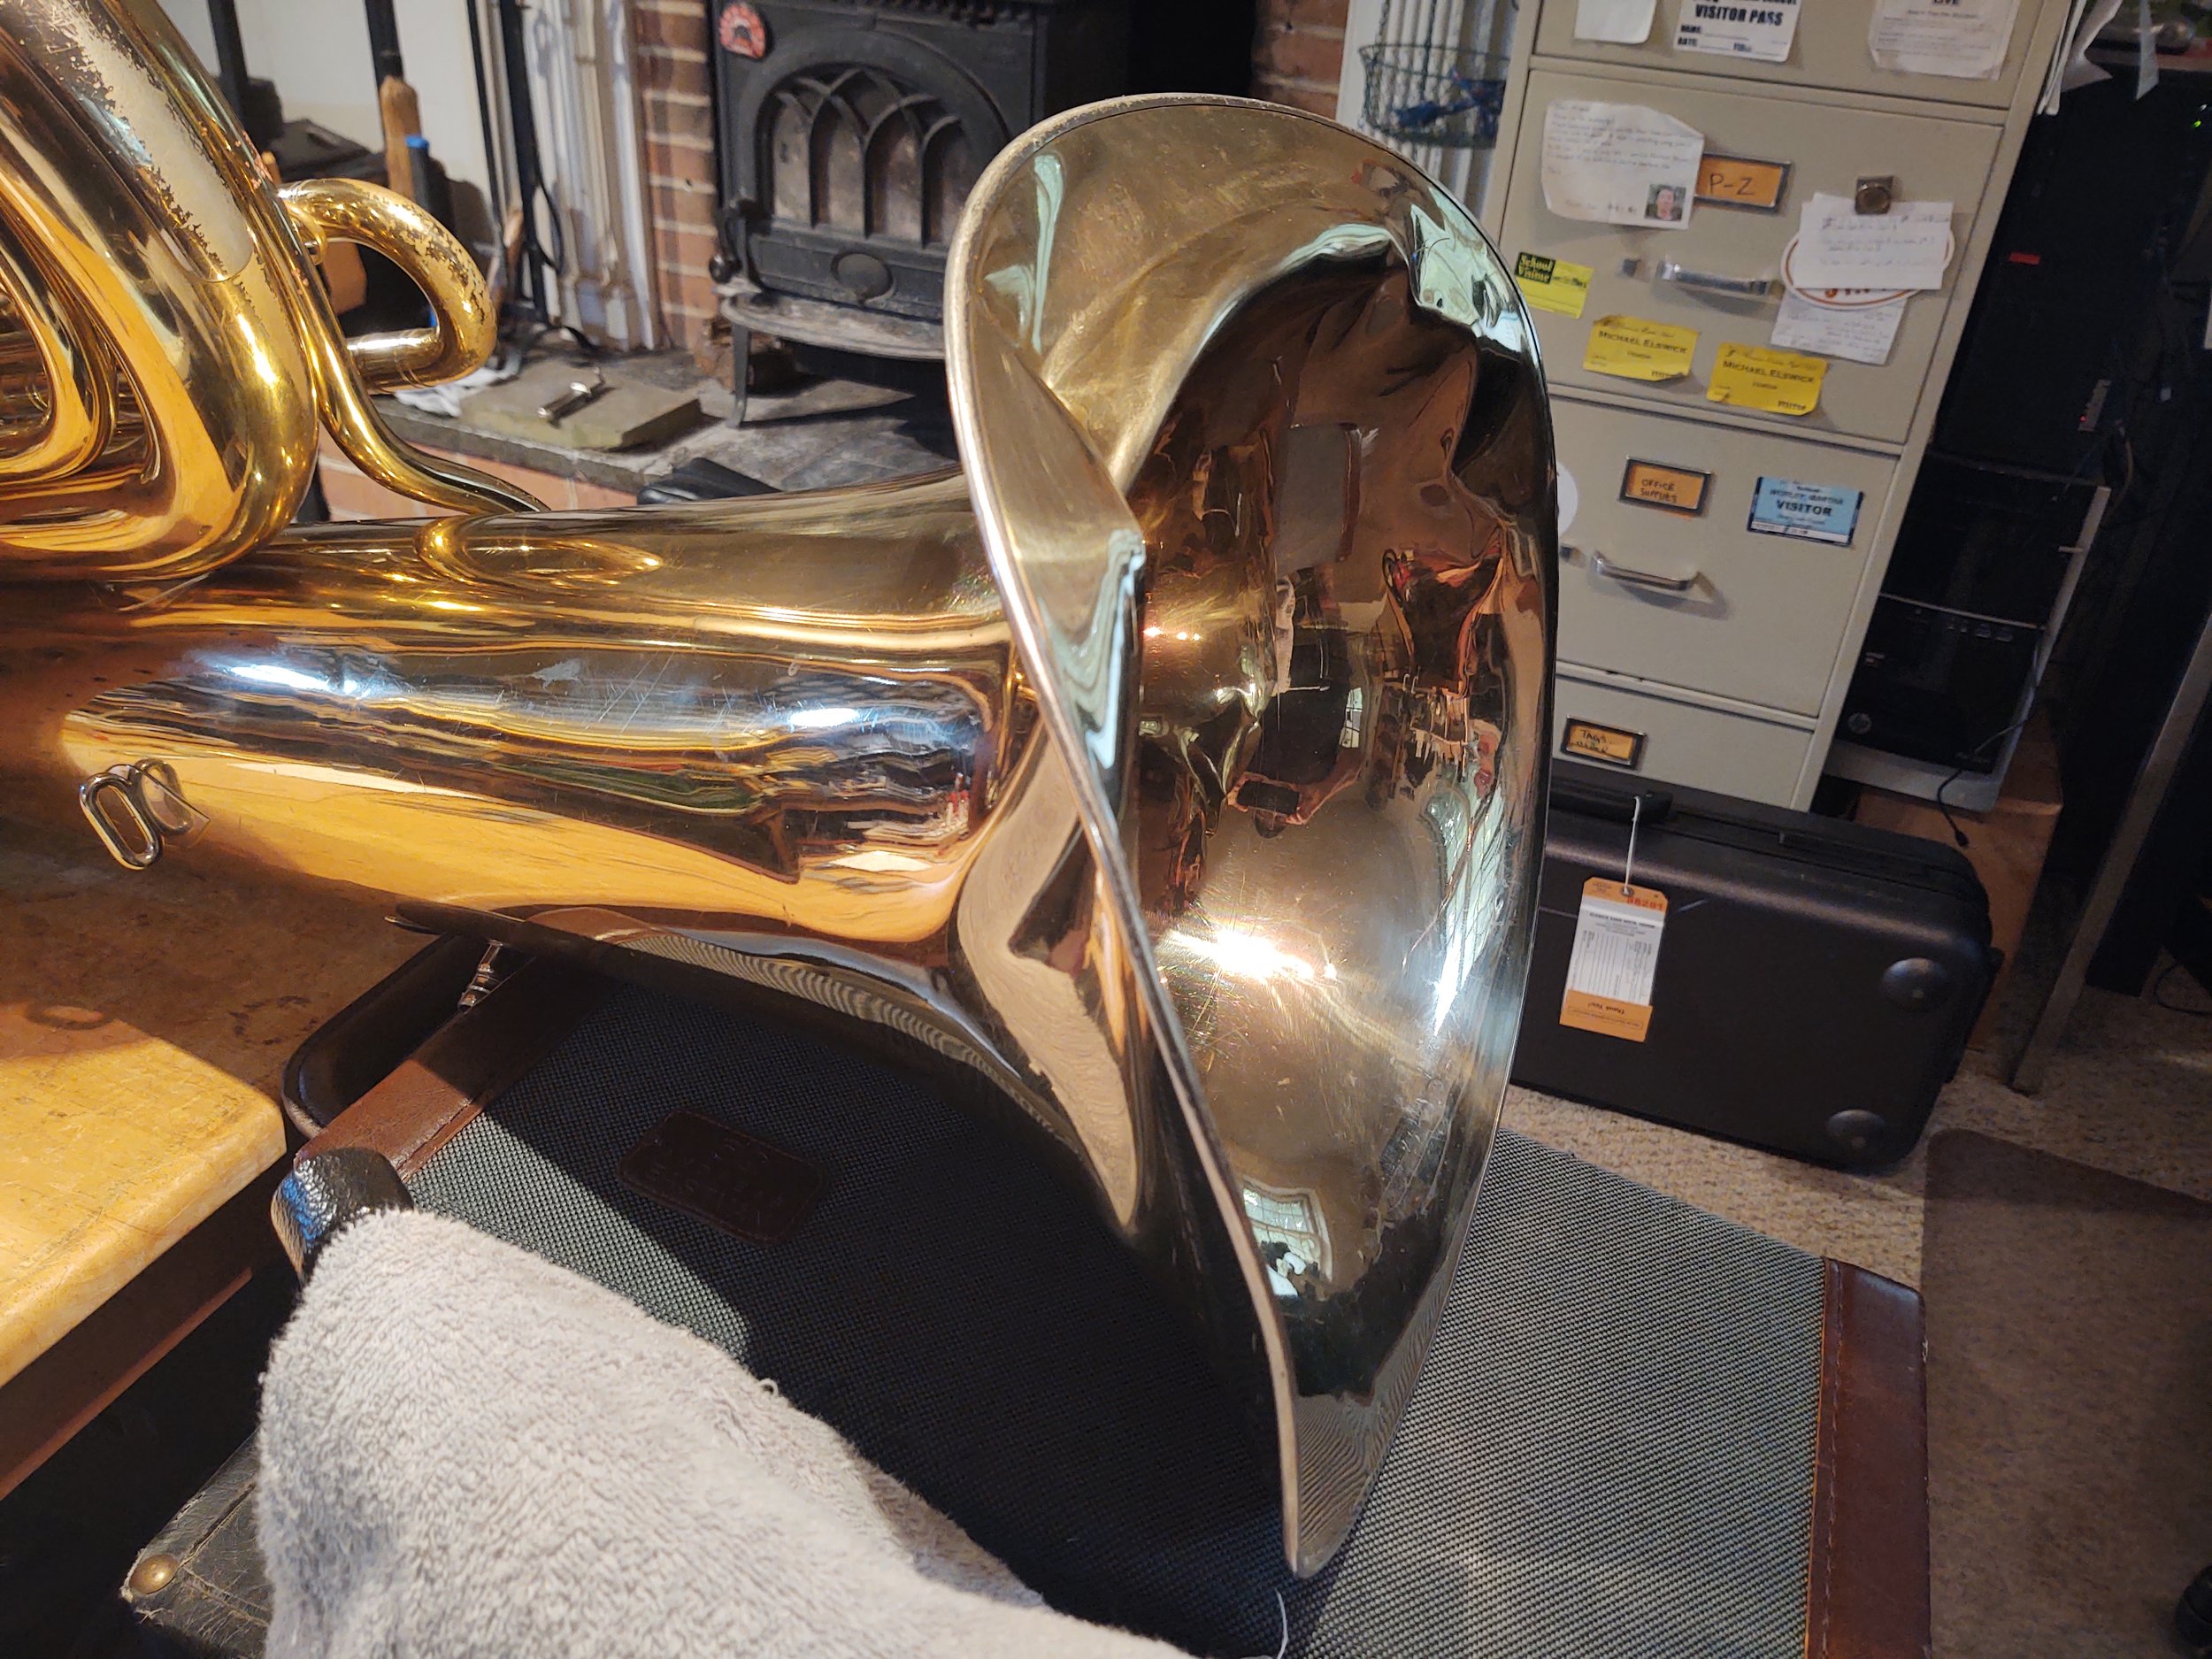


French horn rotors are always dirty
It’s very difficult for you to extract your rotors from your French horn yourself and clean them properly. Since this is true, it’s normally a long time in between cleanings. Consequently, the rotors are always nasty and badly in need of cleaning. These rotors are from a local players instrument, who shall remain nameless.


Wooden Instruments are Subject to Changes by Humidity and Temperature

Leveling a saxophone bell rim
This Conn alto sax, a student model horn, took a pretty serious fall to bend the bell rim that badly. This repair involved a rawhide mallet to bend the rim back, somewhat close, to its original position and a special tool called a Fast Eddie to do the final smoothing of the metal.


A Trumpet that got dropped
This is a Bach, model 37, trumpet, a professional model horn, that obviously got dropped. As you can tell from the first photo the bell section is definitely bent. Second photo, I straightened the bell. Same situation with #3 - bent and #4 - straightened. These last two photos were a little clearer, I thought.
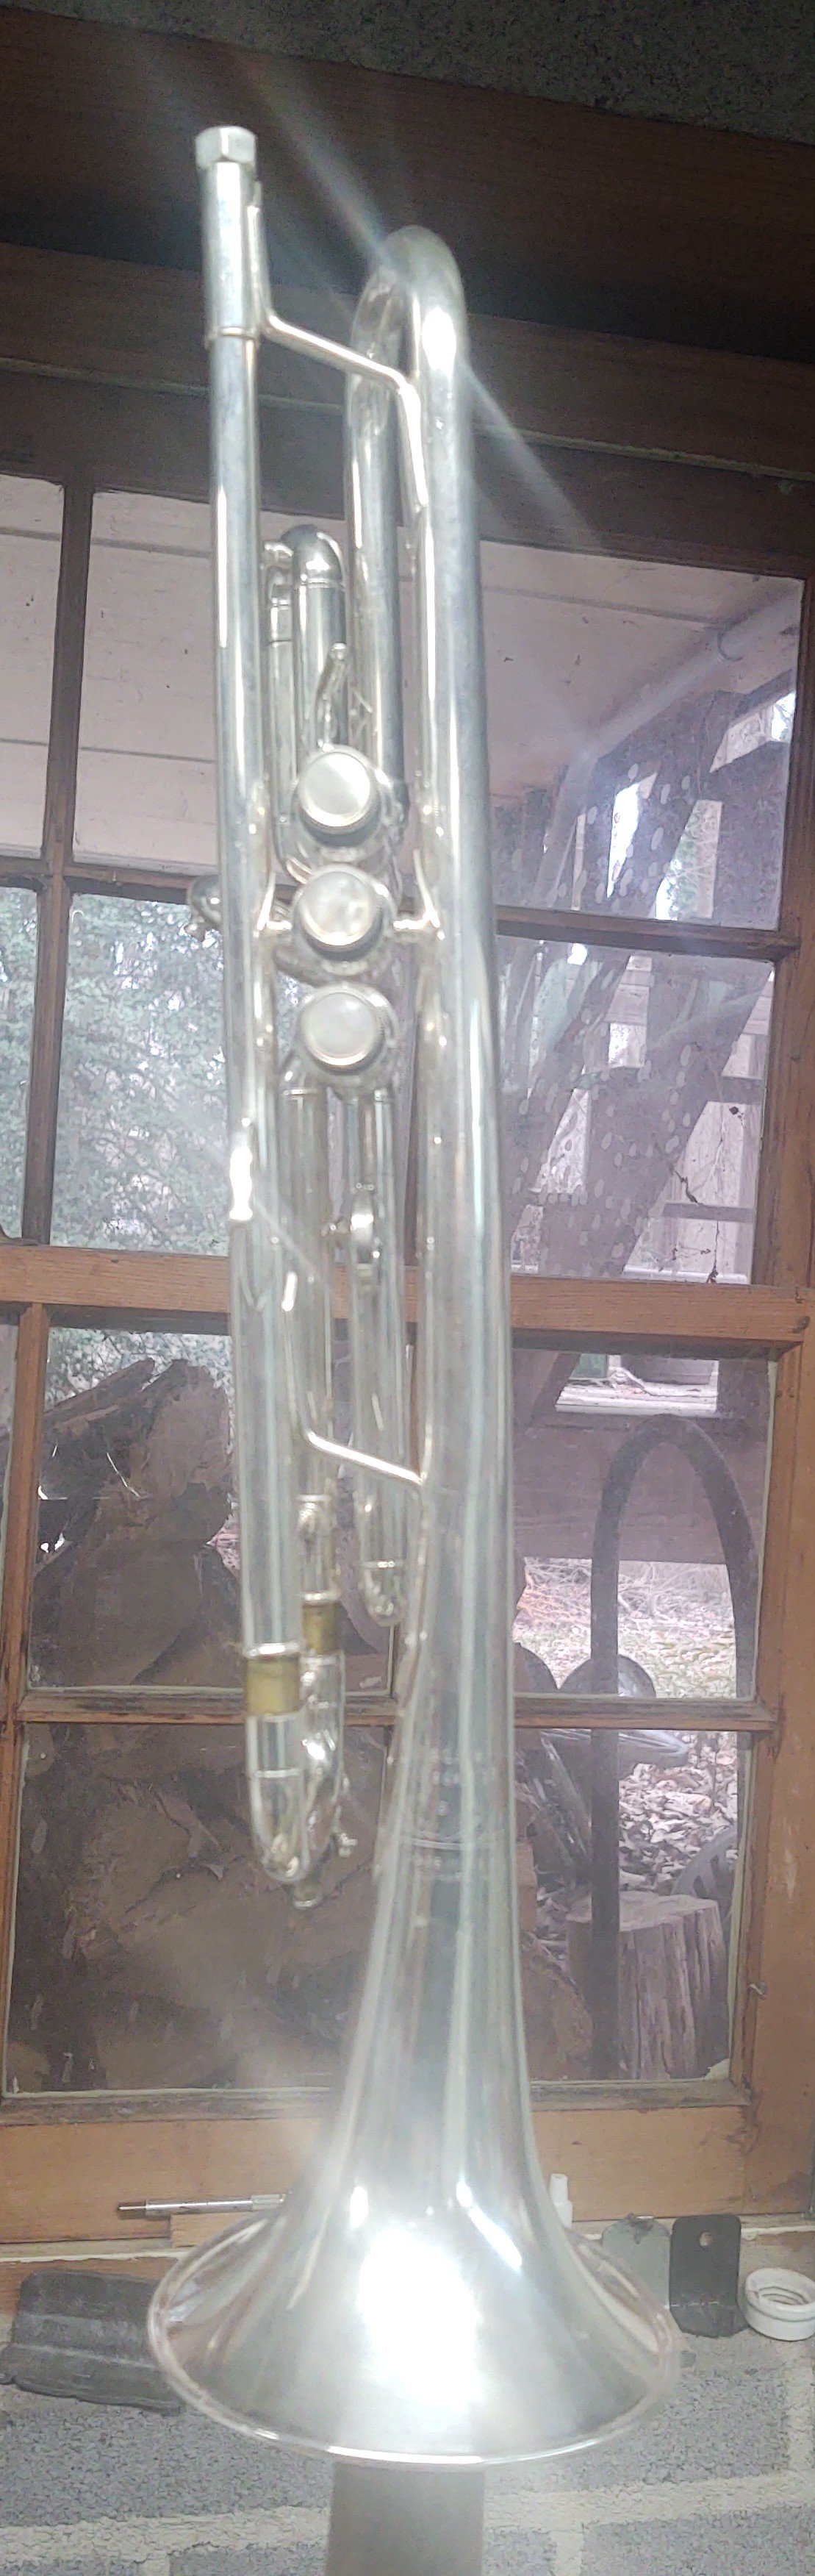


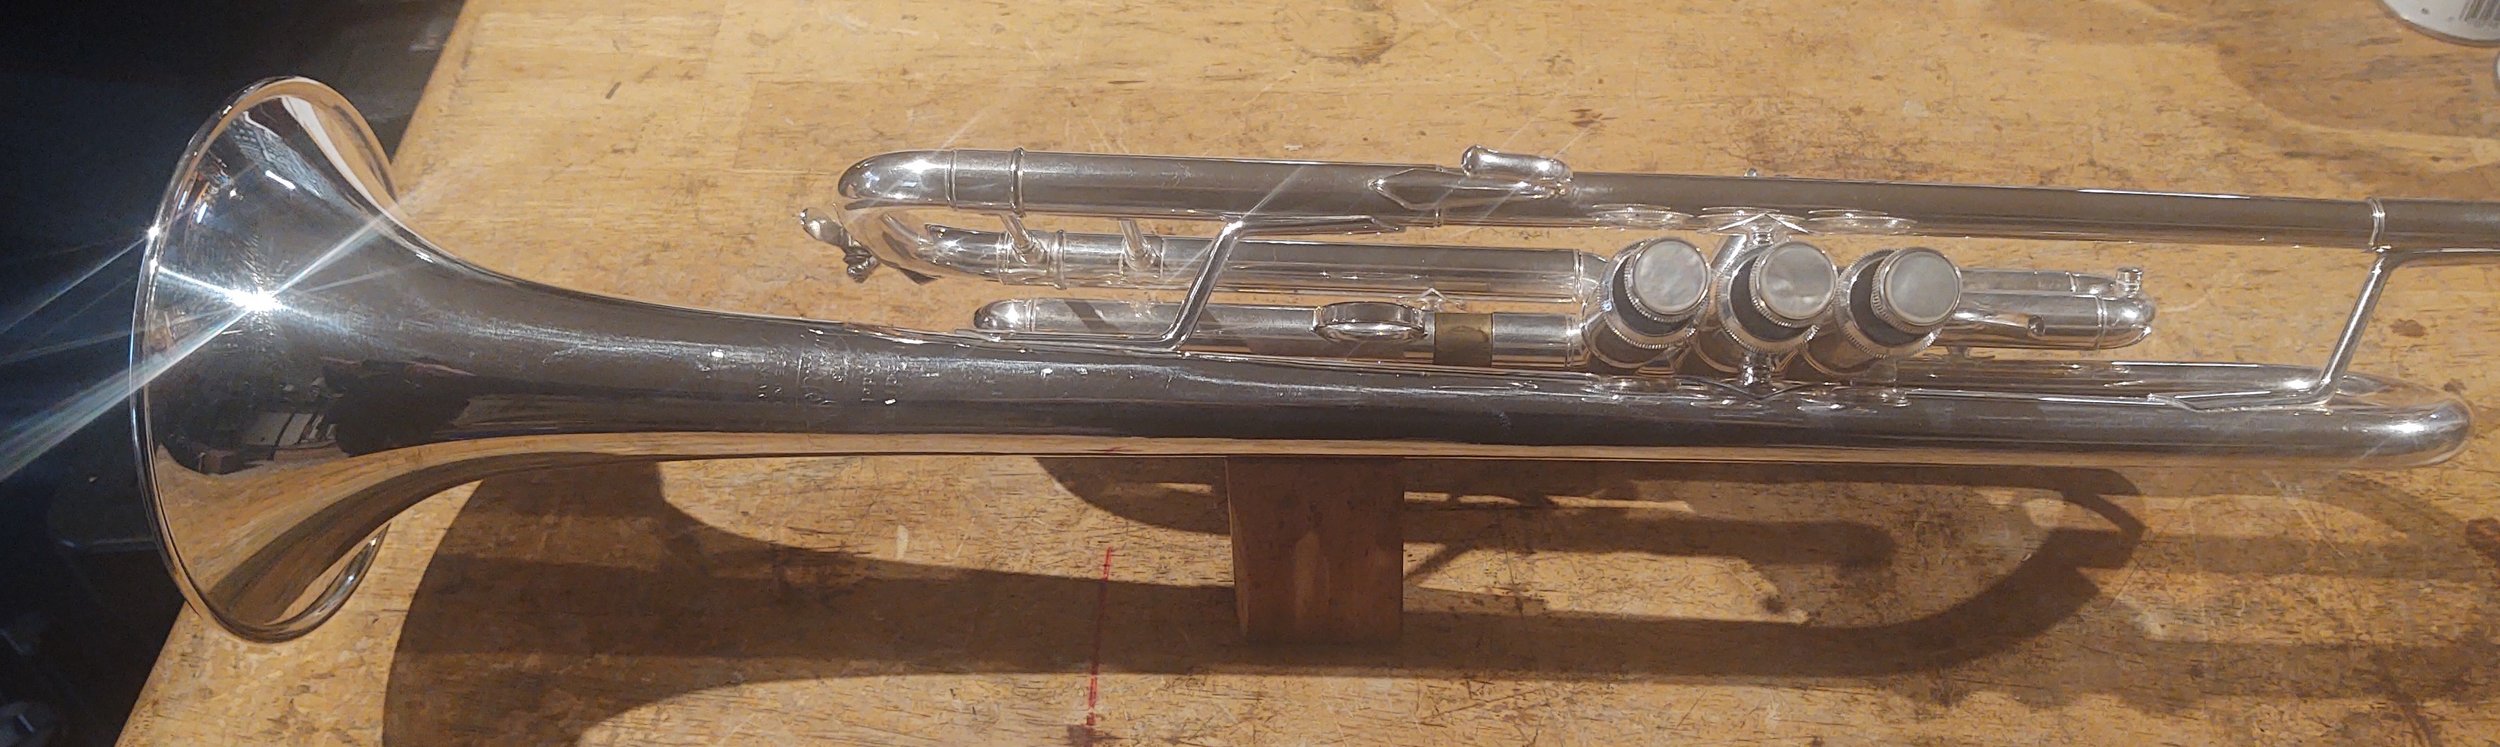
A badly damaged French horn bell
French horn bells constantly get dented and bent out of shape. Same scenario as above; “Before photos on the left” and “After photos on the right”. Fortunately, the metal of French horn bells is not nearly as difficult to work with as tuba bells.

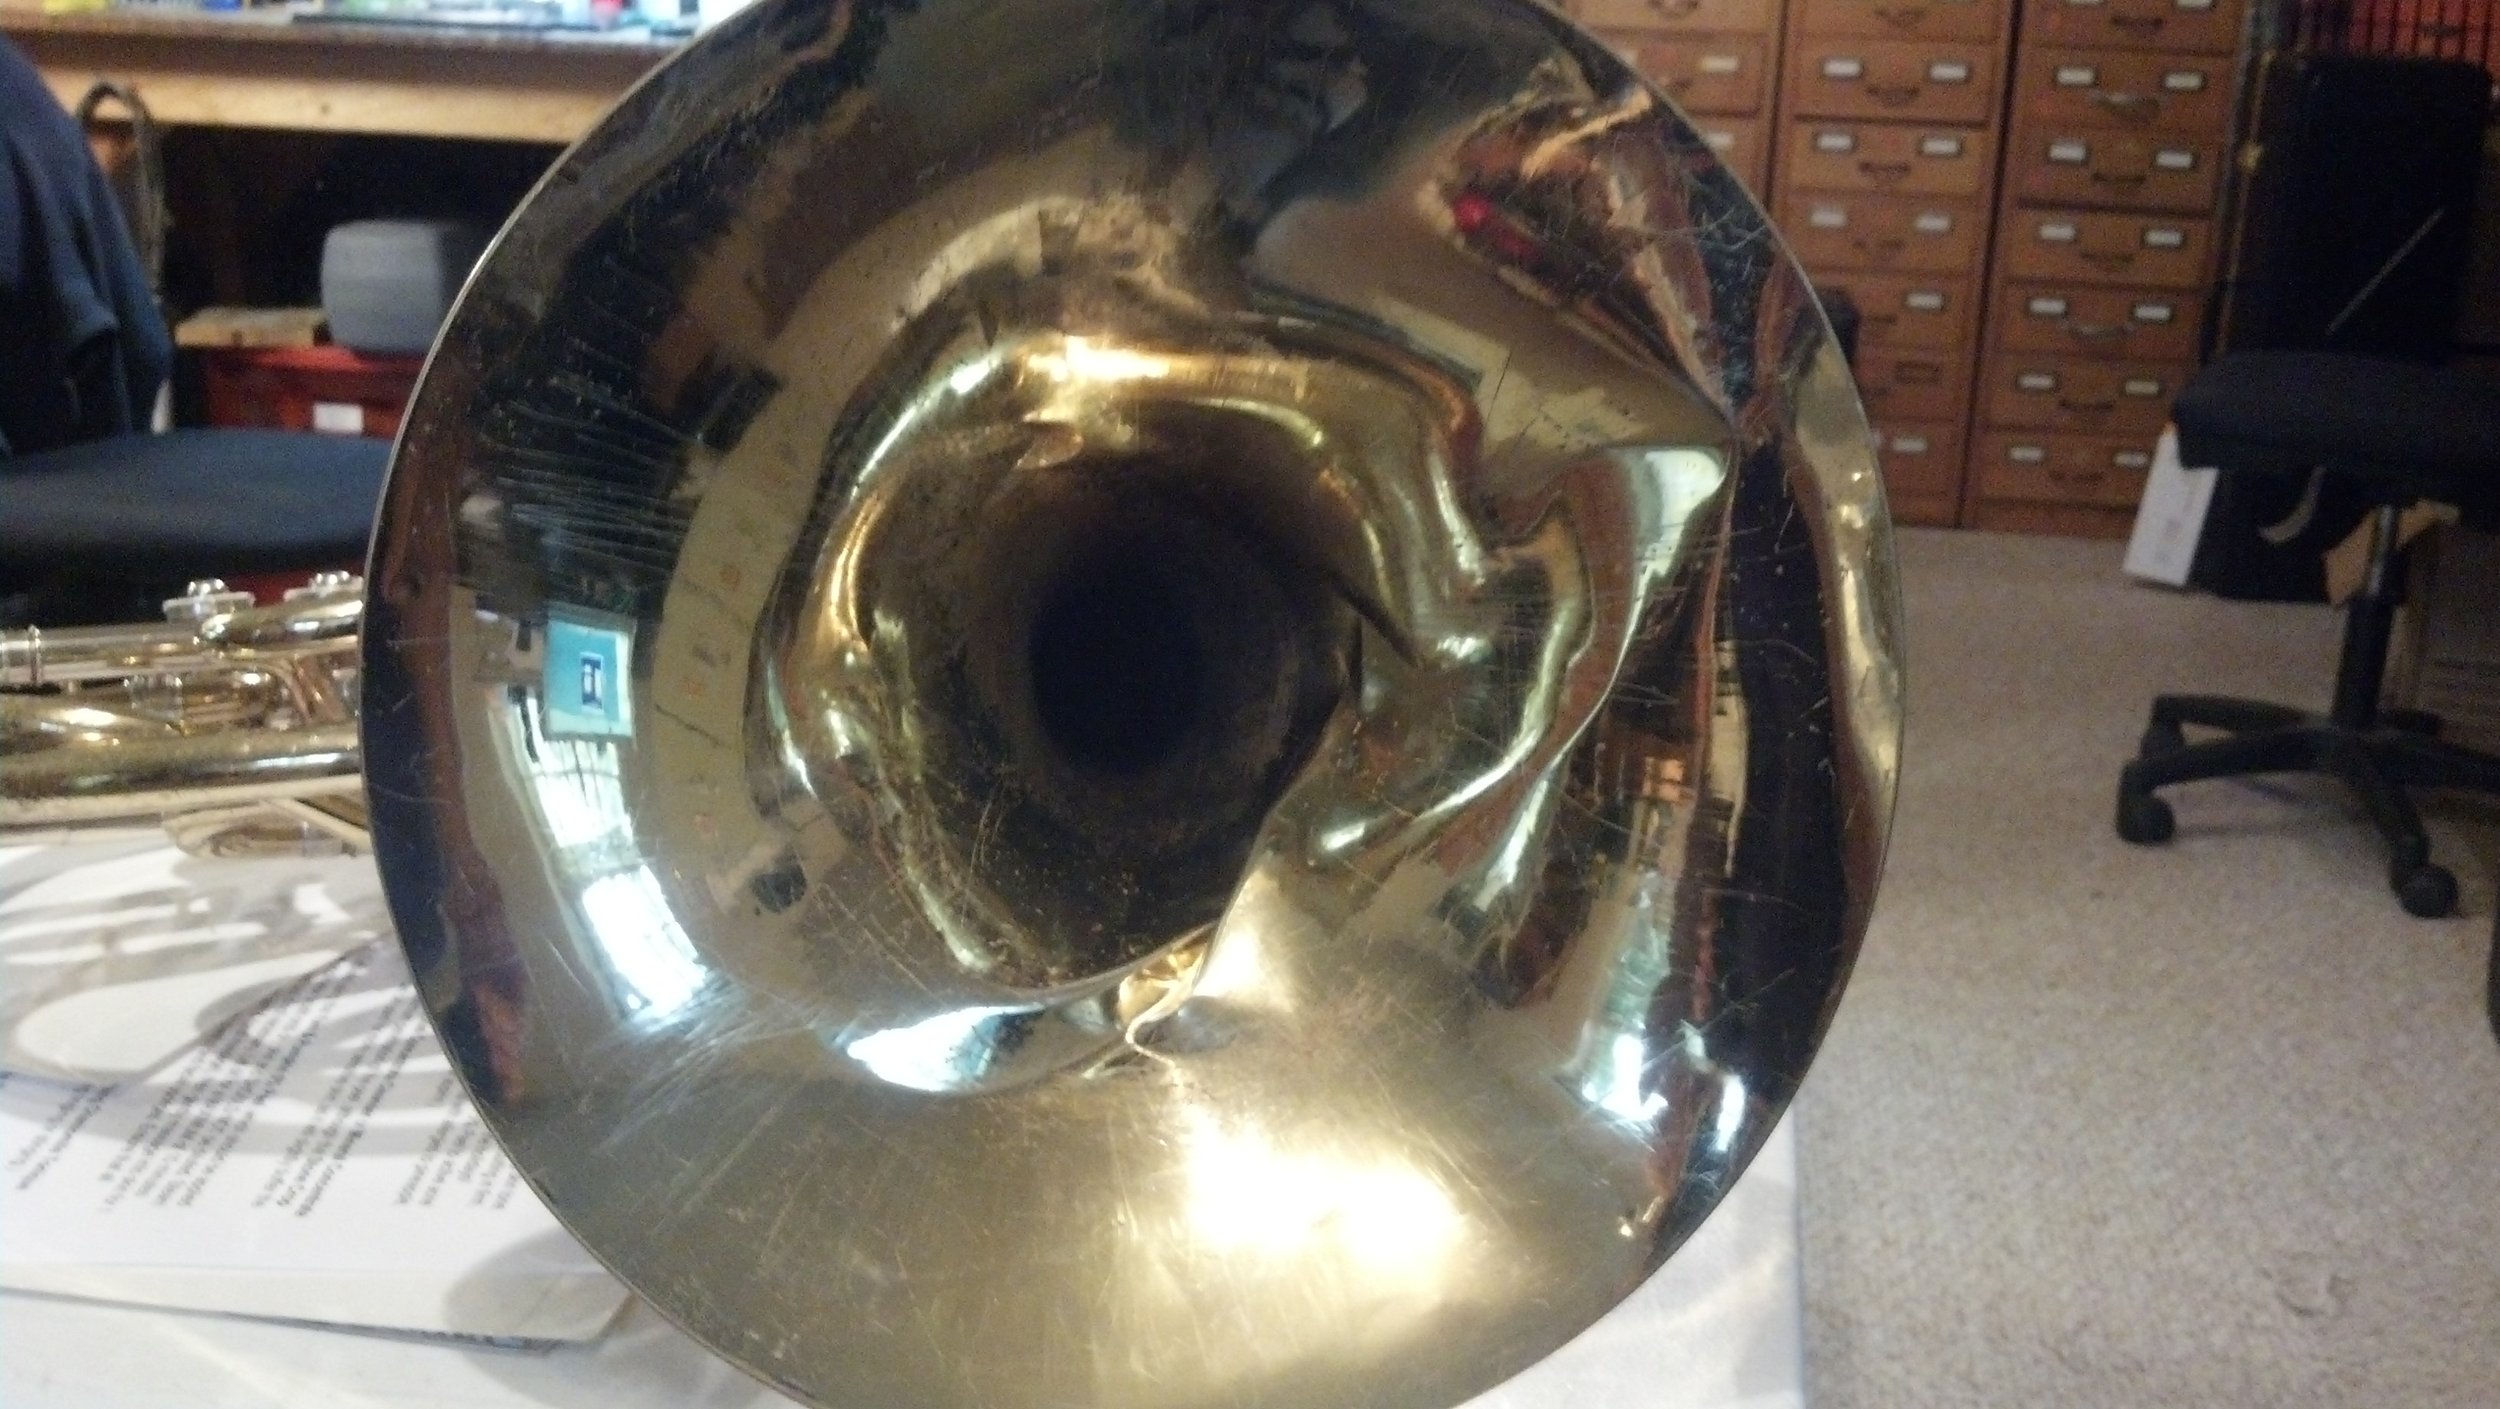


Patching a hole in a trumpet slide
Someone was trying to clean their trumpet and poked a hole in one of the slides. First, I had to flatten the damaged area as much as possible, which also makes the hole much smaller and easier to cover. Since this was a silver-plated horn I luckily had a piece of silver-plated scrap brass to use as a patch. When I was done, the slide was completely airtight, which is what you want.


Musicians in the shop
John D’earth was in the shop back in November picking up one of his students saxophones that I had just repaired.

Leveling and straightening another saxophone bell rim
This is a Selmer Reference 54 tenor sax which is a professional model instrument that costs about $7000.00! Not only did the bell rim get bent but the bell was knocked out of alignment. This means that the 3 lowest keys on the horn, low C#, low B & low Bb were unable to cover the tone holes that they are supposed to cover. This means you couldn’t play those notes. So, the repair was more extensive than just a bent bell rim and more involved that what you see at first glance.


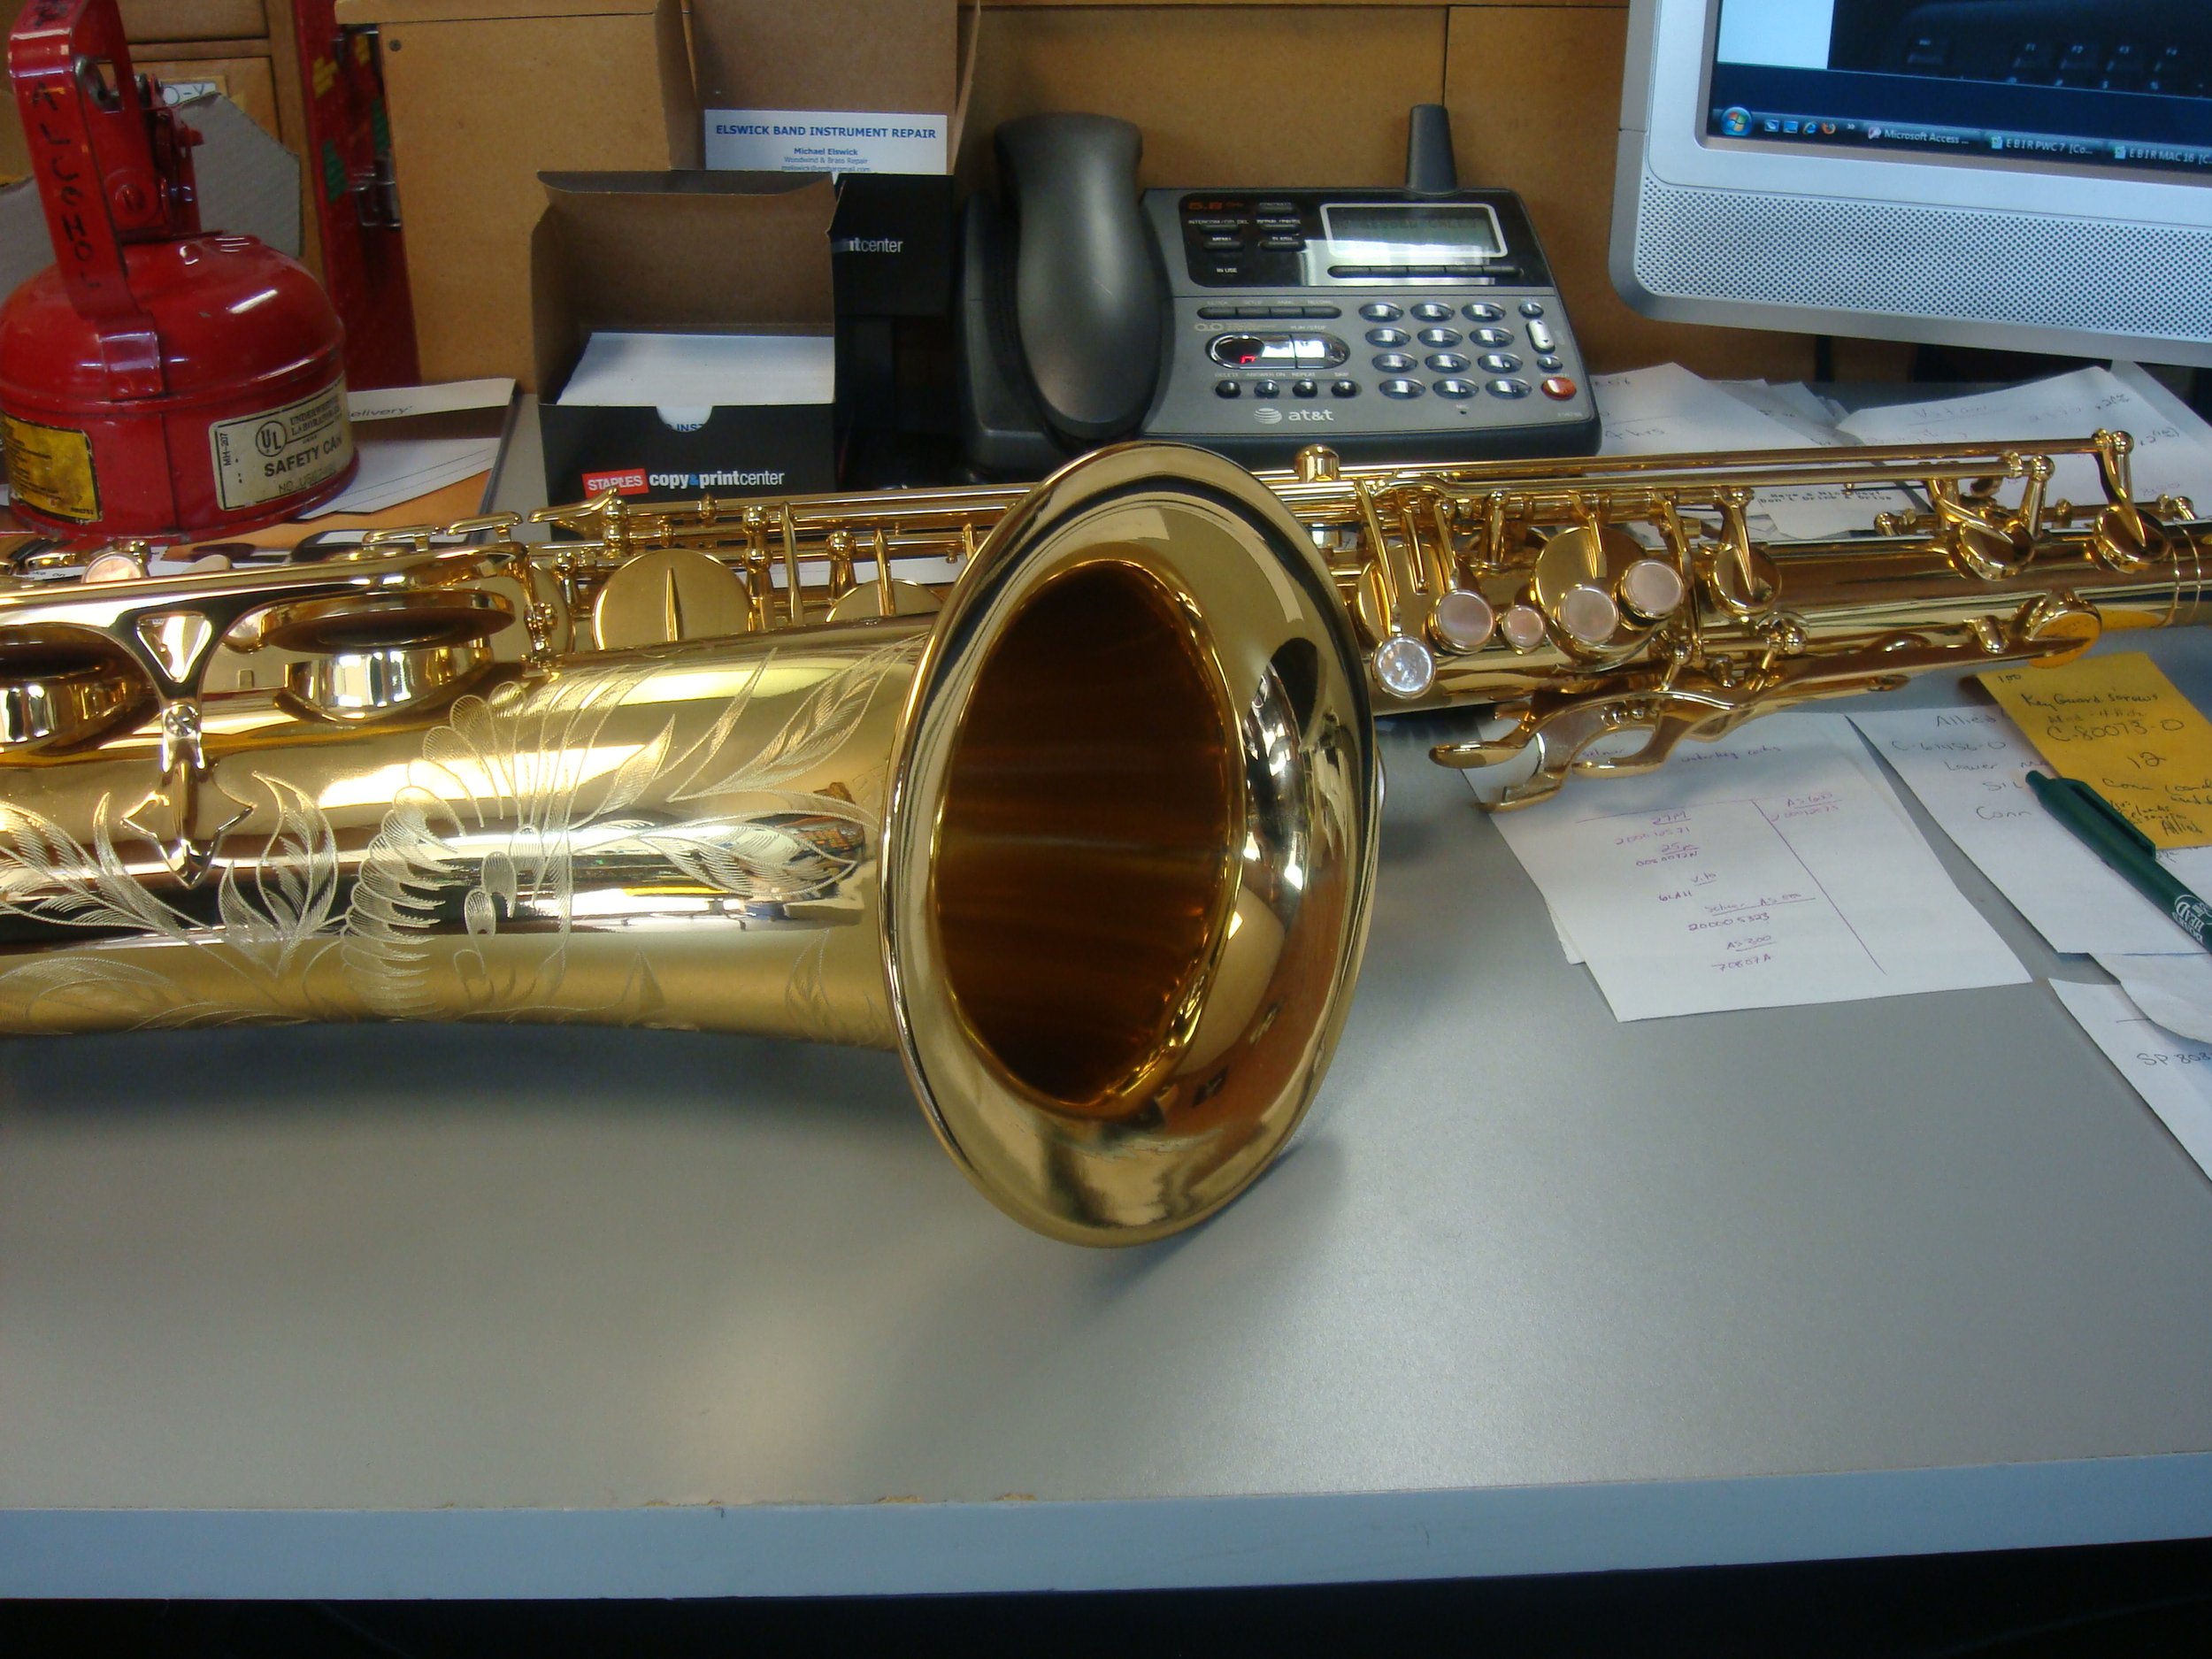

Also, Don’t Run Over Trombones With Your Car!
Obviously the first 2 photos are of a damaged trombone bell. In the 3rd photo you can also see the damage case. And, of course, the last 2 photos are of the repaired bell.


